Valve Seat Repair
If a valve seat is found defective, reface it
or
replace the cylinder head.
Sinkage
of
valve
Standard
Service
limit
0.5 mm
1.5 mm
CAUTION
When checking valve sinkage, the valve guide
must
be in normal condition. Resurface the
valve seat so that it contacts the mid-portion
of
the valve face.
Valve
Seat Installation
Installation
of the cylinder head is in the reverse
order
of
removal. Pay attention
to
the following.
1.
Renew the cylinder head gasket.
No
application
of
sealant is necessary. On the upper front
of
the
gasket is engine model
to
which that gasket is
applicable. Be careful not
to
confuse it with a
gasket for another engine
model.
2.
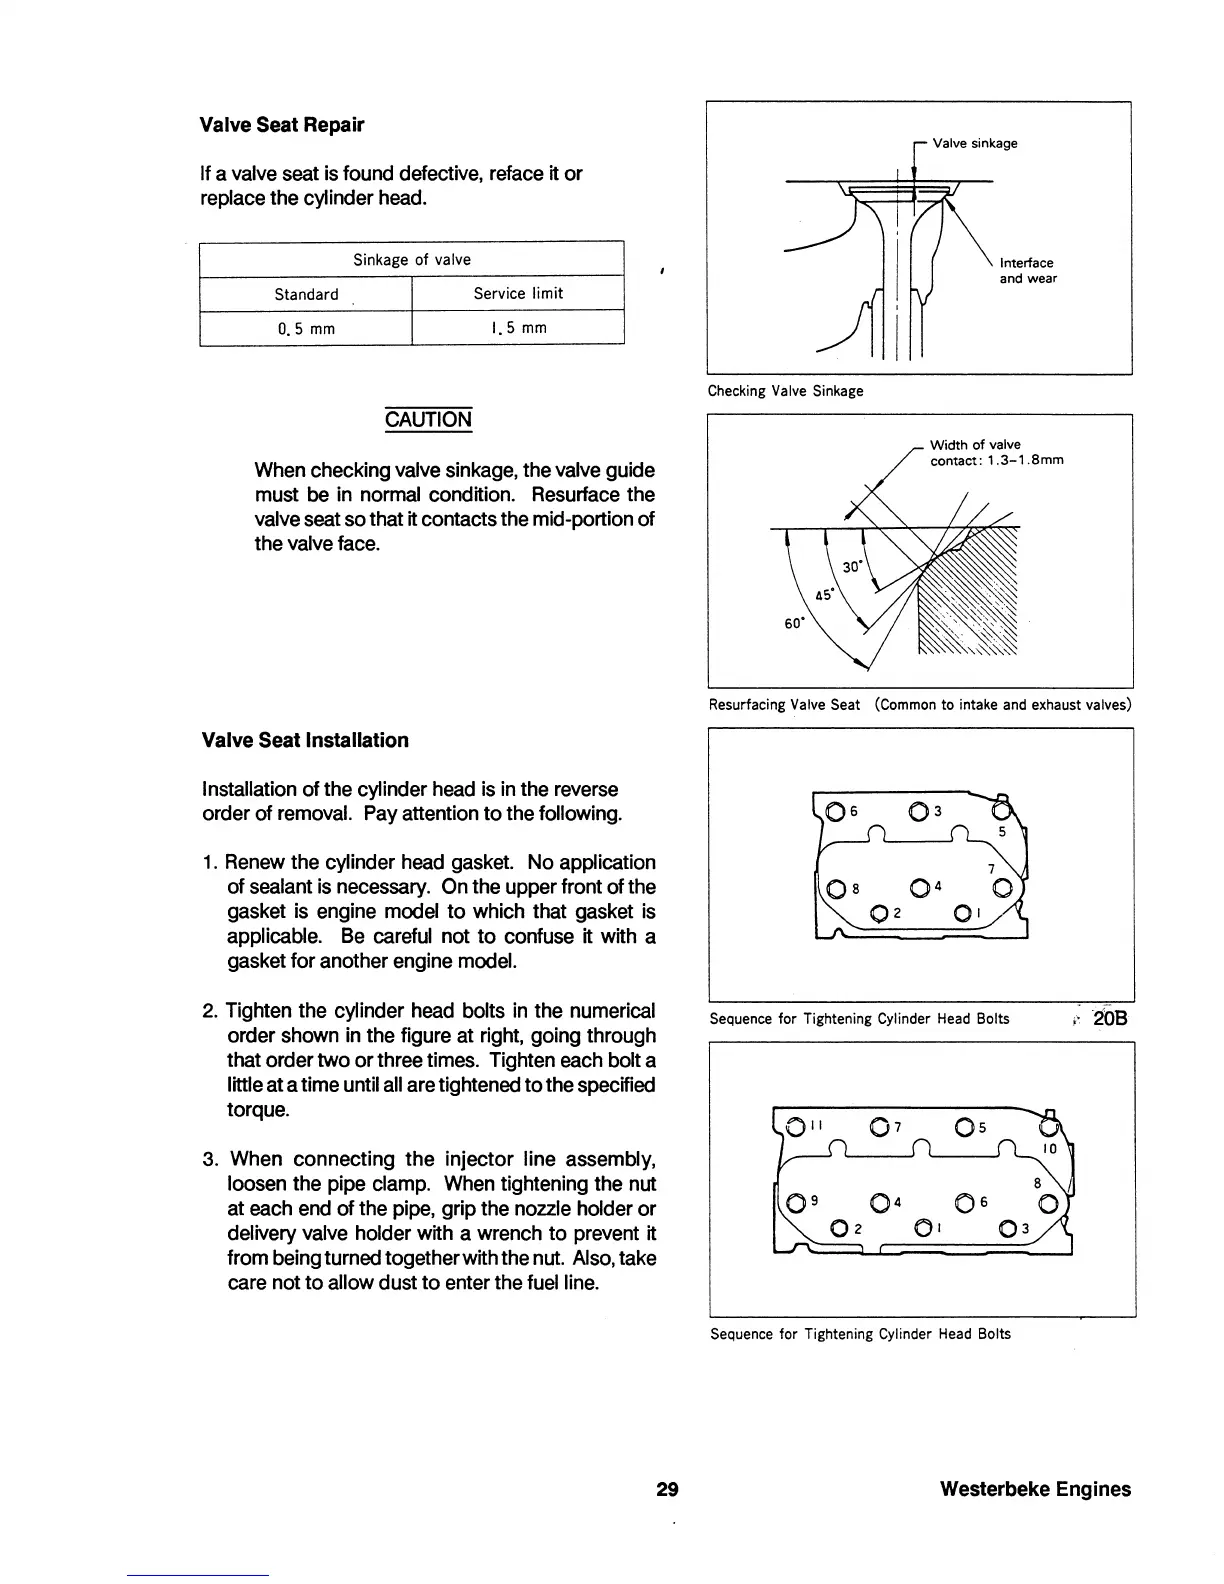
Tighten the cylinder head bolts in the numerical
order shown in the figure at right, going through
that order
two
or
three times. Tighten each bolt a
little
at
a time until all are tightened
to
the specified
torque.
3. When connecting
the
injector line assembly,
loosen the pipe clamp. When tightening the nut
at each end
of
the pipe, grip the nozzle holder
or
delivery valve holder with a wrench
to
prevent it
from being turned together with the nut. Also, take
care not
to
allow dust
to
enter the fuel line.
29
Checking
Valve
Sinkage
Valve sinkage
Interface
and wear
Resurfacing
Valve
Seat
(Common
to intake and exhaust valves)
Sequence
for Tightening Cylinder
Head
Bolts
Sequence
for Tightening Cylinder
Head
Bolts
Westerbeke Engines
 Loading...


