Injection
Nozzle
Removal
1.
Disconnect the injection pipe
and
fuel
return
pipe.
2.
Remove
the injection
nozzle
assembly from
the
cylinder
head.
CAUTION
Attach
an
identification number tag to the
removed
injection
nozzle.
Plug
the openings from
which the pipes
are
disconnected
and
the
nozzle
is
removed
to prevent intrusion of dust,
water,
and
other foreign particles into the
pipes
and
combustion
chamber.
Injection
Nozzle
Disassembly
If the
removed
nozzle
assembly
is
assumed
defective, disassemble the assembly
and
repair or replace
the
faulty
parts.
1.
Grip the
nozzle
holder body
in
a
vise.
Loosen
the retaining
nut.
Never
vise
the retaining nut to
prevent
deformation.
2.
Take
out the
shim
washer,
pressure
spring,
distance
piece,
and
nozzle
assembly.
CAUTION
Scrape
off carbon deposits with a wooden
spatula.
Keep
the
removed
parts
immersed
in
washing oil
(kerosene).
Take
special
care
not to scratch the
needle
valve
in
the
nozzle
assembly.
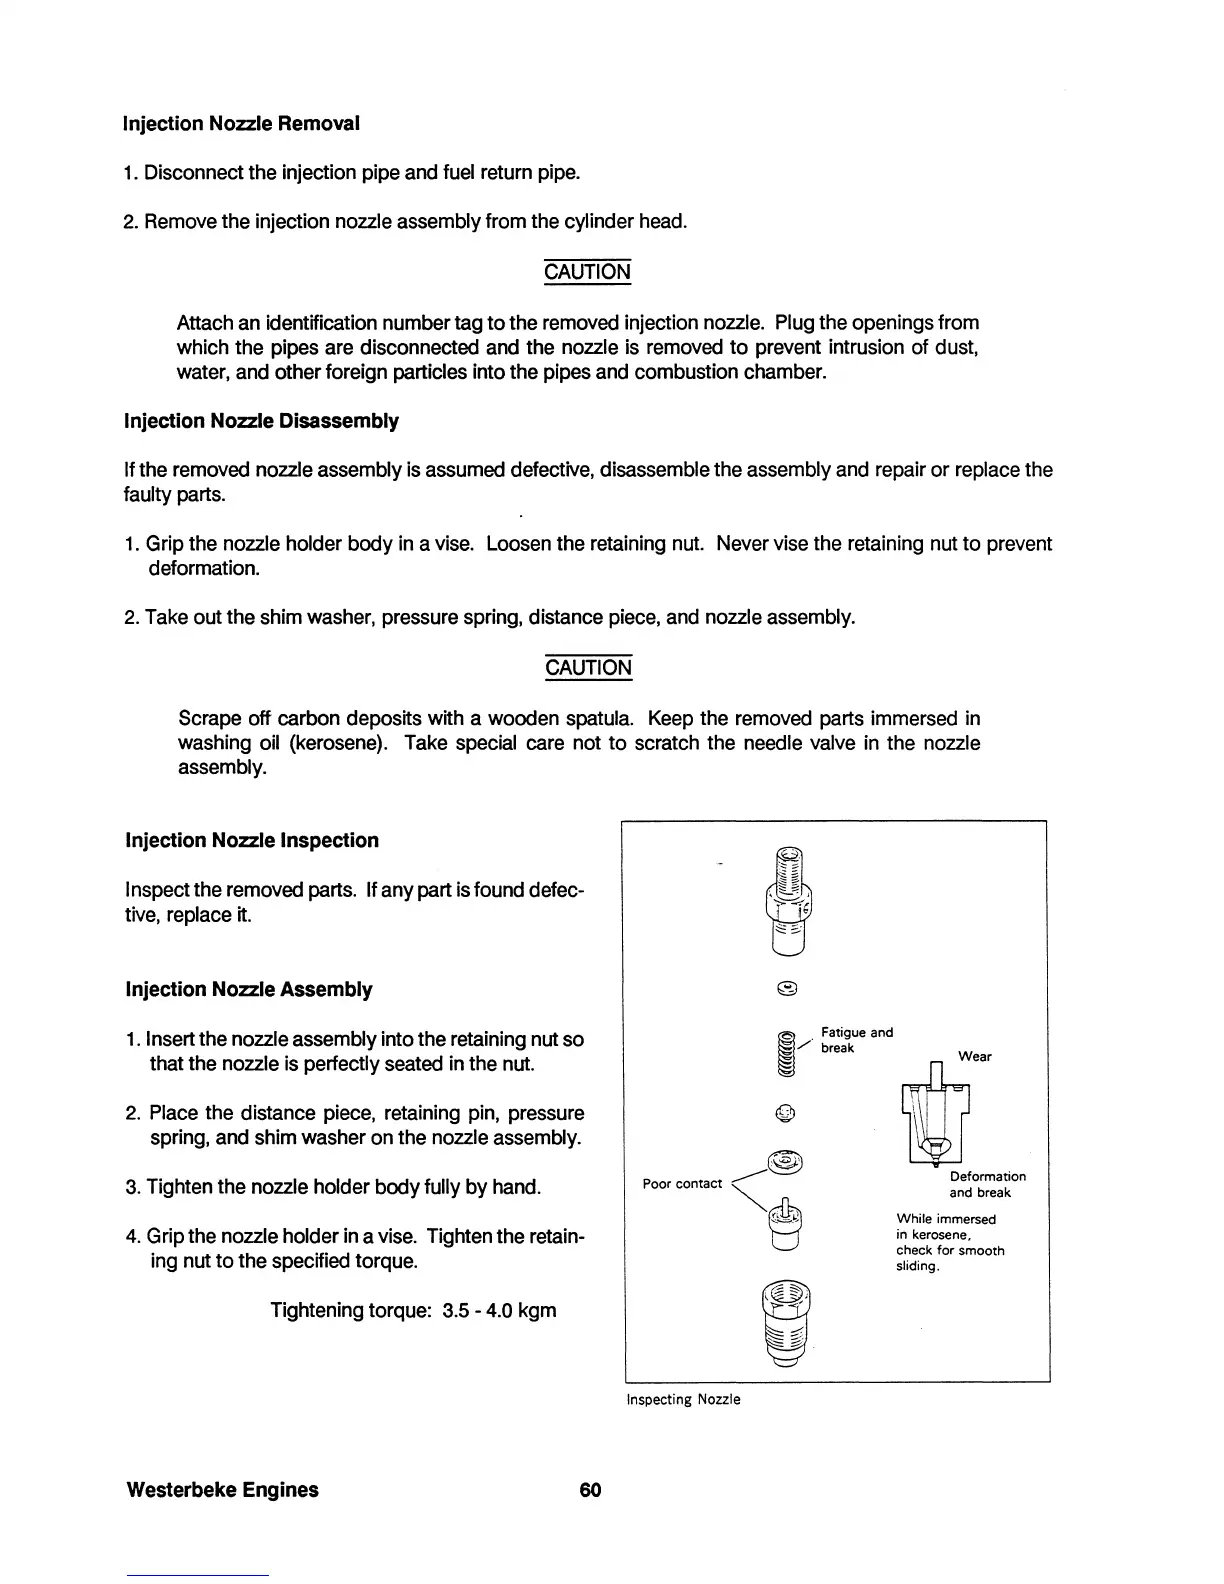
Injection
Nozzle
Inspection
Inspect the
removed
parts.
If
any part
is
found defec-
tive,
replace
it.
Injection Nozzle
Assembly
1.
Insert the
nozzle
assembly into the retaining nut
so
that the
nozzle
is
perfectly
seated
in
the
nut.
2.
Place
the distance
piece,
retaining
pin,
pressure
spring,
and
shim
washer
on
the
nozzle
assembly.
3.
Tighten the
nozzle
holder body fully by
hand.
4.
Grip
the
nozzle
holder
in
a
vise.
Tighten
the
retain-
ing
nut to the specified torque.
Tightening torque:
3.5
-
4.0
kgm
Westerbeke
Engines
60
~
. Fatigue and
!gl/ break
©
@
Poor contact
~
~
9
Inspecting Nozzle
~T
Deformation
and break
While immersed
in kerosene.
check for smooth
sliding.
 Loading...


