Starter
Adjustment
and
Repair
If any abnormality is assumed
by
the following tests,
adjust the starter
or
disassemble and repair it.
1.
Pinion gap inspection.
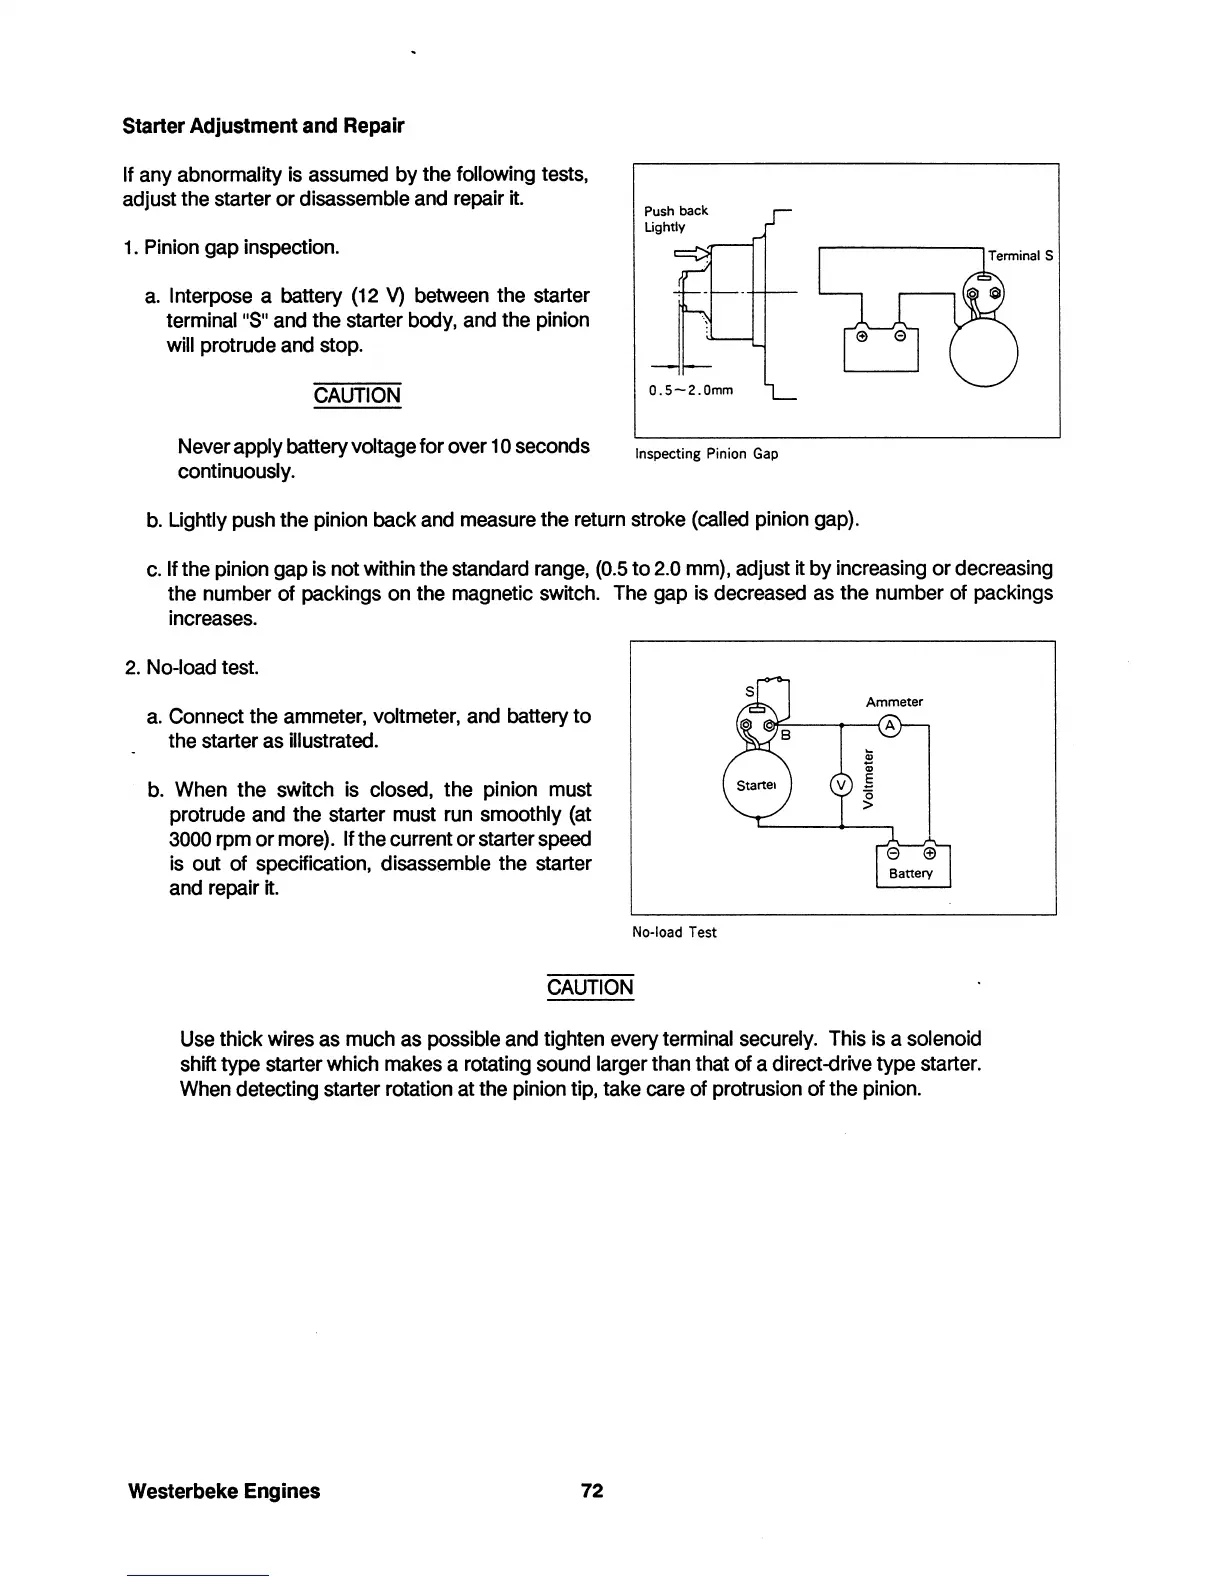
a.
Interpose a battery (12
V)
between the starter
terminallS" and the starter body, and the pinion
will protrude and stop.
CAUTION
Never apply battery voltage
for
over 10 seconds
continuously.
Push
back
Lightly
O.5-2.0mm
Inspecting Pinion
Gap
b. Lightly push the pinion back and measure the return stroke (called pinion gap).
c.
If the pinion
gap
is
not
within the standard range, (0.5
to
2.0 mm), adjust it
by
increasing
or
decreasing
the number
of
packings on the magnetic switch. The gap is decreased as the number
of
packings
increases.
2.
No-load test.
a.
Connect the ammeter, voltmeter, and battery
to
the starter as illustrated.
b. When the switch is closed, the pinion must
protrude and the starter must run smoothly (at
3000 rpm
or
more).
Ifthe
current
or
starter speed
is out
of
specification, disassemble the starter
and repair it.
CAUTION
No·load Test
Use
thick
wires as much as possible and tighten every terminal securely. This is a solenoid
shift type starter which makes a rotating sound larger than that
of
a direct-drive type starter.
When detecting starter rotation
at
the pinion tip, take care
of
protrusion
of
the pinion.
Westerbeke
Engines
72
 Loading...


