Do you have a question about the Whirlpool Hot water dispenser and is the answer not in the manual?
Field to record the builder or dealer name for the appliance.
Field to record the address of the appliance's installation location.
Field to record the contact phone number for the installation.
Field to record the appliance's specific model number for identification.
Field to record the appliance's specific serial number for identification.
Field to record the date the appliance was originally purchased.
Field to record the date the appliance was installed.
Reference to the 'Parts and Features' section for label location.
Key safety precautions to reduce risk of fire, electrical shock, or injury.
Explanation of the heating and dispensing mechanism of the appliance.
List of tools and materials required for installation and use.
Specifications for the required electrical supply and outlet.
Guidance on proper grounding for electrical safety.
List of components included with the hot water dispenser.
Guidelines for connecting the water supply line.
Initial steps including safety gear and location checking.
Instructions for creating or using the opening for the spout.
Guidance on handling and preparing the spout assembly components.
Instructions for preparing and attaching the spout's tubing and gasket.
Steps for securing the spout assembly into the sink or countertop.
Finalizing spout installation and attaching the On/Off Cap.
Instructions for mounting the tank and its support bracket.
Connecting the flexible tubing from the spout to the tank fitting.
Connecting the flexible tubing from the spout to the tank's water inlet.
Instructions for installing the saddle valve on the water supply line.
Procedure for closing the saddle valve after installation.
Flushing the water supply line to remove debris.
Connecting the water supply line to the spout tubing.
Setting the temperature control to the 'Off' position before powering.
Process for filling the tank and dispensing initial water.
Plugging in the power cord and setting the initial temperature.
Checks and procedures required before initial operation.
Explanation of how to adjust and use the temperature control.
Instructions on how to operate the spout to dispense hot water.
Overview of various applications and benefits of the dispenser.
Examples of instant foods and drinks prepared with 190°F water.
Uses of 190°F water for various cooking tasks.
Additional practical applications for the hot water dispenser.
Advice on energy conservation and preparing for periods of nonuse.
Instructions for preparing the dispenser for short periods of inactivity.
Steps for winterizing or storing the dispenser for extended periods.
Procedure for cleaning the spout screen to maintain water flow.
Checks for issues when the dispenser is not heating water.
Addresses issues with vapor, boiling noises, or water being too hot.
Solutions for problems with dripping or sputtering from the spout.
Troubleshooting steps for when no water dispenses from the spout.
Guidance on fixing leaks from the saddle valve.
Solutions for a "rotten egg" taste in the dispensed water.
How to contact Whirlpool for operational assistance.
How to find authorized service technicians.
Information on obtaining genuine replacement parts.
Information to provide when requesting assistance or service.
Details of the one-year limited warranty from installation date.
Specifies what costs are covered by the warranty.
Lists exclusions and costs not covered by the warranty.
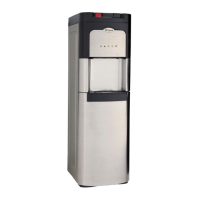
| Type | Hot Water Dispenser |
|---|---|
| Voltage | 120V |
| Temperature Control | Adjustable |
| Material | Stainless steel |
| Safety Features | child safety lock |