11
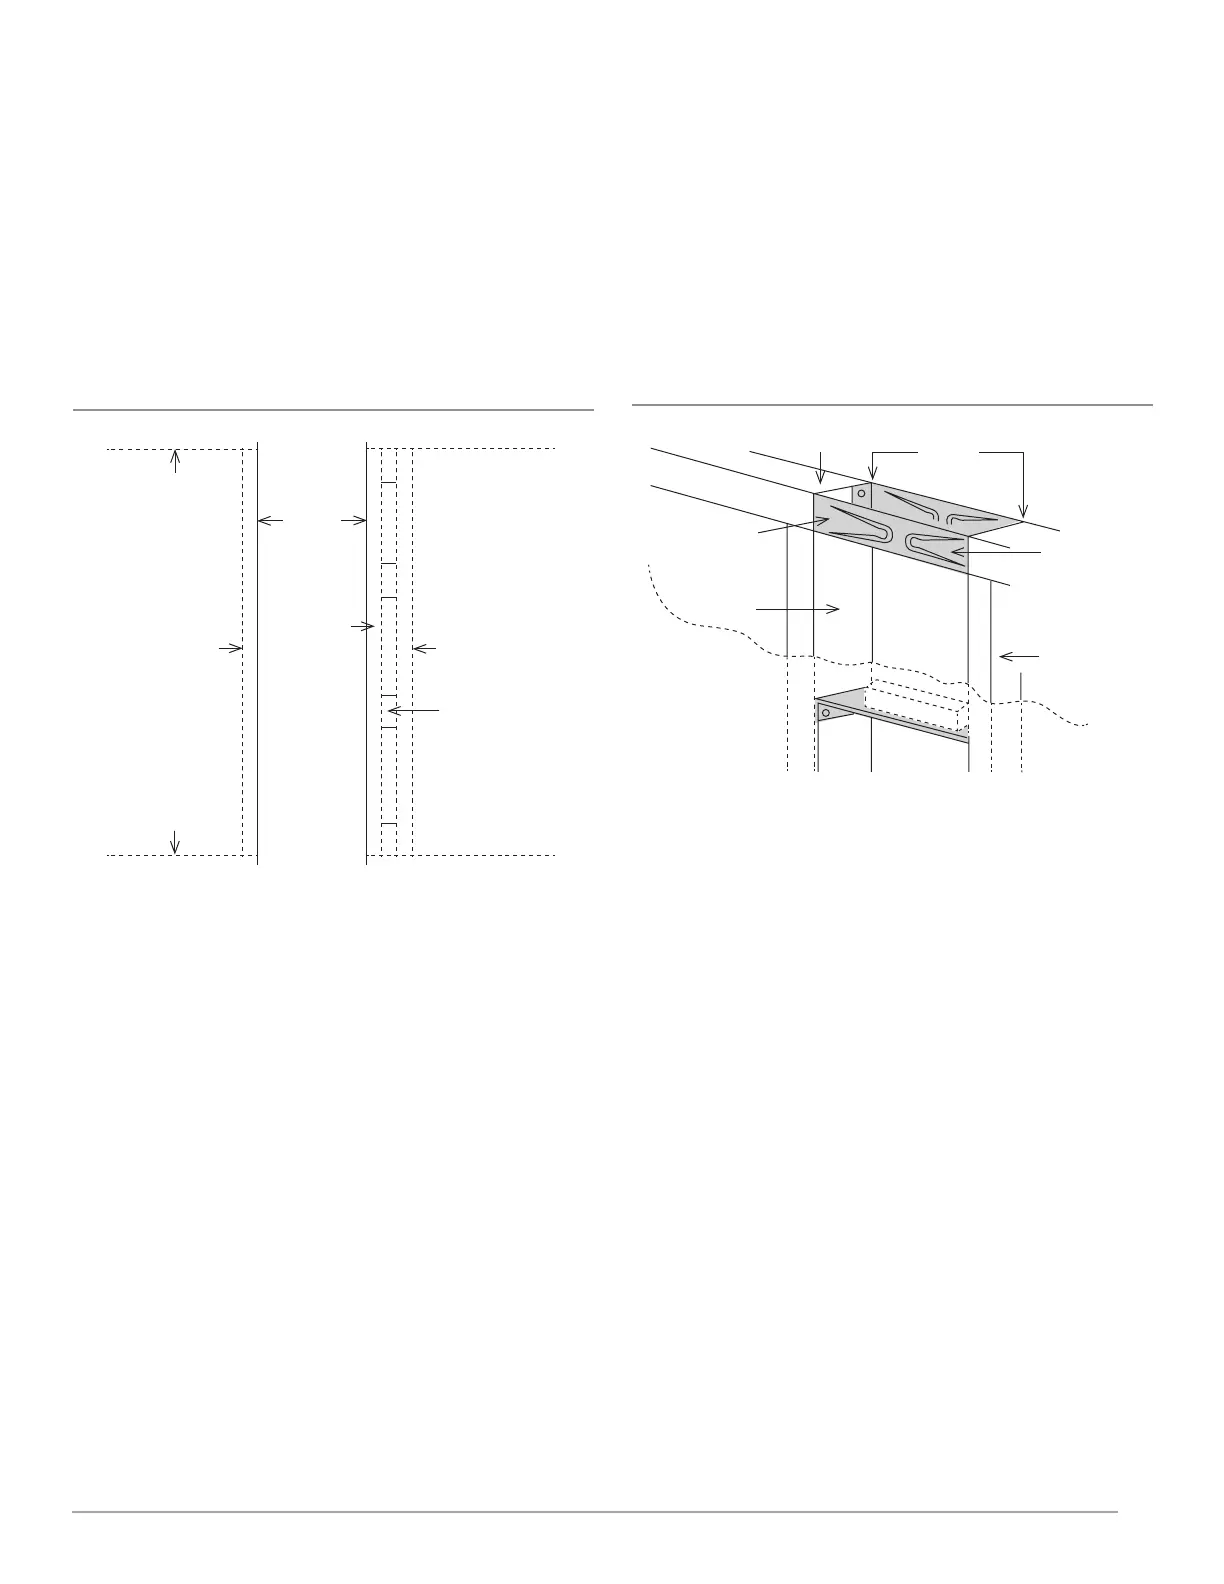
Close off stud space (if required)
If studs are not on 16-inch centers, cut the hole for the
furnace next to an existing stud and frame in the other
side using a 2x4 and spacer blocks as required. (Figure 6).
Ceiling plate opening
Cut away the ceiling plate between the studs where the
furnace is to be installed. Work from the top in the attic. If there
is no access to the top, remove the wall covering between the
two wall studs all the way to the ceiling. Work through this
opening. Cut out the entire plate so the plate edges will be even
with the inner face of the 2x4 studs. (Figure 7).
Install vent base plate (hold-down plate)
Position base plate on top of header plate and fasten with
screws. Note: Hold down plate is not included.
Header plate (vent support)
Measure upward 62¼-inches from the top of the floor plate.
Place a mark on each stud at this distance. (Figure 5). Place
the header plate between the studs with the lower edges
even with marks on the studs. Make sure header plate is level.
Locate rear edge of nailing tabs at back of the header. Nail
header plate to the 2x4 studs which will center the vent collar
in the wall. (Figure 5).
Install ceiling plate spacer
Nail the ceiling plate spacers either across or in between
the cut out section of ceiling plate. If nailed between, ends
must be bent at 90 degrees. They must be fastened along
each long edge of the ceiling plate hole to hold the oval vent
FIGURE 6 – Close Off Stud Space
FIGURE 7 – Ceiling Plate Opening
CEILING PLATE
EXISTING STUD
FLOOR PLATE
EXISTING STUD
NEW STUD
SPACER
BLOCKS
AS REQ’D
14 38
pipe in the center of the hole. Ceiling plate spacers preserve
structural strength and position oval vent pipe in the center
of the cut out opening. Ceiling plate spacers are not
included. (Figure 7).
CEILING PLATE
SPACERS NAILED
IN BETWEEN
CEILING PLATES
OR ACROSS FACE
IF ACCESSIBLE
PLATE SPACER
CEILING PLATE
14 38
2 X 4 STUD
2 X 4 STUD