If the Air 360 Plus system was installed at the RV
manufacturer, you should notice a white circular
Winegard cable access cap on the ceiling of your RV,
directly below where the Air 360 Plus is installed. If the
Air 360 Plus was not previously installed, refer to the
Air 360 Plus installation instructions before attempting
to mount the Gateway system.
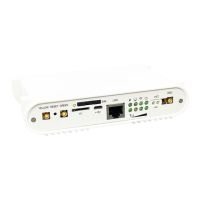
Step 1 - Remove the two screws that secure the access cap to the ceiling and
gently pull the +12VDC power cables and three smaller antenna cables down
through the hole. If any of these cables are missing, please contact your coach
manufacturer or installing dealer.
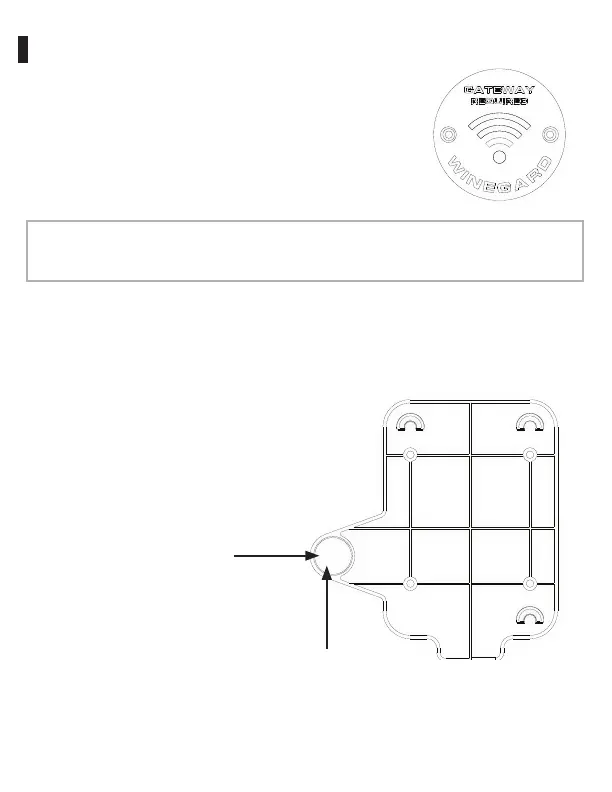
Step 2 - Pull the cables
through the guide hole of the
mounting bracket and align
this hole with the hole in the
ceiling of the RV. Make sure
that the bracket is in a parallel
position with the walls of
the RV. Once in position,
secure the mounting plate
to the ceiling of the RV with
four screws included in the
mounting hardware.
Installation
Note: When mounting the Gateway to the ceiling, it MUST be mounted directly
under the Air360 Plus to ensure the WiFi and 4G LTE antenna cables reach the
Gateway connections.
4
Line up
with hole
in ceiling
Guide
hole

 Loading...