Page 4
CUTTING THE EXTRUSION TO FIT
THE ROOF THICKNESS
There are two methods to determining what the
proper length to cut the extrusion to fit the roof is.
The extrusion is designed to fit roofs up to 6 ½”
thick. If the roof is more than 6 ½” thick, contact
Winegard Technical Services at 800-788-4417 for
further assistance.
Option A
1. Determine the roof thickness by measuring or
contacting your RV manufacturer.
2. Add ¾” to the roof thickness measurement and
cut the extrusion to this overall length.
Option B
1. From the inside of the vehicle, insert the
extrusion into the 1 ¾” hole through the roof,
carefully rotating to align the keys inside the
extrusion with the bottom of the antenna.
2. Once the keys are lined up, push up until the
extrusion bottoms out on the antenna and
cannot move any further up. To ensure proper
engagement, twist extrusion and confirm roof
antenna is rotating.
3. With the extrusion bottomed out on the
antenna, mark the extrusion at the ceiling.
4. Remove the extrusion and add ½” above
the mark. Be careful not to flip the extrusion
before adding or cutting. See figure below. The
extrusion should extend above the ceiling by ½”.
Insert through ceiling
into antenna and align
before cutting
Winegard Company • 2736 Mt. Pleasant Street • Burlington, IA 52601 • 1-800-288-8094 • Fax 319-754-0787 • www.winegard.com
Winegard and Rayzar are registered trademarks of Winegard Company. Printed in U.S.A. ©2016 Winegard Company Rev1 8-16 2452367
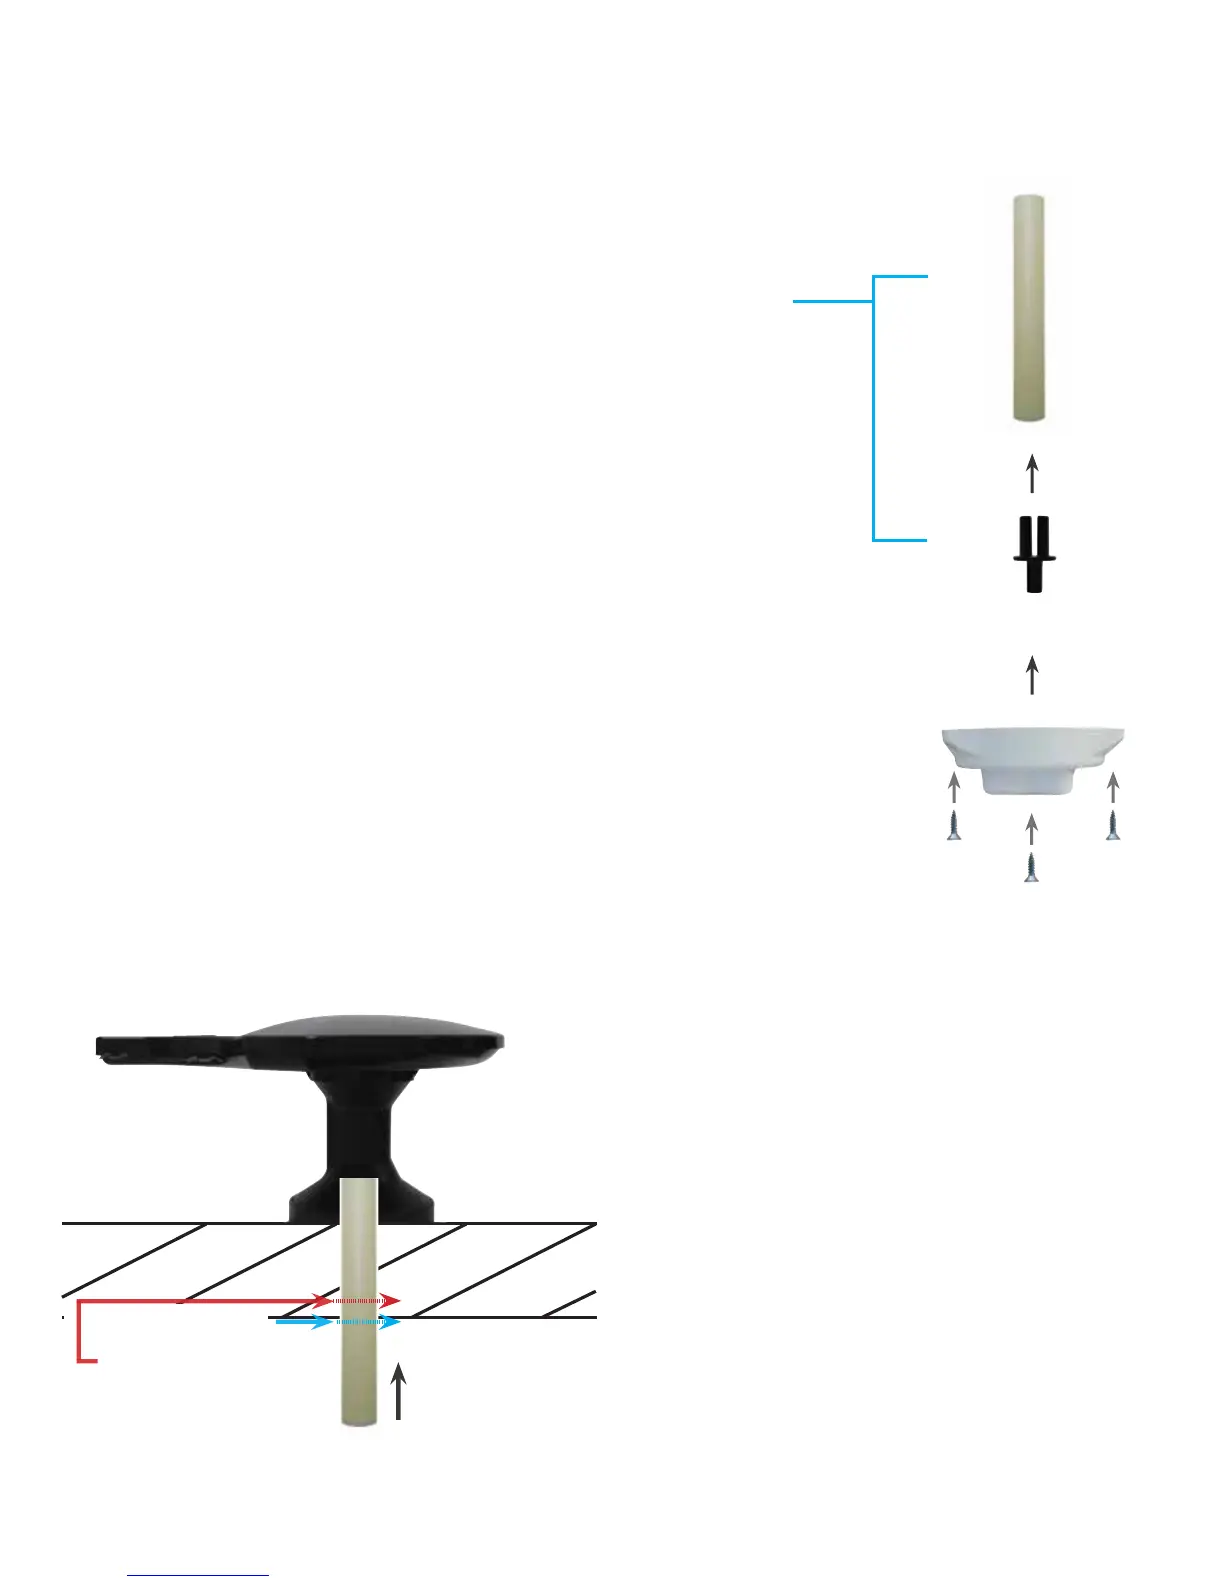
INSTALLING INTERIOR HARDWARE
After the extrusion is cut to length, install the handle
assembly in the order shown in figure below.
Handle Assembly
Mark here
Cut extrusion 1/2”
above ceiling after
fully inserted through
ceiling into antenna
Ceiling
Option B:
Extrusion
Handle Adapter
Step 1
Handle Adapter
into Extrusion
Roof Top
Roof depth
Step 2
Slide Handle
Assembly into
Handle Adapter
Step 3
Screw Handle
Assembly to Ceiling
 Loading...