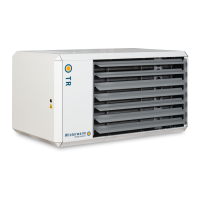
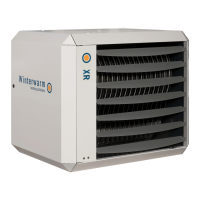
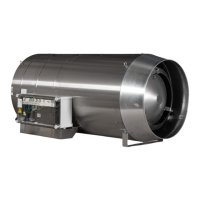
This document provides installation and user instructions for the UNIT AIR HEATER TYPE TR, specifically for models produced from 2019 onwards. It is intended for gas, electrical, and mechanical installers, as well as end-users for reference. Adherence to these instructions is crucial for safe operation and to maintain the product's warranty.
Function Description
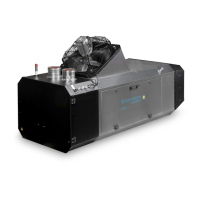
The Type TR unit air heater is designed for both heating and ventilation. It incorporates a temperature-sensing system that monitors the temperature difference between the unit's internal sensor (NTC) and a room thermostat. If this difference exceeds a preset value (factory setting 8°C), indicating warm air accumulation near the roof, the system fan activates at a regulated speed. This function, known as Delta-T-regulation, acts as an automatic variable de-stratification fan, ensuring even temperature distribution throughout the building. This regulation can be switched off via the room thermostat's Menu Program Settings if not required.
The heater operates through a defined burner cycle, which is displayed on the unit. This cycle includes:
- Stand-by (0): Waiting for heat demand.
- Reset (1): Software reset.
- Pre-check (3): Zero position check of the pressure switch.
- Pre-purge (4): 30 seconds of pre-ventilation from the combustion fan, during which the pressure switch is checked.
- Pre-ignition (5): Ignition without opening the gas valve.
- Igniting (6): Ignition (5 seconds), gas valve opens.
- Flame check (7): Verifies the presence of flame.
- Burn (8): The heater burns and begins to modulate.
- Minimum (9): Before the flame stops, the burner modulates to minimum power.
- Burner off (10): Gas valve closes, flame stops.
- Post Purge (11): Burner fan purges with fresh air, and the system fan cools the heat exchanger.
The heater has a minimum burn time of 4 minutes to prevent frequent starts and stops. It will attempt to ignite twice before entering a lock-out condition, requiring a manual reset.
Summer ventilation is also possible, allowing the fan to run at a certain speed during warmer months, as instructed in the thermostat manual.
Important Technical Specifications
The Type TR heaters are available in various models, from TR10 to TR150, with different heat outputs and gas consumption rates.
General Specifications (ERP2018):
- Electrical Connection: 230V, 50Hz.
- Electrical Power Consumption (max): Ranges from 0.190 kW (TR24) to 1.500 kW (TR150).
- Electrical Power Consumption (min): Ranges from 0.190 kW (TR24) to 1.500 kW (TR150).
- Electrical Power Consumption (standby): 0.004 kW for all models.
- NOx Class: 4 for all models.
- Sound Level: Ranges from 42 dBA (TR10-TR20) to 63 dBA (TR150).
- Minimum Suspension Height (horizontal throw): 1.7 m for all models.
- Minimum Suspension Height (vertical throw): 4.0 m for all models.
- Maximum Flue/Air Length: 9 m for all models.
- Weight: Ranges from 50 kg (TR10-TR15) to 260 kg (TR150).
Gas Specifications:
- Natural Gas G20 (I2H):
- Nominal supply pressure: 20 mbar.
- Supply pressure (min-max): 17-25 mbar.
- Gas category: II2H3P B/P.
- CO2 High (indication): 8.0% to 9.0%.
- Propane G31 (P):
- Nominal supply pressure: 30-50 mbar.
- Supply pressure (min-max): 25-50 mbar.
- Gas category: II2H3P B/P.
- CO2 High (indication): 8.8% to 10.0%.
- Butane G30 (B):
- Nominal supply pressure: 30-50 mbar.
- Supply pressure (min-max): 25-50 mbar.
- Gas category: II2H3P B/P.
- CO2 High (indication): 9.2% to 9.5%.
Flue System:
- Maximum Flue Length: 9 meters vertical, 6 meters horizontal. A 90° bend counts as 2 meters, and a 45° bend as 1 meter.
- Flue Material: Only CE marked flue material from Muelink & Grol (M&G) and Burgerhout, type Alu-fix (minimum T200 temperature class) is approved. Mixing components from different manufacturers is not allowed.
- Condensation: Condensation can form during heating. For flue lengths over 4 meters, a condensation trap at the heater or pipe insulation is necessary to prevent accumulation.
Protection:
- IP Classification: IP00B (not waterproof).
- Temperature Protection: Two temperature protections are included. The NTC thermostat monitors air temperature. If the temperature becomes too high, the burner modulates to minimum input, and the system fan runs at maximum speed. If it continues to rise, the burner switches off (E05/E36). If it reaches an unacceptable level, the heater stops (L31) and requires a manual reset.
- Flue Transport Supervision: A pressure switch controls combustion air transport, checking for sufficient airflow during the pre-purge phase. Insufficient pressure difference results in fault L14.
Usage Features
- Room Thermostat Control: The heater is controlled by special modulating Winterwarm room thermostats:
- Multi Therm Comfort: A digital clock thermostat with optimiser, capable of controlling 1 to 8 HR10-HR60 heaters or 1 to 4 HR80-HR120 heaters.
- Multi Therm Standard: A digital thermostat, with similar control capabilities.
- Interface Printboard: A module for connecting heaters to Building Management Systems (BMS) using 0-10V signals, high/low signals, external reset, and other inputs/outputs.
- Two-wire Low-Voltage Communication: The thermostat communicates with the heater via a two-wire, low-voltage bus system.
- Multi-Heater Installation: One room thermostat can control up to 8 heaters. Each heater must have a unique number set via a micro switch on its control board for the system to function correctly.
- Display for Status and Error Codes: The heater's display shows the current operating status and error codes (e.g., L-codes for volatile lock-outs, E-codes for temporary errors), aiding in troubleshooting.
Maintenance Features
- Regular Inspection: The heater must be inspected and cleaned annually by a qualified installer. This is especially important in dusty, humid environments or with high frequency of switching on/off.
- Pre-Inspection Steps: Before inspection, switch off electrical power and close the manual gas valve.
- Burner and Heat Exchanger Cleaning:
- Remove the burner (including flange and pre-mix fan) by unscrewing M6 socket screws and disconnecting ignition and fan wires.
- Inspect the heat exchanger for dirt/damage.
- Inspect and clean the ignition electrode, ensuring not to twist it out of shape.
- Clean the air supply and flue discharge paths.
- Vacuum clean the inside of the heater.
- If the heat exchanger is dirty externally, clean it with a soft brush (never steel wire brush).
- Clean the fan-grid with a vacuum cleaner and brush.
- Reinstall the burner with a new gasket.
- Combustion Efficiency Check: After maintenance, check the heater's combustion efficiency and adjust if necessary. A flue gas analysis should be obtained and recorded.
- Gas Control Adjustment: Gas control adjustment is generally not necessary after installation but must be performed by a qualified person using calibrated instruments if required (e.g., after fitting a new valve). Incorrect adjustment can lead to overheating or toxic carbon monoxide production and invalidates the warranty.
- Fuse Replacement: The heater control board has one fuse (F1). Replace it only with a fuse of the same type (5AT).
- User Instruction: End-users must be instructed on safe use, location of the manual gas valve, operation (lock-out indication and reset), and necessary maintenance. The manual must be left with the end-user for reference.