3
TORCH WIZARD INSTALLATION & OPERATION MANUAL
wire-wizard.com
2.1 MOUNTING THE TORCH WIZARD
®
Select a location within the robotic workcell that
provides the robot with the shortest approach points.
It is important to consider the robot work envelope
and any fixed obstructions or potential interference.
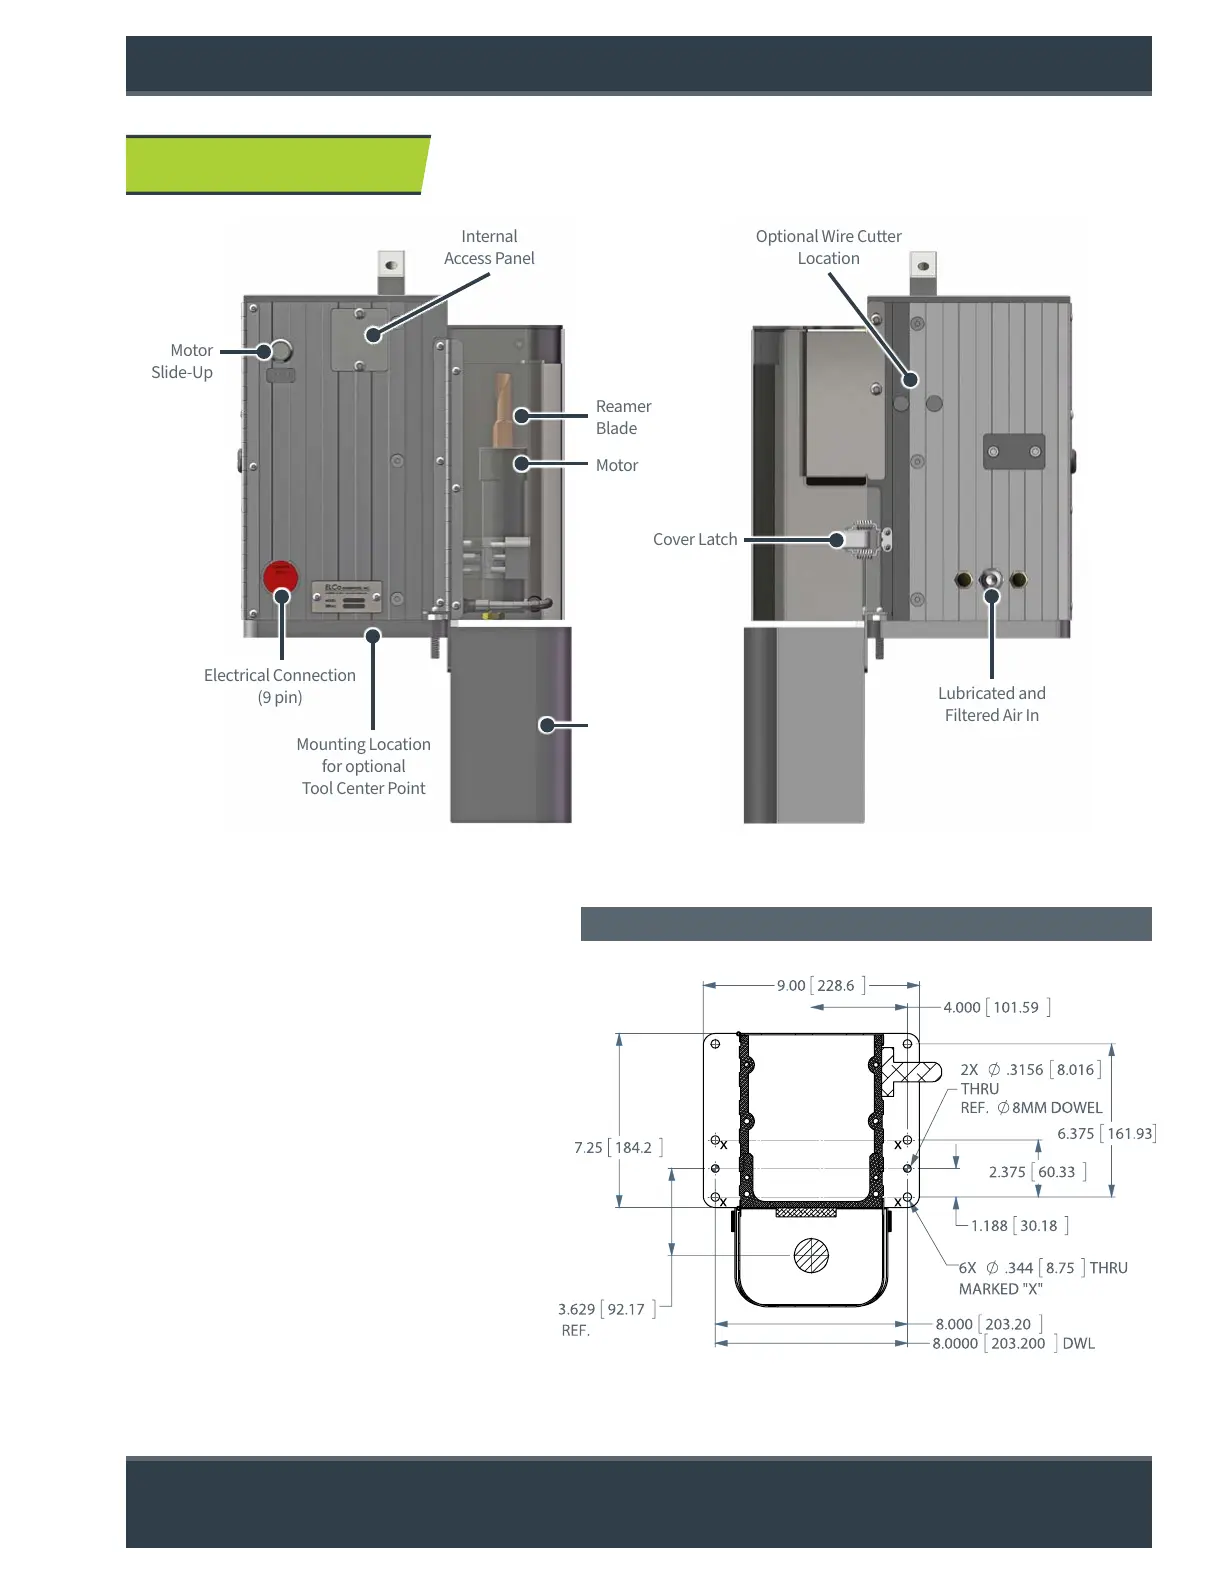
Mount the Torch Wizard® to a stable platform
that is parallel to the floor for best results
(an optional stand is available). Use the
(4) 11/32 mounting holes provided on
base of the Torch Wizard® to secure the
unit to the platform.
It is recommended that (4) M8 – 1.25 SHCS
(Socket Head Cap Screws) are used to
mount the Torch Wizard® to the platform
(the optional stand provides M8 – 1.25
tapped holes for mounting).
2.0 INSTALLATION
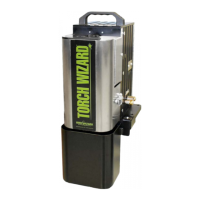
Optional Wire Cutter
Location
Motor
Slide-Up
Cover Latch
Internal
Access Panel
Reamer
Blade
Mounting Location
for optional
Tool Center Point
Motor
Lubricated and
Filtered Air In
Electrical Connection
(9 pin)
Catch Tray
Figure 1: Torch Wizard Components (EL-NCS-20 shown)
Bolt Pattern (same for all models)
Figure 2