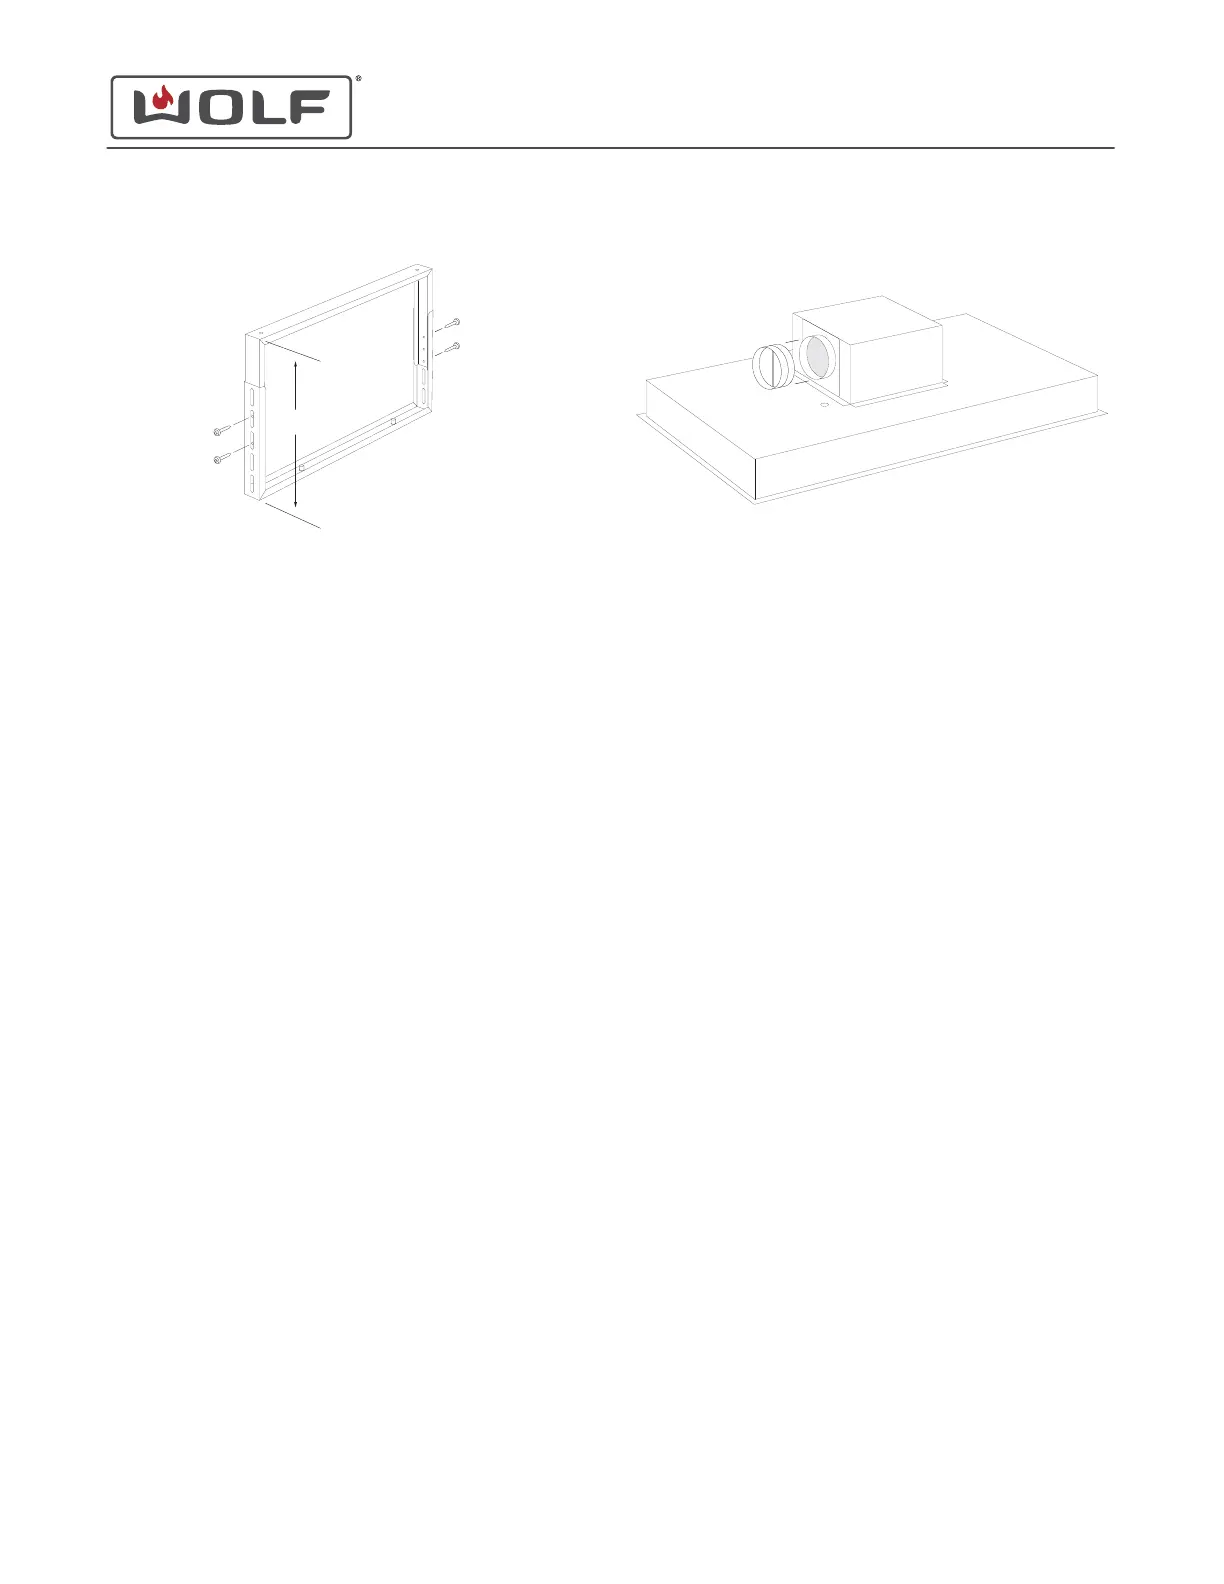
3 Use the
3
/
8
" length screws to secure the brackets.
LOWER MOUNTING BRACKET REMOVAL
Remove the Lower Mounting Bracket
LOWER MOUNTING BRACKET INSTALLATION
Install the Lower Mounting Bracket
DAMPER REMOVAL
Remove the Damper
1 Remove the duct sealing tape around the damper.
2 Pull the damper from the round discharge.
DAMPER INSTALLATION
Install the Damper
1 Place the round damper on the round discharge.
2
Secure the damper with duct sealing tape.
WIRE HARNESS REMOVAL
Remove the Wire Harness
1 Disconnect the LED light wire harnesses.
2 Use a Phillips screwdriver to remove the screws holding the
control assembly to the frame.
3 Use a flat-head screwdriver to remove the wire cover on the
rear of the control panel.
4 Disconnect the wire harness from the control panel.
5 Open the ribbon cable cover of the power board assembly
with a flat-blade screwdriver, and disconnect the ribbon
cable.
6 Remove the four screws holding the power board assembly
case together.
7 Inside the power board assembly case, disconnect the wire
harnesses from the power board assembly.
8 Remove the two screws that hold the cover onto the J-box.
9 Inside the J-box, disconnect the wire harness.
10 Disconnect the wire harness from the wire clips around the
perimeter of the inner panel.
11 Remove the wire harness from the unit.
WIRE HARNESS INSTALLATION
Install the Wire Harness
1 Insert the wire harness into the wire clips around the
perimeter of the inner panel.
2 Connect the wire harness to the J-box.
Wolf V-Series Cooktop Hoods Service Manual
INSTALL THE MOUNTING BRACKET (continued)
service.subzero.com
825309 REV. B
8