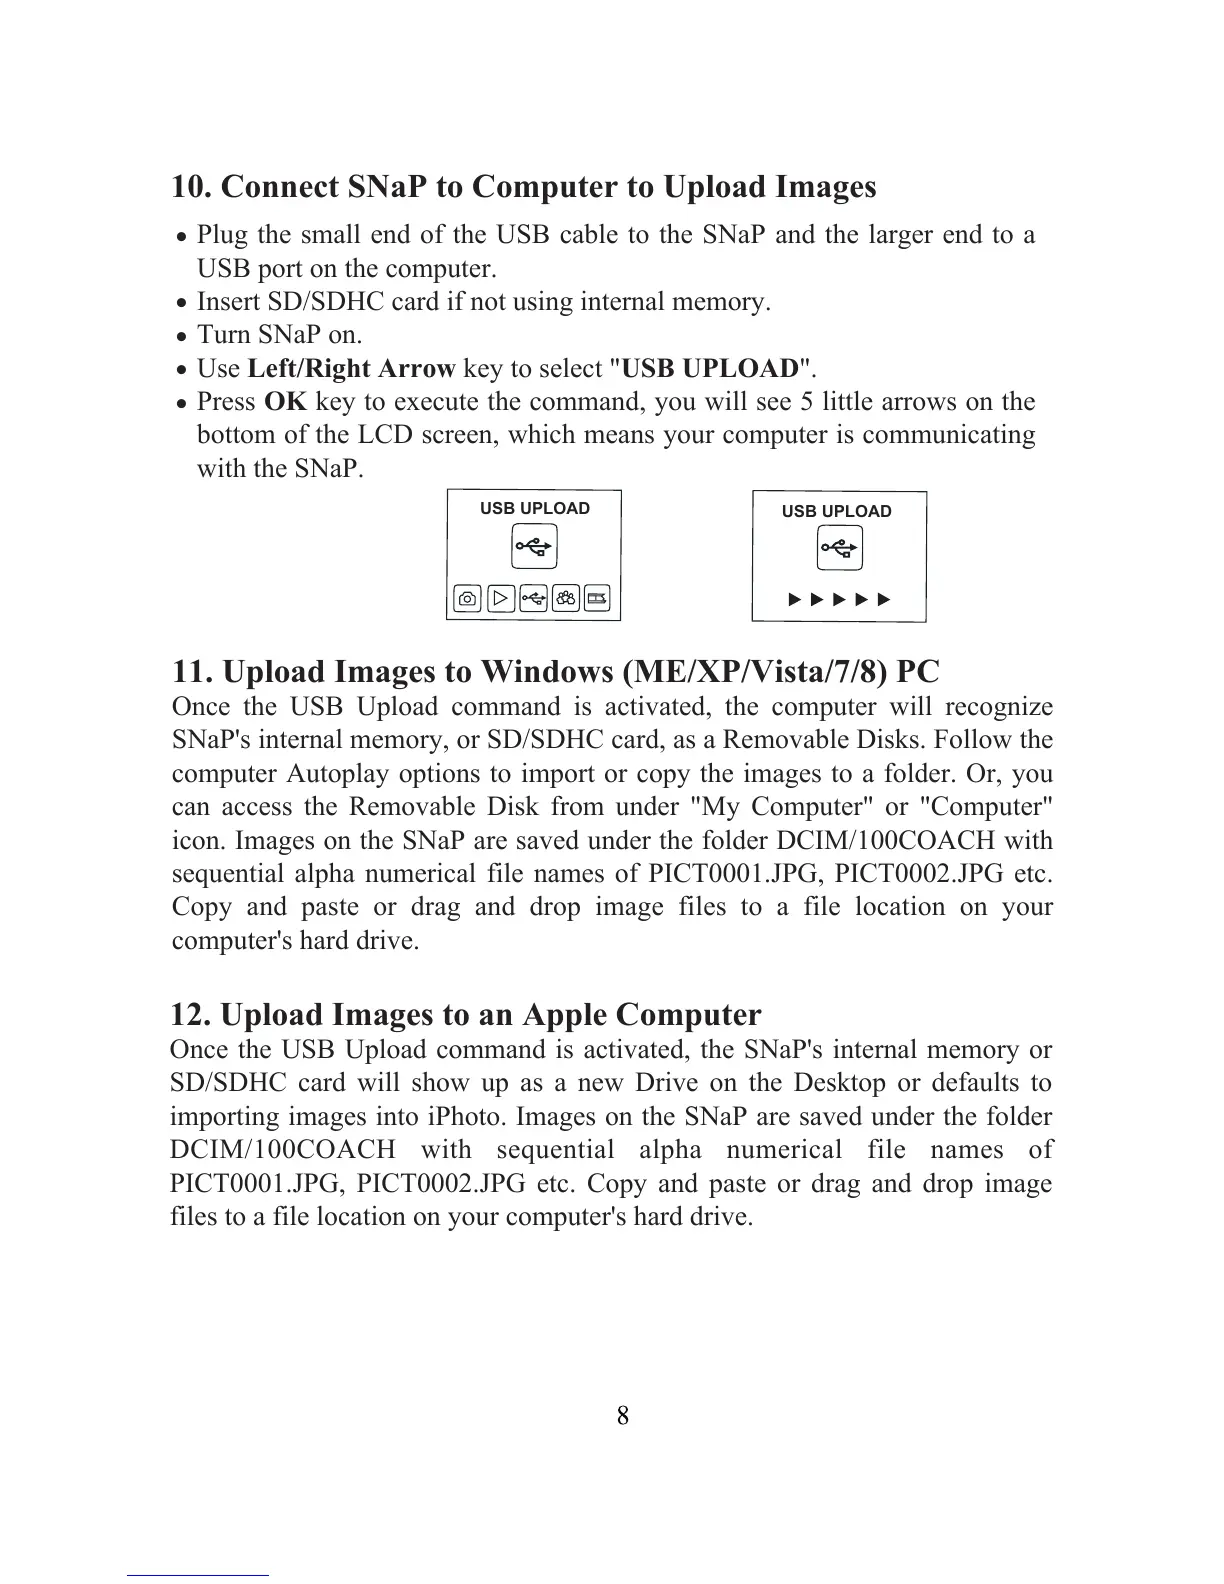
10. Connect SNaP to Computer to Upload Images
Plug the small end of the USB cable to the SNaP and the larger end to a
USB port on the computer.
Insert SD/SDHC card if not using internal memory.
Turn SNaP on.
Use Left/Right Arrow key to select "USB UPLOAD".
Press OK key to execute the command, you will see 5 little arrows on the
bottom of the LCD screen, which means your computer is communicating
with the SNaP.
.
.
.
.
.
USB UPLOAD
USB UPLOAD
11. Upload Images to Windows (ME/XP/Vista/7/8) PC
Once the USB Upload command is activated, the computer will recognize
SNaP's internal memory, or SD/SDHC card, as a Removable Disks. Follow the
computer Autoplay options to import or copy the images to a folder. Or, you
can access the Removable Disk from under "My Computer" or "Computer"
icon. Images on the SNaP are saved under the folder DCIM/100COACH with
sequential alpha numerical file names of PICT0001.JPG, PICT0002.JPG etc.
Copy and paste or drag and drop image files to a file location on your
computer's hard drive.
12. Upload Images to an Apple Computer
Once the USB Upload command is activated, the SNaP's internal memory or
SD/SDHC card will show up as a new Drive on the Desktop or defaults to
importing images into iPhoto. Images on the SNaP are saved under the folder
DCIM/100COACH with sequential alpha numerical file names of
PICT0001.JPG, PICT0002.JPG etc. Copy and paste or drag and drop image
files to a file location on your computer's hard drive.