.
.
.
.
.
.
.
.
7. Home Menu Displayed in Film Mode
.
Film Type
: to select the type of film you wish to convert, color negative,
slide, or black and white
.
Delete All: to delete images stored in the internal memory or SD/SDHC
memory card if inserted
.
Convert: to start the photo converting mode
.
Playback: to review all converted images
.
USB Upload: to communicate and upload image files to a computer
.
Language: to select the menu in English or Japanese
8. Convert Film to Digital Images
Move top lever to "Film" side and the "Film" LED will light up. It is
recommended to use a clean lint free cloth or compressed air (not included) to
remove any dust particles on the film.
Make sure the top lever is on the "Film" side.
Press OK key to enter the film type selection.
Press Left/Right arrow key to select the type of film then press OK key to
confirm the selection.
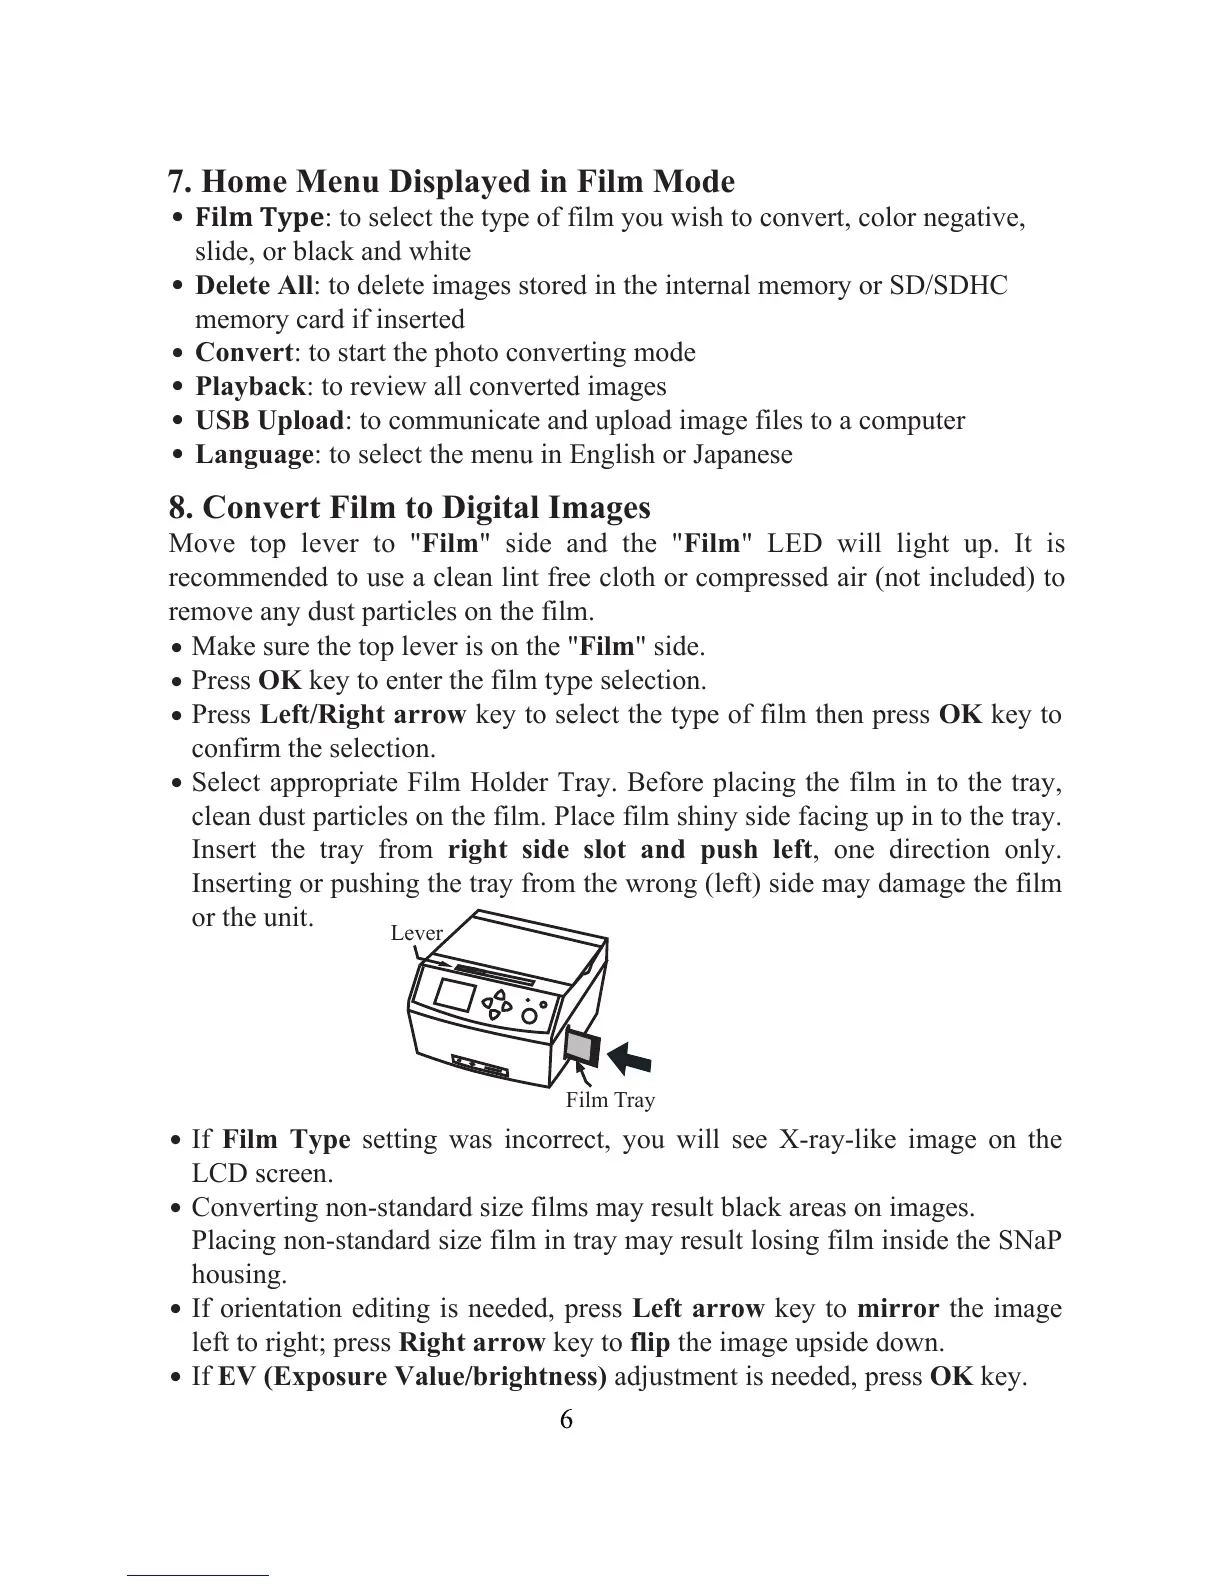
Select appropriate Film Holder Tray. Before placing the film in to the tray,
clean dust particles on the film. Place film shiny side facing up in to the tray.
Insert the tray from right side slot and push left, one direction only.
Inserting or pushing the tray from the wrong (left) side may damage the film
or the unit.
If Film Type setting was incorrect, you will see X-ray-like image on the
LCD screen.
Converting non-standard size films may result black areas on images.
Placing non-standard size film in tray may result losing film inside the SNaP
housing.
If orientation editing is needed, press Left arrow key to mirror the image
left to right; press Right arrow key to flip the image upside down.
If EV (Exposure Value/brightness) adjustment is needed, press OK key.
Film Tray
Lever