.
.
.
.
.
.
.
.
.
.
.
.
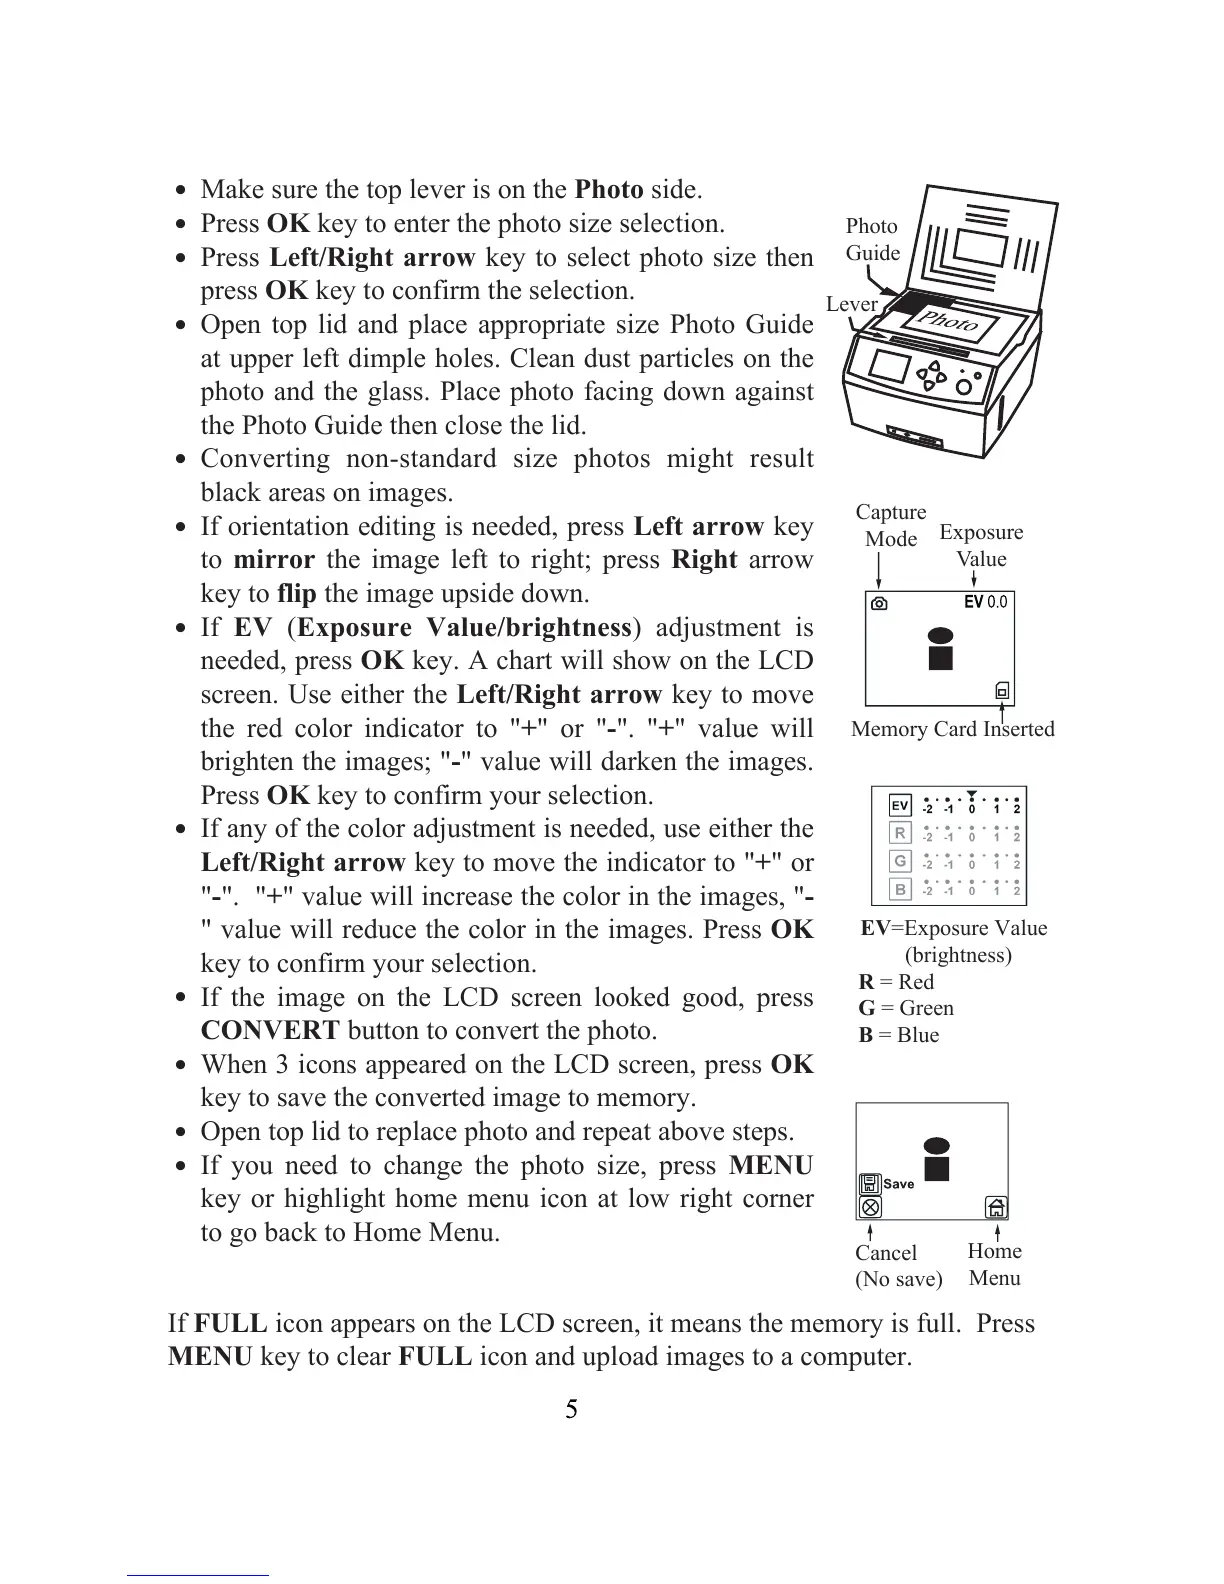
Make sure the top lever is on the Photo side.
Press OK key to enter the photo size selection.
Press Left/Right arrow key to select photo size then
press OK key to confirm the selection.
Open top lid and place appropriate size Photo Guide
at upper left dimple holes. Clean dust particles on the
photo and the glass. Place photo facing down against
the Photo Guide then close the lid.
Converting non-standard size photos might result
black areas on images.
If orientation editing is needed, press Left arrow key
to mirror the image left to right; press Right arrow
key to flip the image upside down.
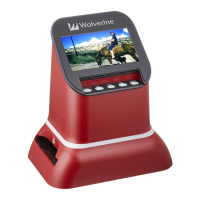
If EV (Exposure Value/brightness) adjustment is
needed, press OK key. A chart will show on the LCD
screen. Use either the Left/Right arrow key to move
the red color indicator to "+" or "-". "+" value will
brighten the images; "-" value will darken the images.
Press OK key to confirm your selection.
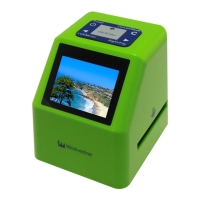
If any of the color adjustment is needed, use either the
Left/Right arrow key to move the indicator to "+" or
"-". "+" value will increase the color in the images, "-
" value will reduce the color in the images. Press OK
key to confirm your selection.
If the image on the LCD screen looked good, press
CONVERT button to convert the photo.
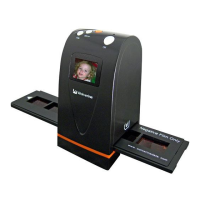
When 3 icons appeared on the LCD screen, press OK
key to save the converted image to memory.
Open top lid to replace photo and repeat above steps.
If you need to change the photo size, press MENU
key or highlight home menu icon at low right corner
to go back to Home Menu.
If FULL icon appears on the LCD screen, it means the memory is full. Press
MENU key to clear FULL icon and upload images to a computer.
Photo
Guide
Lever
Home
Menu
Cancel
(No save)
EV=Exposure Value
(brightness)
Capture
Mode
Exposure
Value
Memory Card Inserted
R = Red
G = Green
B = Blue