www.WoodMaxx.com
18
ASSEMBLY INSTRUCTIONSASSEMBLY INSTRUCTIONS
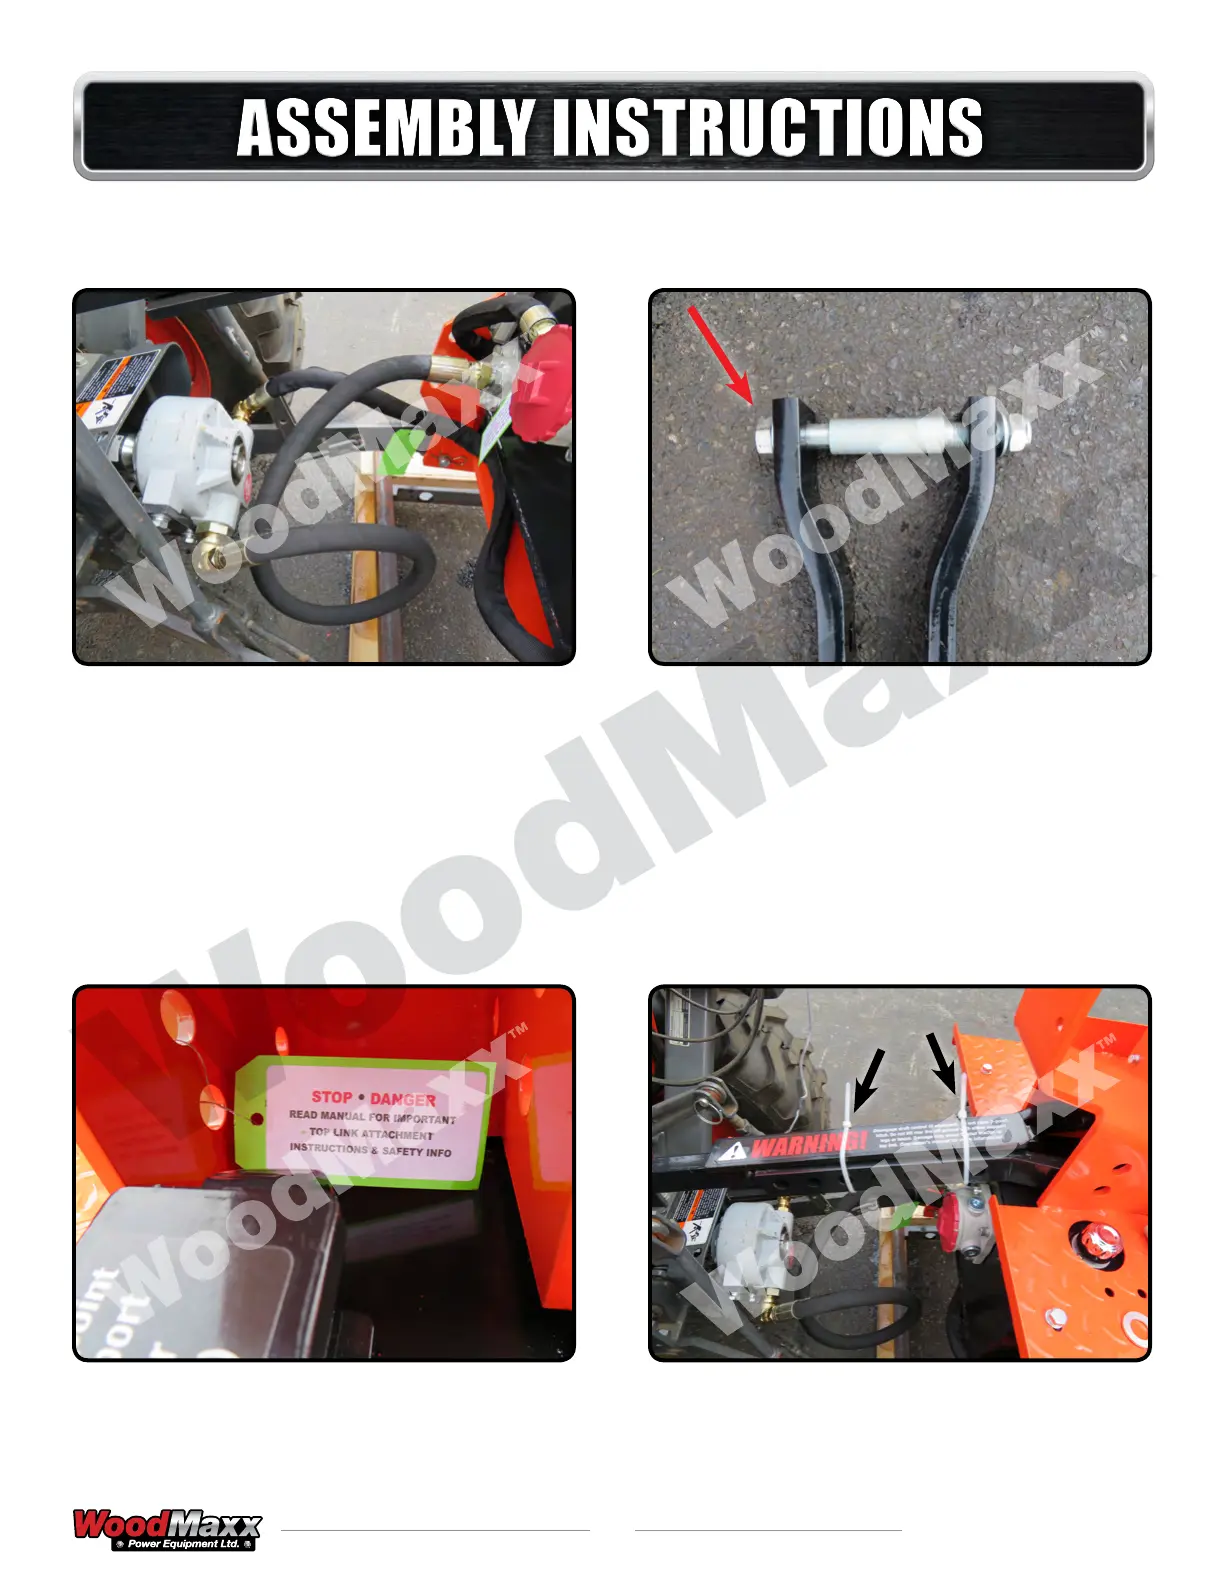
Slightly loosen the hydraulic tting on the
pump and tank so that you can adjust the
hoses so that they do not drag on the ground
or rub on any frame members. This will be
different for everybody, you can see that here
we made a loop with the suction line to take
up the slack. Be sure to tighten all tting when
done. (15/16” wrench, 1-1/4” wrench, crescent
wrench)
Prepare the remaining top link assembly
components by removing the bolt.
Note - When installed, the spacer bushing
should be mounted on the bolt as shown here.
Stop here and read the important top link
information on page 23-24.
Install the 2 joint plates that make up the top
link assembly as shown. Temporarily secure the
joint plates to the top link using (2) - 1/4” x 13”
zip ties as shown ( black arrows).
Assembly Instructions (continued)