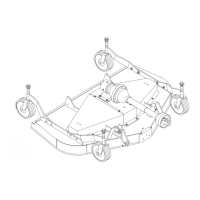
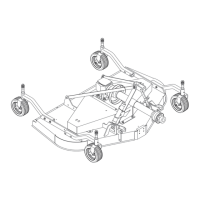
24 Assembly
MAN1260 (4/09/2018)
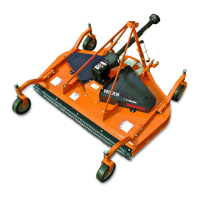
Figure 35
. Quick Hitch Kit Installation (Optional)
DEALER CHECK LISTS
PRE-DELIVERY CHECK LIST
(DEALER’S RESPONSIBILITY)
Inspect the equipment thoroughly after assembly to ensure it is set up properly
before delivering it to the customer.
The following check lists are a reminder of points to inspect. Check off each
item as it is found satisfactory or after proper adjustment is made.
___ Check that all safety decals are installed and in good condition.
Replace if damaged.
___ Check that shields and guards are properly installed and in good
condition. Replace if damaged.
___ Check all bolts to be sure they are properly torqued.
___ Check that all cotter pins and safety pins are properly installed.
Replace if damaged.
___ Check and grease all lubrication points as identified in “Lubrication
Information” on page 12.
___ Gearboxes are not filled at the factory. Prior to delivery, fill as spec-
ified in the “Owner Service, lubrication information” on page 12 and
check to see that there are no leaking seals.
___ Check that blades have been properly installed.
DELIVERY CHECK LIST
(DEALER’S RESPONSIBILITY)
___ Show customer how to make adjustments and select proper PTO
speed.
___ Instruct customer how to lubricate and explain importance of lubri-
cation.
___ Point out the safety decals. Explain their meaning and the need to
keep them in place and in good condition. Emphasize the
increased safety hazards when instructions are not followed.
___ Present Operator's Manual and request that customer and all oper-
ators read it before operating equipment. Point out the manual
safety rules, explain their meanings and emphasize the increased
safety hazards that exist when safety rules are not followed.
___ Show customer how to make sure driveline is properly installed and
that spring-activated locking pin or collar slides freely and is seated
in groove on tractor PTO shaft.
___ Show customer the safe, proper procedures to be used when
mounting, dismounting, and storing equipment.
___ Explain to customer the potential crushing hazards of going under-
neath raised equipment. Instruct that before going underneath to
disconnect the driveline, securely block up all corners with jack-
stands and to follow all instructions in the “Owner Service, Blocking
Methods” section of the Operator’s Manual. Explain that blocking
up prevents equipment dropping from hydraulic leak down, hydrau-
lic system failures or mechanical component failures.
___ For mounted units, add wheel weights, ballast in front tires, and/or
front tractor weight to enhance front end stability. A minimum 20%
of tractor and equipment gross weight must be on front tractor
wheels. When adding weight to attain 20% of tractor and equip-
ment weight on front tractor wheels, you must not exceed the
ROPS weight certification. Weigh the tractor and equipment. Do
not estimate!
___ Make customer aware of optional equipment available so that cus-
tomer can make proper choices as required.
___ Point out all guards and shields. Explain their importance and the
safety hazards that exist when not kept in place and in good condi-
tion.
CHAIN CUT-TO-LENGTH CHART
Model Dimension “A”
PRD6000E 1016 mm (40")
PRD7200E 1143 mm (45")
PRD8400E 1270 mm (50")
NOTE:
This kit is used on other models. Use only the hardware listed below.
1. Offset link, 9.5 x 50.8 x 381 mm (.38 x 2 x 15")
2. Chain, 9.5 mm (3/8") proof coil 38-link
3. Sleeve, 23.8 x 36.5 x 49.2 mm (.94 x 1.44 x 1.94")
4. Screw, 1/2 NC x 6 HHCS GR5
5. Washer, 1/2" flat
6. Sleeve, 12.7 x 19.1 x 85.7 mm (.50 x .75 x 3.38")
7. Nut, 1/2 NC flange lock
8. Sleeve, 22.2 x 28.6 x 15.1 mm
(7/8 x 1-1/8 x 19/32")
9. Washer, 3/4 flat
10. Sleeve, 20.6 x 31.8 x 45.0 mm (.81 x 1.25 x 1.81")
11. Screw, 3/4 NC x 4-1/2 HHCS
12. Nut, 3/4 NC plated hex