48
Checking
ATTENTION
Before each ride, check that the front and rear brakes work and that the tyres have
sucient pressure.
HINT
Disc brakes need some time until they are "braked in". You can speed up this process
by braking several times from medium speed until you come to a standstill.
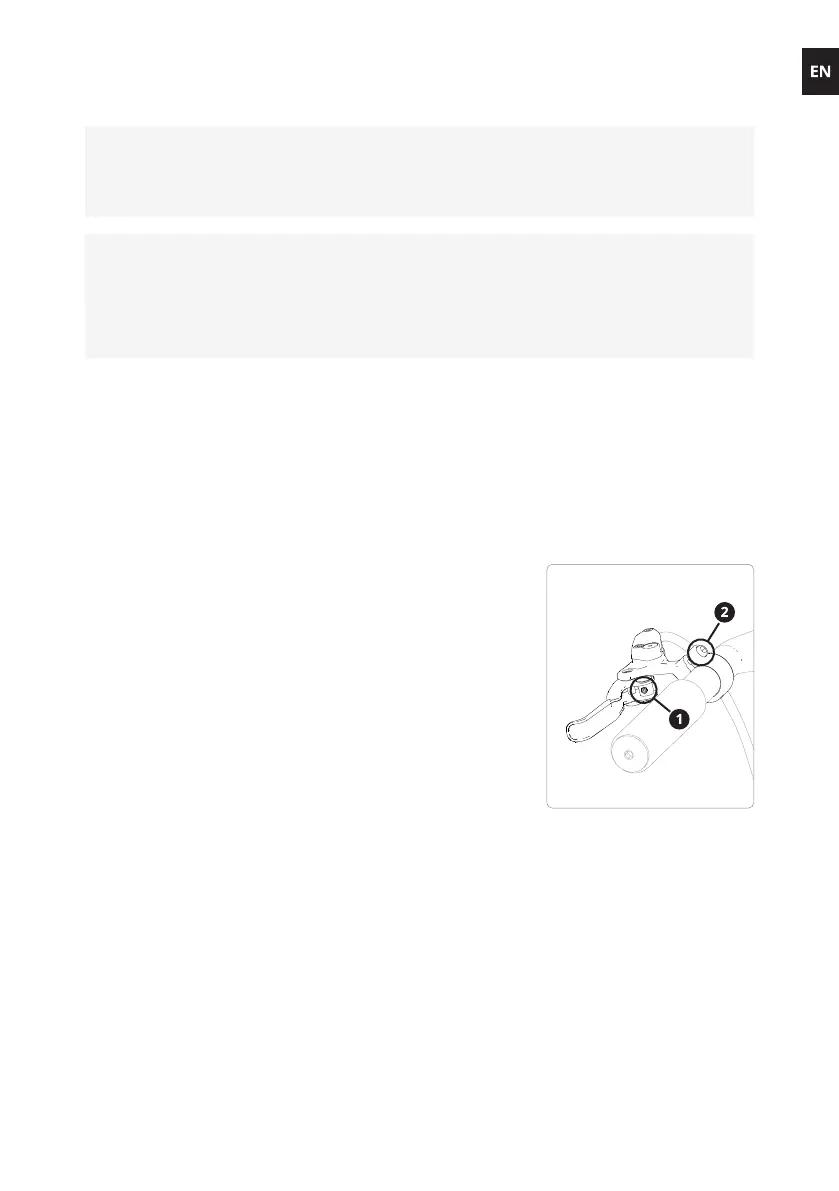
6�3 Adjusting handlebar and brake lever
See Section 11.1 on page 60 for tightening torques.
Once you've assembled all the parts, the woom UP is ready to go. The following adjustments
are only necessary if you nd that the position of the brake lever or shifter or the inclination
of the handlebar is not suitable for your child.
Adjusting the brake lever position and grip width
The distance from the brake lever to the handlebar grip is set
to a default value depending on the woom UP model.
To reduce the distance between the brake lever and the
handlebar grip, use a 2 mm hex key to turn the brake lever
adjusting screw (1– see gure) counter clockwise. To increase
the distance, turn the screw clockwise (observe the warning!).
To adjust the position of the brake lever on the handlebar,
loosen the clamping screw (2 – see gure) by turning it counter
clockwise and reposition the lever. Then tighten the clamping
screw to the torque specied in Section 11.1 on page 60.
Make sure
that the brake levers are positioned in such a way that
your child can brake safely and easily and
that the shifter can be easily reached.