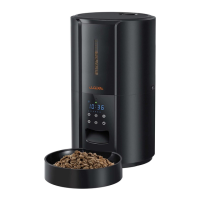
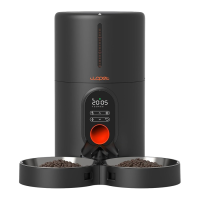
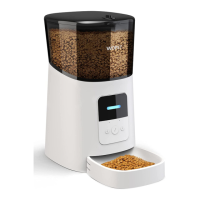
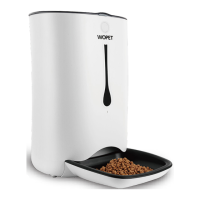
This document provides a quick operation guide for the Castle Automatic Feeder, models FT70 and FT70 Plus, manufactured by Wopet. It details the display overview, button functions, screen panel introductions, and step-by-step instructions for setting up and operating the device.
The Castle Automatic Feeder is designed to automate pet feeding, offering features such as scheduled meals, portion control, and a recording function for personalized meal calls. The device is equipped with a clear digital display and a set of intuitive buttons for easy programming and interaction.
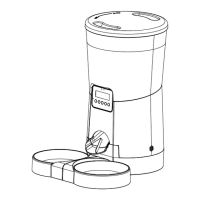
Display Overview:
The display provides a comprehensive overview of the feeder's status and settings. Key indicators include:
- Indicator: A general status light.
- Buzzer: Indicates audible alerts or confirmations.
- Time Setting Icon: Flashes when the device is powered on, prompting the user to set the current time.
- Lock Icon: Indicates whether the device is locked or unlocked.
- Timing/Portions: Shows the set meal times and portion sizes.
- Meal Number: Displays the current meal number being set (1 to 6).
- Battery Level Icon: Shows the current battery status; it lights up when running on battery power and turns red to indicate low battery.
- Manual Icon: Used for manual feeding.
- Setting/Save/Unlock Icon: Multifunctional button for entering settings, saving changes, and unlocking the device.
- Recording Icon: Used to record a voice message.
- Number Increase/Decrease Icons: Used to adjust numerical values during settings.
- Return/Cancel Icon: Used to go back to the previous step or cancel an action.
The feeder features several buttons, each with specific functions:
- Set/Save/Unlock Button (Gear icon):
- Press to save settings and move to the next step.
- Press and hold for 2 seconds to lock or unlock other buttons and the screen. The device automatically locks after 2 minutes of inactivity.
- Return/Cancel Button (Curved arrow icon):
- Returns to the previous step.
- Returns to the main interface after completing settings.
- Number Increase Button (Up arrow icon):
- Press to increase a numerical value (e.g., hour, minute, portion).
- Number Decrease Button (Down arrow icon):
- Press to decrease a numerical value.
- Manual Button (Hand icon):
- [Must be Unlocked] Press to dispense 1 portion of food manually.
- Recording Button (Microphone icon):
- [Must be Unlocked] Hold for 3 seconds to start recording a voice message (max 10 seconds) after a beep is heard. The recording is saved after a double beep.
Screen Panel Introduction:
The screen panel provides visual cues and information:
- Lock Icon: Indicates that the device is locked. It locks automatically after 2 minutes of inactivity. To unlock, hold the Set/Save/Unlock button for 2 seconds.
- Clock Indicator: Flashes when the device is powered by an adapter or battery, prompting the user to set or modify the current time.
- Timing (24-hours format): Displays the local time.
- Meal Number (1-6): Indicates the number of meals programmed.
- Battery Level: Lights up when the device is running on battery power and turns red when the battery is low.
Usage Features:
The feeder offers a structured setup process for optimal use:
Step 1: Setting Current Time
- When powered on, the clock icon will flash. If the screen is locked, press and hold the Set/Save/Unlock button for 2 seconds to unlock it.
- Hour Setting: Press the Set/Save/Unlock button to set the "hour." The two hour digits will flash. Use the Number Increase/Decrease buttons to adjust the hour.
- Minute Setting: After setting the hour, press the Set/Save/Unlock button again to move to the "minute" setting. Use the Number Increase/Decrease buttons to adjust the minute.
- Press the Set/Save/Unlock button to save the current time. The manual includes a 12-hour to 24-hour clock comparison chart for reference.
Step 2: Setting Meal Times and Portions
- Initiate Meal Setting: Press the Number Decrease button. The "1" (for meal 1) will flash, indicating you are setting up the first meal.
- Set Meal Hour: Press the Set/Save/Unlock button to set the "hour" for the meal. Use the Number Increase/Decrease buttons to adjust the hour.
- Set Meal Minute: Press the Set/Save/Unlock button to move to the "minute" setting for the meal. Use the Number Increase/Decrease buttons to adjust the minute.
- Set Meal Portion: Press the Set/Save/Unlock button to set the portion size. Use the Number Increase/Decrease buttons to adjust the portion.
- Save Meal Settings: Press the Set/Save/Unlock button to save the meal settings.
- Set Other Meals: Press the Number Decrease button to move to set other meals (up to 6). Repeat the above steps for each meal. If a portion is set to 0, that meal will not be displayed on the interface.
Step 3: Returning to Interface
- Return from Settings: Press the Return/Cancel button to return to the main interface after setting up.
- Modify Settings: To modify local time, feeding time, or portion, press the Set/Save/Unlock button.
Step 4: Locking & Unlocking
- Locking: From the main interface, press the Return/Cancel button. Then, press and hold the Set/Save/Unlock button for 2 seconds to lock the screen. The lock icon will appear. The device locks automatically after 2 minutes of inactivity.
- Unlocking: Press and hold the Set/Save/Unlock button for 2 seconds. The lock icon will disappear, indicating the screen is unlocked.
Step 5: Recording a Voice Message
- [Must be Unlocked] Hold the Recording button for 3 seconds. After a beep, you can start recording your voice message (maximum 10 seconds).
- A double beep indicates that the recording has been saved. This recording will play at each scheduled mealtime.
Step 6: Manual Feed
- [Must be Unlocked] Press the Manual button to dispense 1 portion of food immediately.
Maintenance Features:
Step 7: Reset to Factory Default
- [Must be Unlocked] To reset the feeder to its factory settings, press and hold both the Recording button and the Return/Cancel button simultaneously for 3 seconds until a beep is heard. This will clear all programmed settings, including meal times, portions, and recorded voice messages.
The Castle Automatic Feeder is designed for user-friendly operation, providing a reliable solution for automated pet feeding with customizable options. Its locking mechanism prevents accidental changes, and the clear display ensures all settings are easily visible.