HANGZHOU WORLDE DIGITAL PIANO CO.,LTD HANGZHOU WORLDE MUSIC ELECTRONIC CO., LTD
WEBSITE: WWW.WORLDE.COM.CN EMAIL:SALES@WORLDE.COM.CN TEL:86 571 88730848
- 11 -
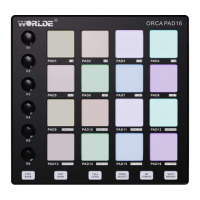
5.1.2 Assign a Pad to Start/Stop MMC
One feature that often comes in handy with a controller keyboard is the ability to start and stop a song without having to
use the computer keyboard or mouse. It’s really easy to set up the TUMAMINI pads to do that.
For example we’ll use Pad 7 to send Stop commands and Pad 8 to send Start commands. This is accomplished through
the use of MIDI Machine Control commands, which you’ve probably seen abbreviated as “MMC”.
5.1.2.1 Select the Pad Mode
Let’s begin by selecting Pad 7 by clicking on its graphic in the TUNAMINI software editor or by tapping Pad 7 on the
TUNAMINI. Then click the Mode field to activate the pull-down menu to select MMC. Besides, click the CC No. field to
activate the pull-down menu to select one of MMC function(Rew CC No.:5, FF CC No.:4,STOP CC No.:1, PLAY CC
No.:2,REC CC No.:6, LOOP CC No.:3).
5.1.2.2 Set the MMC Message number
Once the Mode has been set to MMC, the trick is to set both the LSB and MSB to the same number so the pad knows
which command to send. MMC Stop command needs the CC number set to 1, like so:
Next, select Pad 8 so we can set it to the MMC command for “Start”. This means the CC number must be set to 2:
Now you should have Pad 8 set to start your song and Pad 7 set to stop it. Of course you can assign those functions to any
pad you like, now that you know how to do it.