ASSEMBLY
1. ASSEMBLY OF THE MAIN HANDLE (See Fig. A)
Align and insert the shaft into the upper housing until a
click can be heard. Make sure the grooves are correctly
matched (See Fig. A).
NOTE: Make sure that the handle is firmly locked
in place. Do not try to remove these pieces after
connecting.
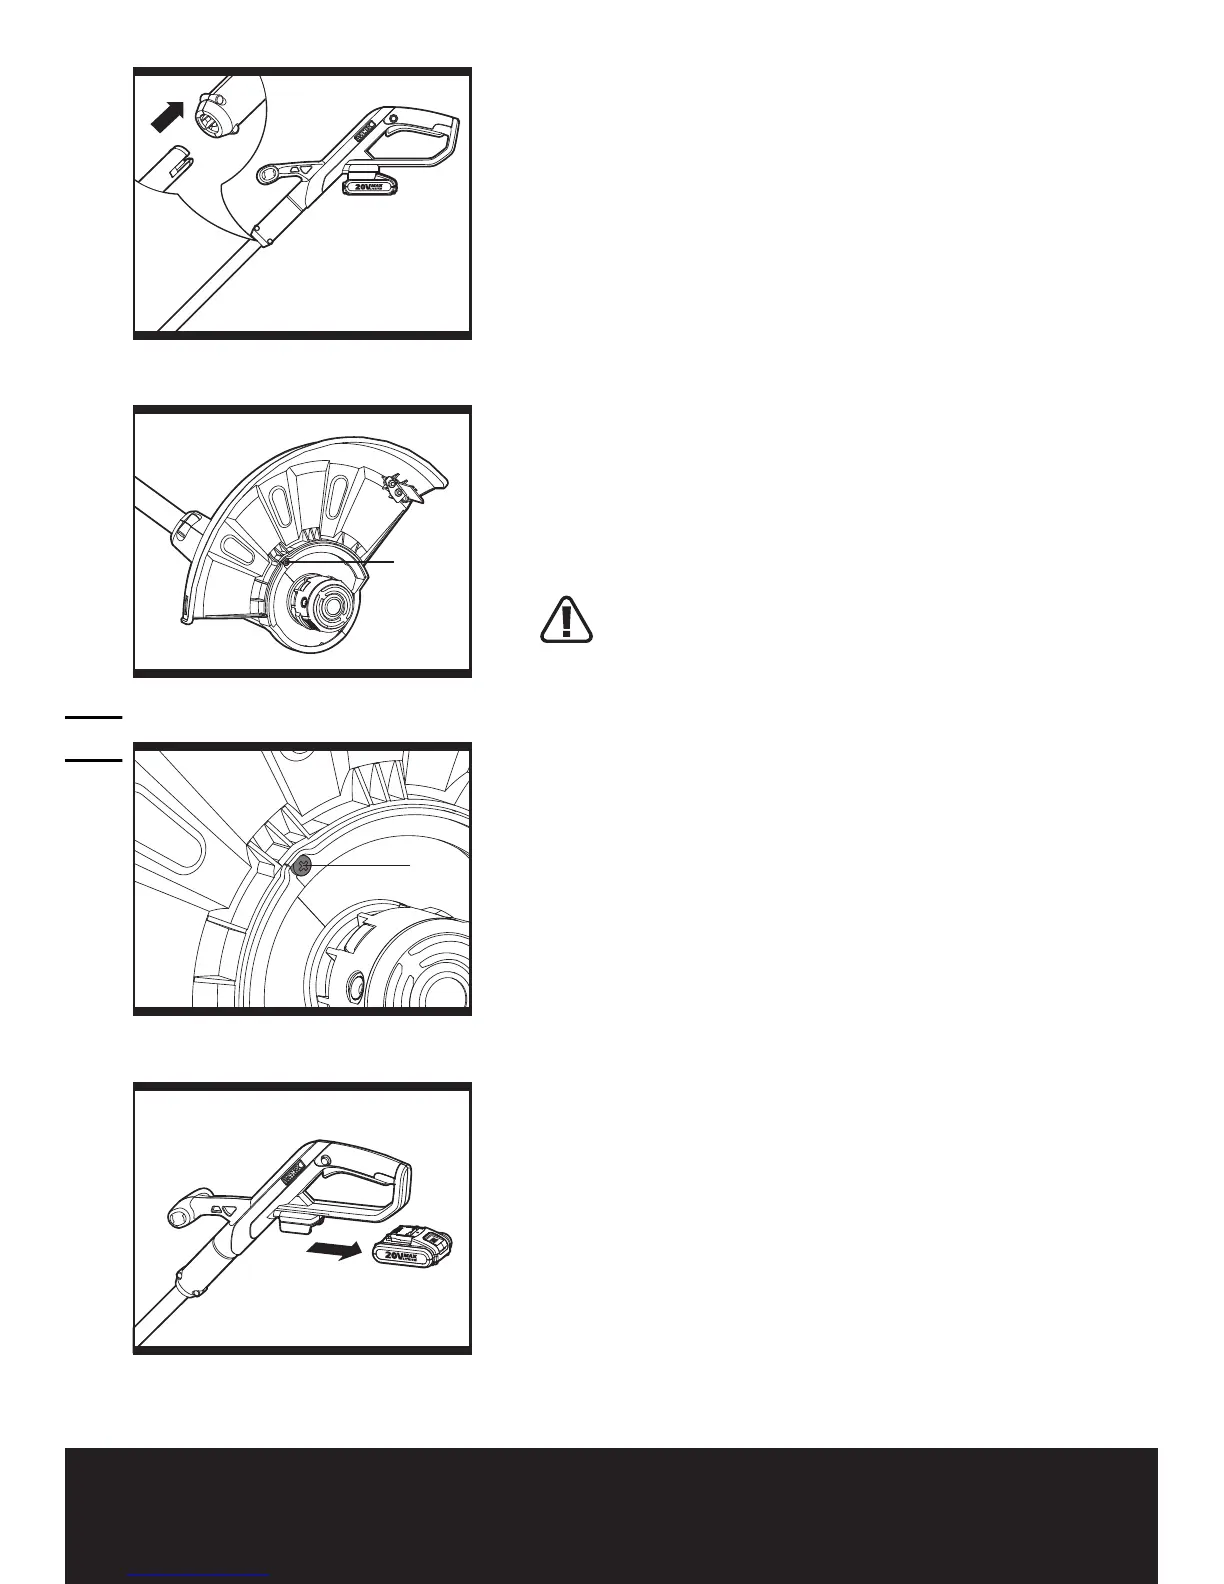
2. ASSEMBLY OF THE SAFETY GUARD
(See Fig. B1, B2)
Remove a screw from the guard; attach the safety
guard to the trimmer head. Align the guard so it slides
into the slots located on the trimmer head. Turn the
tool over and secure the safety guard onto the trimmer
head with the screw (a) provided.
OPERATION INSTRUCTIONS
WARNING! The charger and battery pack are
specially designed to work together so do not
attempt to use any other devices. Never insert or allow
metallic objects into your charger or battery pack
connections because of an electrical failure and hazard
will occur.
1. BEFORE USING YOUR CORDLESS GRASS
TRIMMER
The battery pack included is shipped UNCHARGED. You
must charge before first use.
The battery charger supplied was designed to only
charge the Li-Ion battery also supplied. Do not use
another battery charger.
2. CHARGING YOUR BATTERY PACK
The Li-Ion battery is protected against deep
discharging. When the battery is empty, the machine
will switch off by means of a protective circuit: The
trimmer head will no longer rotate .
In a warm environment or after heavy use, the battery
pack may become too hot to permit charging. Allow
time for the battery to cool down before recharging.
3. TO REMOVE OR INSTALL BATTERY PACK
(See Fig. C1, C2)
Depress the battery release button to release battery
pack from your trimmer (Fig. C1). After recharging,
insert the battery pack into trimmer’s battery port (Fig.
C2). A simple push and slight pressure will be sufficient
until a click is heard.
a
a
 Loading...