make contact. Do not force trimmer line into work area.
EDGING (See Fig. E2, E3, E4)
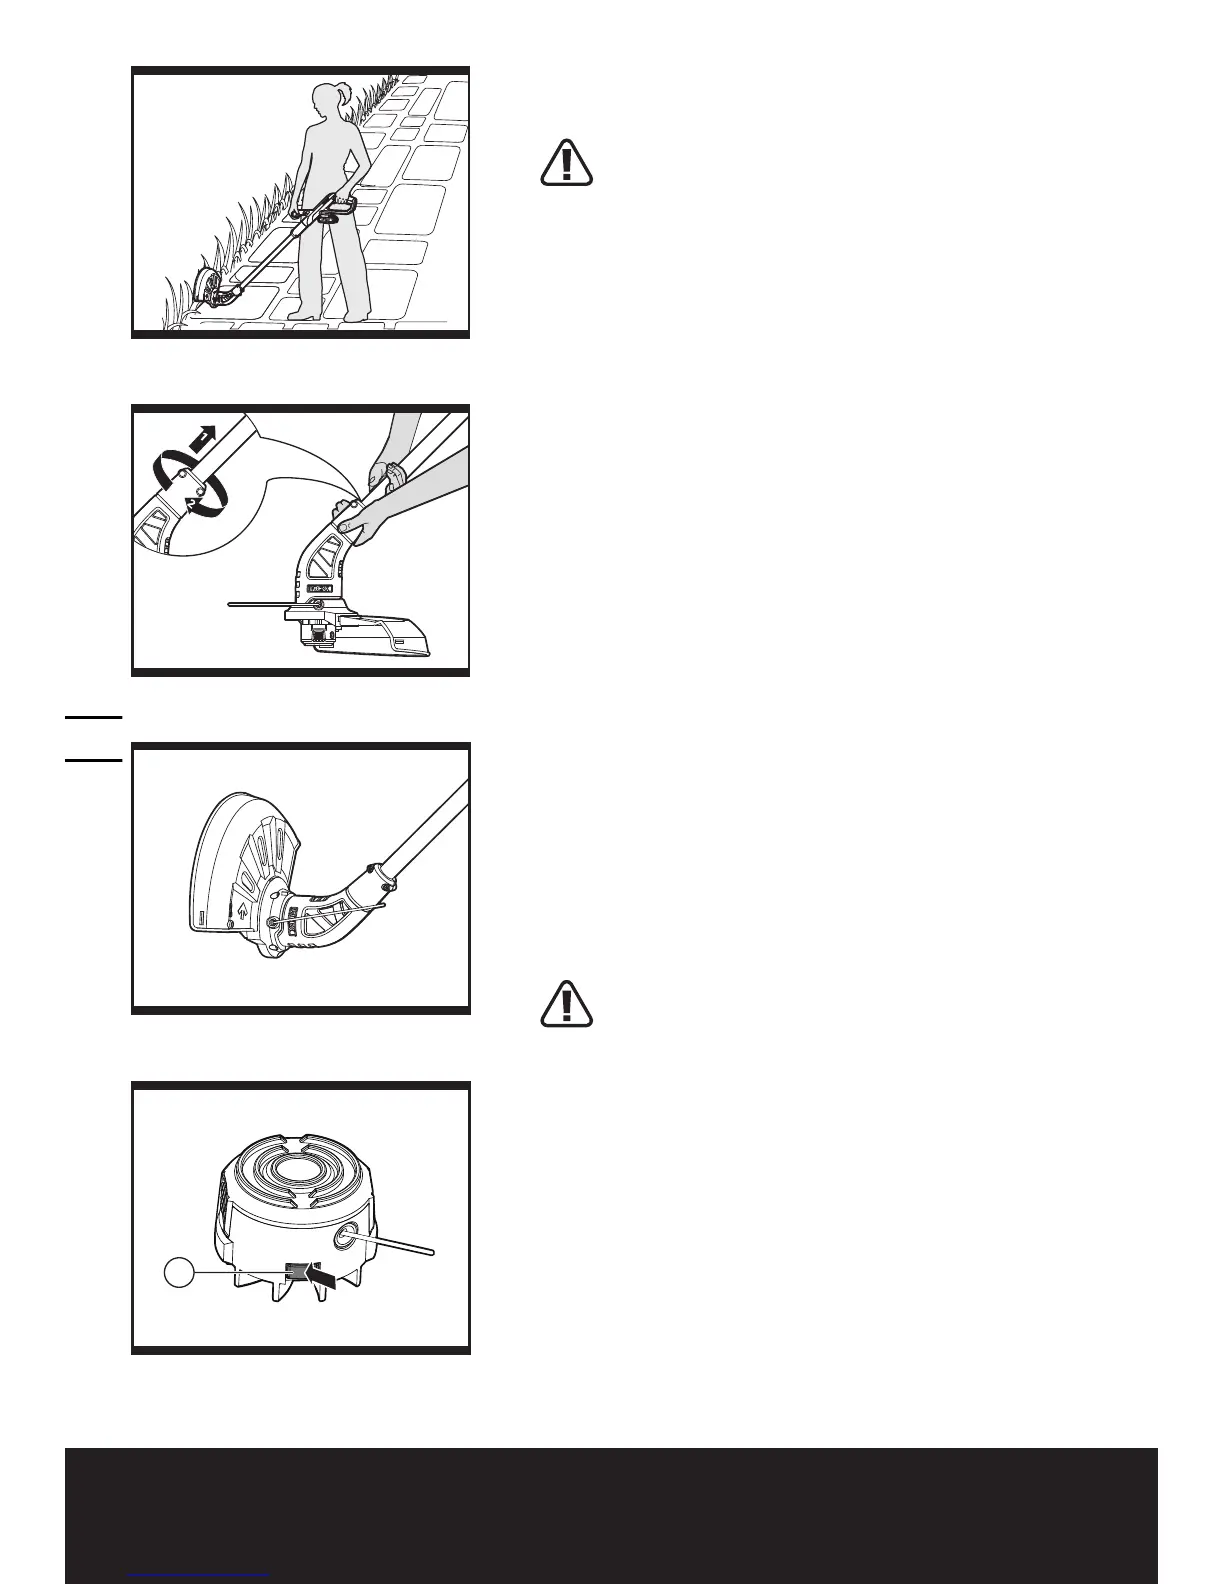
ALWAYS REMOVE THE BATTERY PACK
BEFORE ADJUSTING THE TRIMMER HEAD
POSITION
For edging, position the trimmer head as Fig. E2.
To rotate the trimmer head to edging—first hold the
trimmer shaft as shown in Fig. E3---then with your
other hand hold the trimmer head - Push down and
rotate 180 degrees and then release- the trimmer will
then lock into the edging position automatically—Fig.
E4
NOTE: The trimmer head will only rotate in one
direction.
Take extra caution while edging as objects can be
thrown from the trimmer line.
AUTOMATIC LINE FEED SYSTEM
When initially switching ON the trimmer, a small length
of line is fed out.
A ‘clattering’ noise will be heard when the lines hit the
line cutter. DO NOT BE ALARMED, this is normal.
After a few seconds the line will be cut to the correct
length and the noise will reduce as the motor receives
full speed.
If the noise of the line being cut can’t be heard, more
line will need to be fed out.
To feed more line, it is first necessary to allow the
trimmer to stop completely, then restart, allowing the
motor to reach full speed.
Repeat above until you hear the lines hitting against the
line cutter.
TO MANUALLY FEED THE LINE
(See Fig. F1)
ALWAYS REMOVE THE BATTERY PACK
BEFORE ADJUSTING THE TRIMMER HEAD
POSITION
If required, line can be feed out manually.
To operate, press and release manual line feed button
(13), while gently pulling out the line until it is long
enough to reach the line cutter.
If the line extends past the line cutter, too much line has
been fed out.
If too much line is fed out, remove the spool cap and
turn spool counter-clockwise until the line is at the
desired length.
 Loading...