10
Cordless Lawn Trimmer
Lawn Edge Trimmer
WG168E
ASSEMbLY
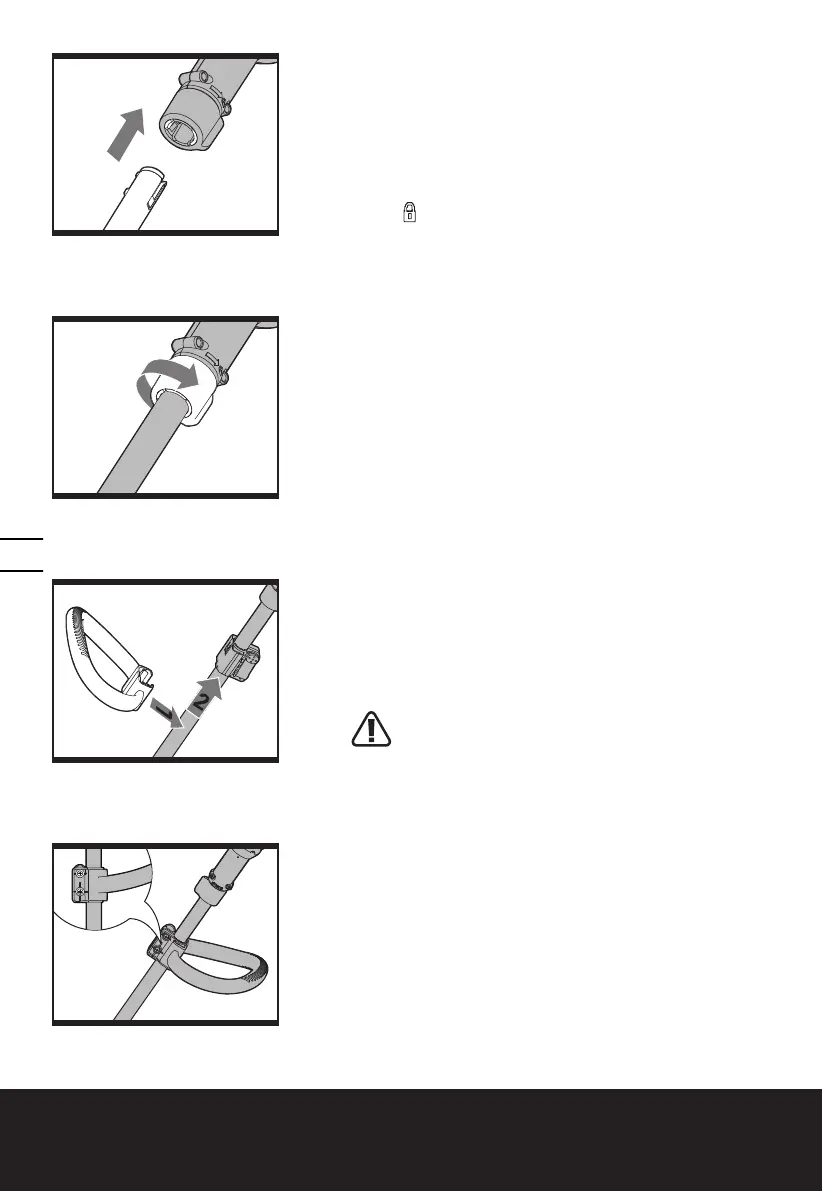
1. ASSEMBLY OF THE MAIN HANDLE (See Fig.
A1, A2)
Align and insert the shaft into the upper housing until a
click can be heard. Make sure the grooves are correctly
matched. (See Fig. A1).
Tighten the shaft locking knob in the direction indicated
to lock (See Fig. A2).
NOTE: Make sure that the handle is firmly locked
in place
2.ASSEMBLY OF THE AUXILIARY HANDLE (See
Fig. B1, B2)
Slide the auxiliary handle onto the grooves of auxiliary
handle support until a click can be heard. And make sure
the auxiliary handle locking clamp is closed. (See Fig.
B1)
NOTE: Make sure the handle is firmly secured in
place.
If the handle is loose, then tighten the 2 side screws.
(See Fig. B1)
3. ASSEMBLY OF THE SAFETY GUARD (See Fig.
C1, C2, C3)
Remove the screw from the bottom of the trimmer head-
--then attach the safety guard to the housing.
Secure the guard in place by the refitting of the screw
(a).
Remove the line cutter protection tape. (See Fig. C3)
OPERATION INSTRUCTIONS
WARNING! The charger and battery pack are
specially designed to work together so do not
attempt to use any other devices. Never insert or allow
metallic objects into your charger or battery pack
connections because of an electrical failure and hazard
will occur.
1. BEFORE USING YOUR CORDLESS GRASS
TRIMMER
The battery pack included is shipped UNCHARGED. You
must charge before first use.
The battery charger supplied was designed to only
charge the Li-Ion battery also supplied. Do not use
another battery charger.
2. CHARGING YOUR BATTERY PACK
The Li-Ion battery is protected against deep discharging.
A1
A2
B1
B2
C1
C2
C3
D1
D2
E
F
G
H1
H2
H3
H4
I1
I2
J
K1
K2
K3
K4

 Loading...