-
5
-
Tyre changer operation is consisted of three parts:
1)Demounting the tyre bead
2)Demounting the tyre
3)Mounting the tyre
Caution: Before any operations, don’t wear loose clothing and wear protective hat, gloves, and skid-proof shoes. Ensure to
exhaust the air in the tyre completely, and remove all the wheel weights from the rim.
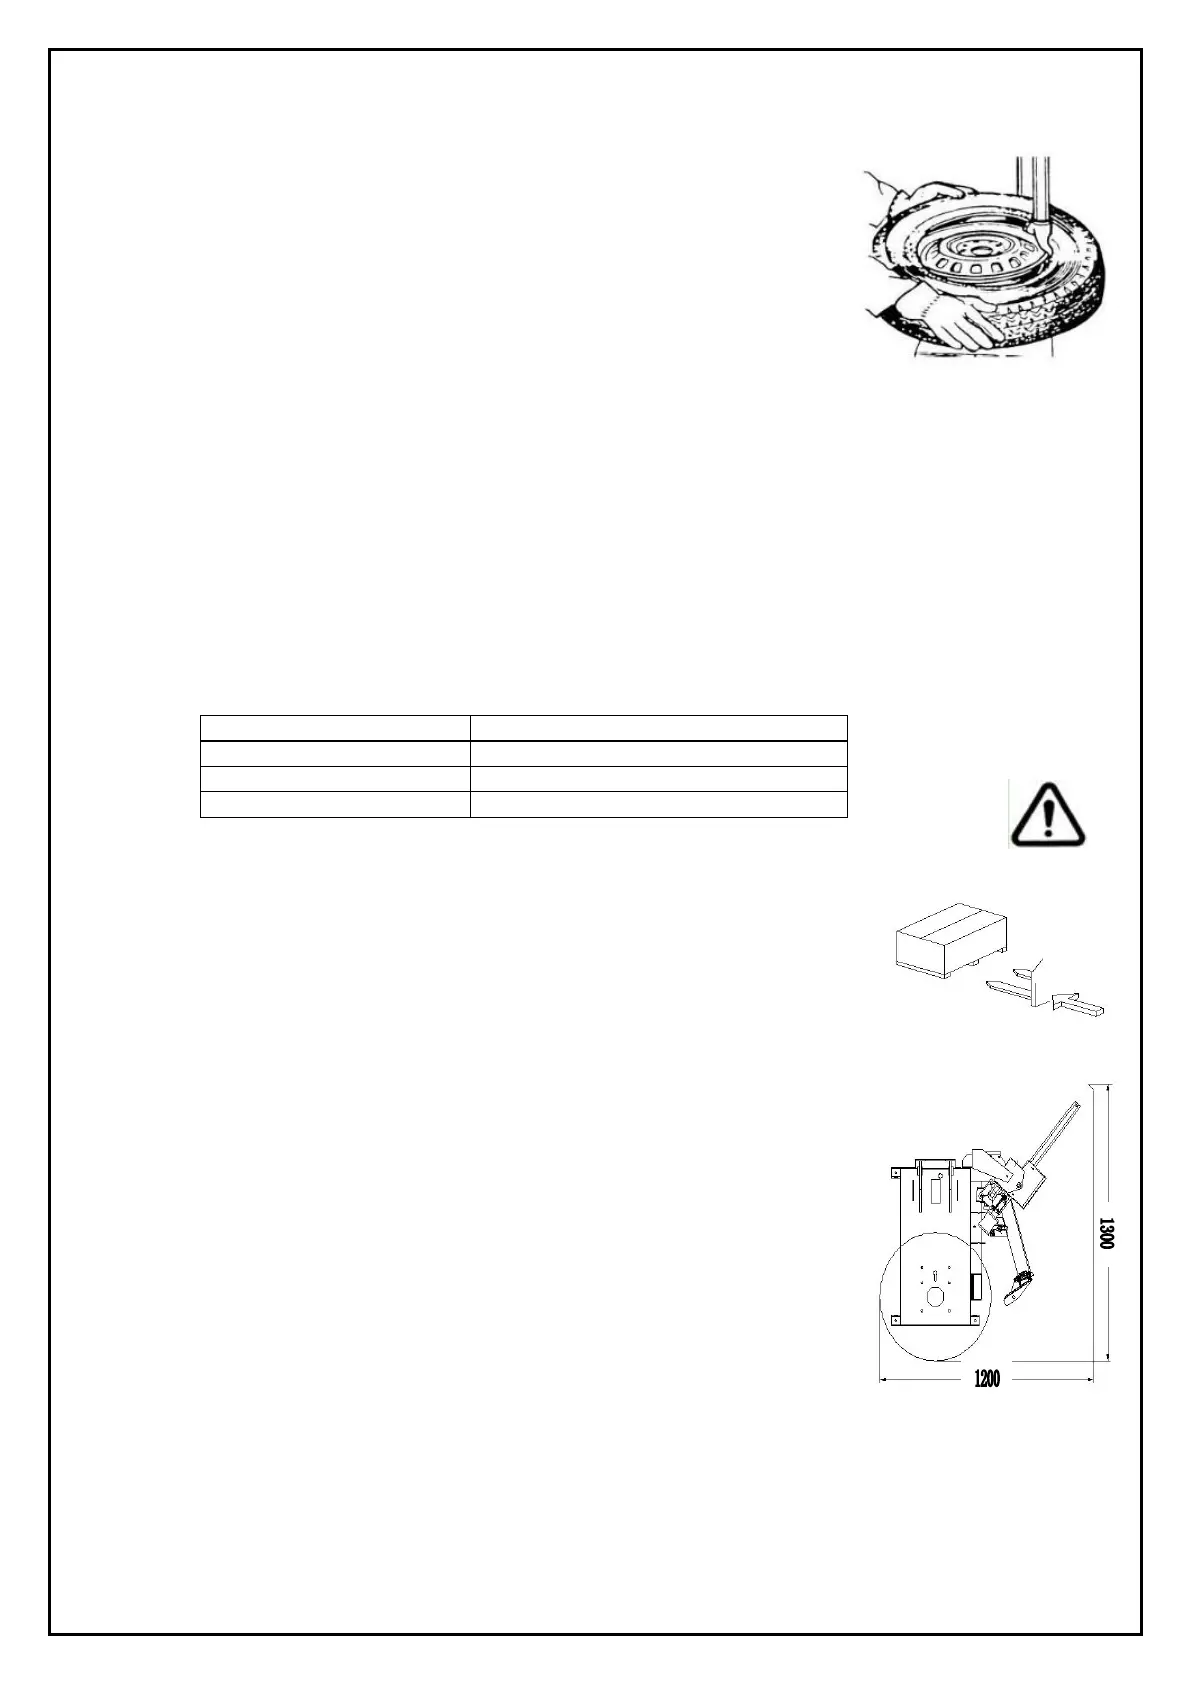
9.1. Breaking the tyre bead:
Ensure to exhaust the air in the tyre completely, place the tyre against the rubber buffer
(S). Bring the shovel (F) against the bead about 10mm from the edge of the rim shown
as Fig 5. Depress Bead breaker Pedal (U) to push paddle into tyre. Repeat the above
operations on different positions around the tyre and both sides of tyre until tyre bead is
released completely
.
9.2. Demounting the tyre :
Ensure to remove all the weights on the wheel rim and to exhaust the air in the tyre completely before this operation. Apply
lubricating grease
(or similar lubricant) around the tyre bead. Without the lubricant may lead to badly wear and tear on tyre.
Clamp the wheel methods shown as below regarded to the ruled dimension:
a- to clamp the wheel from outside:
Depress the
Jaws open and close Pedal (V) halfway down to middle, positioning for the four clamps (G) by reference scale on
the Turntable (Y); put the tyre on turntable, hold the rim, and depress the
Jaws open and close Pedal (V) until the wheel is
secured by the jaws.
b- to clamp the wheel from inside:
Positioning for the four clamps (G) and let them all closed. Put the tyre on the turntable and depress the
Jaws open and close
Pedal (V) to open the clamps thereby lock the wheel in place.
Caution: Check to make sure the wheel firmly secured by the four clamps
before next step.
Lower the Vertical Arm (M) until the Mounting head/demounting head (I) rests
next to the
edge of the rim,
flip pneumatic locking button (K) to lock the
Vertical Arm (M) and Horizontal arm
in position, and control the distance from
Mounting head/demounting head to the edge of wheel rim about 2-3 mm.
Insert the
Lifting Lever (T) between the tyre bead and the front section of the mounting
head/
demounting head (I), and move the tyre above the mounting
head/demounting head as shown as Fig 6.
Caution: Chains, bracelets, loose clothes and anything else close to the rotating parts will bring danger to the operator.
With the Lifting Lever held in position, depress the Turntable Rotation Pedal (Z), rotate the Turntable (Y) in a clockwise
direction until the tyre is completely separated from the wheel rim.
For the other side tyre demounting, keep using the lifting lever to lift the tyre, make the other side tyre separated from t
he
wheel rim. Depress the Titling pedal (H), the column backward down, take out the tyre.
9.3. Mounting the tyre :
Caution: Check to make sure that the tyre and the wheel rim are of same size before mounting the tyre.
To avoid any damage on type, lubricate the tyre bead and the wheel rim with the lubrication recommended by manufacturer.
-
6
-
Put on the tyre and check the situation.
Caution: When clamp the wheel rim, don't put your hands on the wheel rim to avoid injury during this operation.
Lock the Hexagonal Vertical Mounting Arm, put the tyre on the rim, let the Rocker Arm
back to place as demounting the tyre.
And let one side of tyre down bead above the rear section of the Mounting
head/demounting head, the other side under the front section of the Mounting
head/demounting head. Suppress the trye with hands or h
elp arm, and then spin the
turntable for mounting the tyre down bead.
Repeat the above operation for mounting the tyre up bead. (Fig 7)
F
Fig 7
10. Help Arm S002
The help arm S002 is an auxiliary device for tire changer, it is used to help to demount and mount tires.
Before any operation of this machine, the operator is requested to read the manual carefully. Do not attempt any
operations that are not stated in it. Manufacturer will not be responsible for any injury or damage caused by
improper
operation. Please keep the manual handy for consulting.
10.1 Technical Data
10.2. Safety Regulations
This device is especially reserved to trained professional personnel or somebody
who has experiences on mechanical operation and read this manual carefully. This
device must be used together with our tire changers, we are not sure it can work with
others. Manufacturer won’t be responsible for any unauthorized modification
10.3. Installation
Notice!
The installation of this auxiliary device should be done by professional personnel.
Before assembly, disconnect the device from power supply and air source.
10.3.1. Transport
Move the device with a forklift truck as illustrated in Fig 8.
10.3.2. Unpacking
When unpacking, check and make sure all parts shown on the packing list are
included. If any parts are missing or broken, please call the manufacturer or the dealer asap. Please keep the
package out of children’s reach.
 Loading...