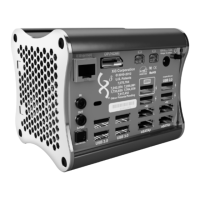
Chapter 3 InternalComponents 8
The Dangers of Static Electricity
Likeallcomputers,X7AModularComputersarepoweredbyelectricity.Asaresult,arandomstaticelectricitychargecan
causeseriousdamagetoyourX7AModularComputer(justasitcantoanyelectricaldevice).
IfyouchoosetoopenyourX7AModularComputerforanyreason,youmustdoeverythingpossibletopreventanaccidental
staticelectricaldischarge.Specifically,
•DOgroundyourself,whileseated,beforetouchingorhandlingyourX7AModularComputerbytouchinganygrounded
metallicobjectNOTconnectedtoortouchingtheX7AModularComputer.
• DONOTopenorworkonyourX7AModularComputerinacarpetedroomoraroomwithalinoleumfloor.
• DONOTworkonoropenyourX7AModularComputerduringorpriortoanelectricalstorm.
Removing & Replacing Boards
Upgrading,updatingand/orreplacingaPIOorSIOBoardwithinanX7AModularComputerisassimpleasfollowingthe12-
stepprocessbelow:
1. TurnoffyourX7AModularComputer(asnotedabove).
2. DisconnectthePowerCord/PowerAdaptorandallothercordsfromyourX7AModularComputer.
3. Unscrewthe4screwsononehoneycombedendcapoftheX7AModularComputerchassis.{NOTE: This requires a
Torx T-10 wrench or bit.}
4. Removethehoneycombedendcap.
5. Slideoutthe3boardsandI/OPlatefrominsidetheX7AModularComputerchassis.
6. RemovetheI/OPlatefromthe3boards.
7. DetachthePIOBoardorSIOBoard(asneeded)bypullingitupwardandawayfromtheXi3ProcessorBoard.
8. AttachthereplacementPIOorSIOBoardbyclickingitintoplaceinthecorrespondingslotsontheXi3ProcessorBoard.
9. ReattachtheI/OPlateontothe3boards.
10. Slidethe3boardsandtheI/OPlatebackintotheX7AModularComputerchassis.{NOTE: If your new PIO or SIO Board
is not identical to the one being replaced, you will need to use a new I/O Plate. You should have received this new I/O
Plate with your new PIO or SIO Board.}
11. Reattachthehoneycombedendcapbyscrewingthe4screwsbackintoplace.
12. ReconnectthePowerCord/PowerAdaptorandallothercordstoyourX7AModularComputer.
Turn Off Your X7A Modular Computer
HerearethesimplestepstoturnofforshutdownyourX7AModularComputer.
1.CloseanyopenfilesonyourX7AModularComputer.
2.CloseanyapplicationsinuseonyourX7AModularComputer.
3.Closeanyopenwebbrowsers.
4.ForopenSUSELinuxusers:
a. FindandclickontheopenSUSEiconfoundinthebottomleft-handcornerofyourdisplayscreen.
b. Nextclickonceonthe“KickoffApplicationLauncher”icon.Thenuseyourcursortomouseoverthe“Leave”icon.
Nextclickonceonthe“Shutdown”icon.
c. TheopenSUSELinuxOperatingSystemwillnowautomaticallyshutdownin30seconds.Oryoucanexpeditethe
shutdownbyclickingyourcursoronceonthe“Turnoffcomputer”button.
5.ForWindowsusers:
a.ClickontheStarticoninthebottomleft-handportionofyourmonitor.
b.ClickontheShutDownicon.
Restarting Your X7A Modular Computer
YoucanrestartyourX7AModularComputerbybrieflydepressingthePowerButtononthebackofthecomputer.
 Loading...