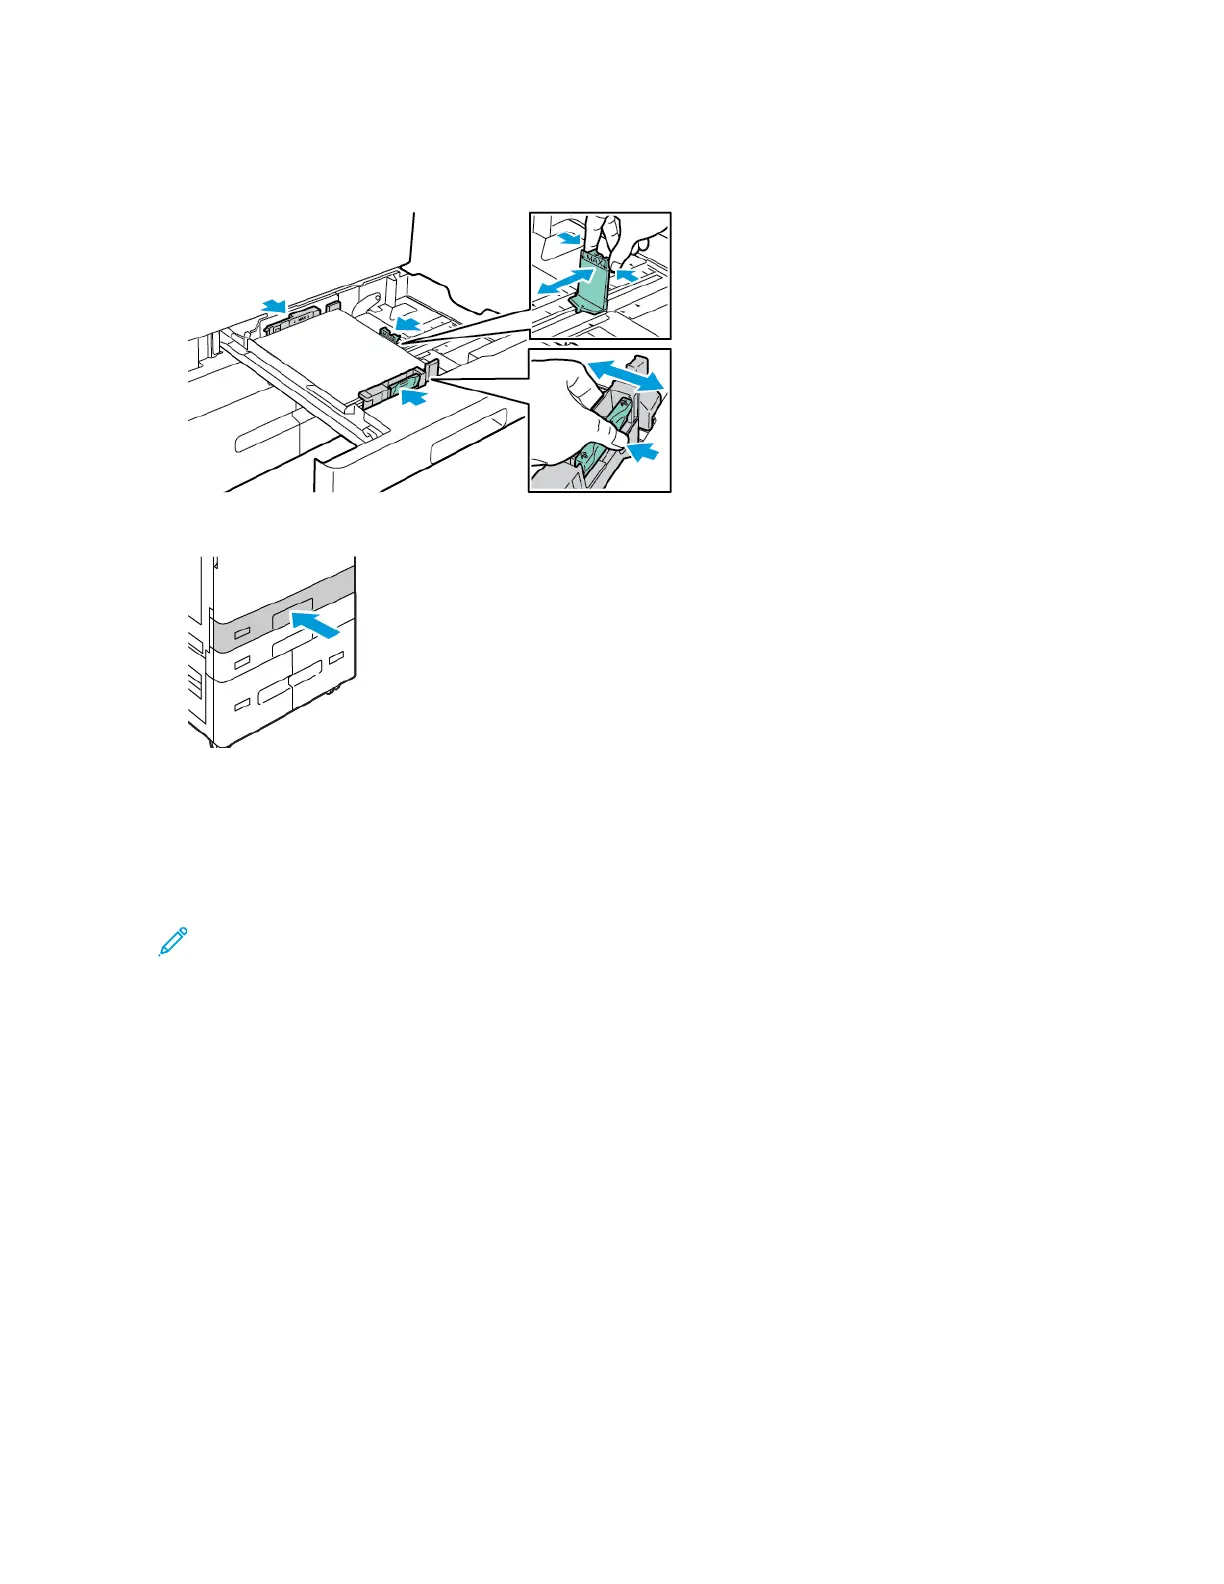
6. To adjust the length and width guides to fit the paper, pinch the guide locks, then slide the paper
guides in until they touch the paper.
7. Slide the tray back into the printer.
8. At the control panel, select the correct paper size, type, and color.
• If letterhead paper is loaded in the printer, for type, select Letterhead.
• If pre-printed paper is loaded in the printer, for type, select Pre-printed.
9. To confirm the settings, touch Confirm.
Note: To change the paper settings when the tray is set to Dedicated mode, refer to
Configuring Dedicated Paper Trays.
AAddjjuussttiinngg tthhee PPaappeerr GGuuiiddeess iinn tthhee 552200--SShheeeett
AAddjjuussttaabbllee TTrraayyss
You can adjust the paper guides in Trays 1–4 to accommodate standard or custom paper sizes. In the
standard position, the guides move into the supported standard paper settings. In the custom
position, the guides move in 1-mm (0.04 in.) increments.
To move the paper guides from the standard to the custom paper-size position:
218
Xerox
®
AltaLink
®
C81XX Series Color Multifunction Printer
User Guide
Paper and Media

 Loading...


