214 A Appendix
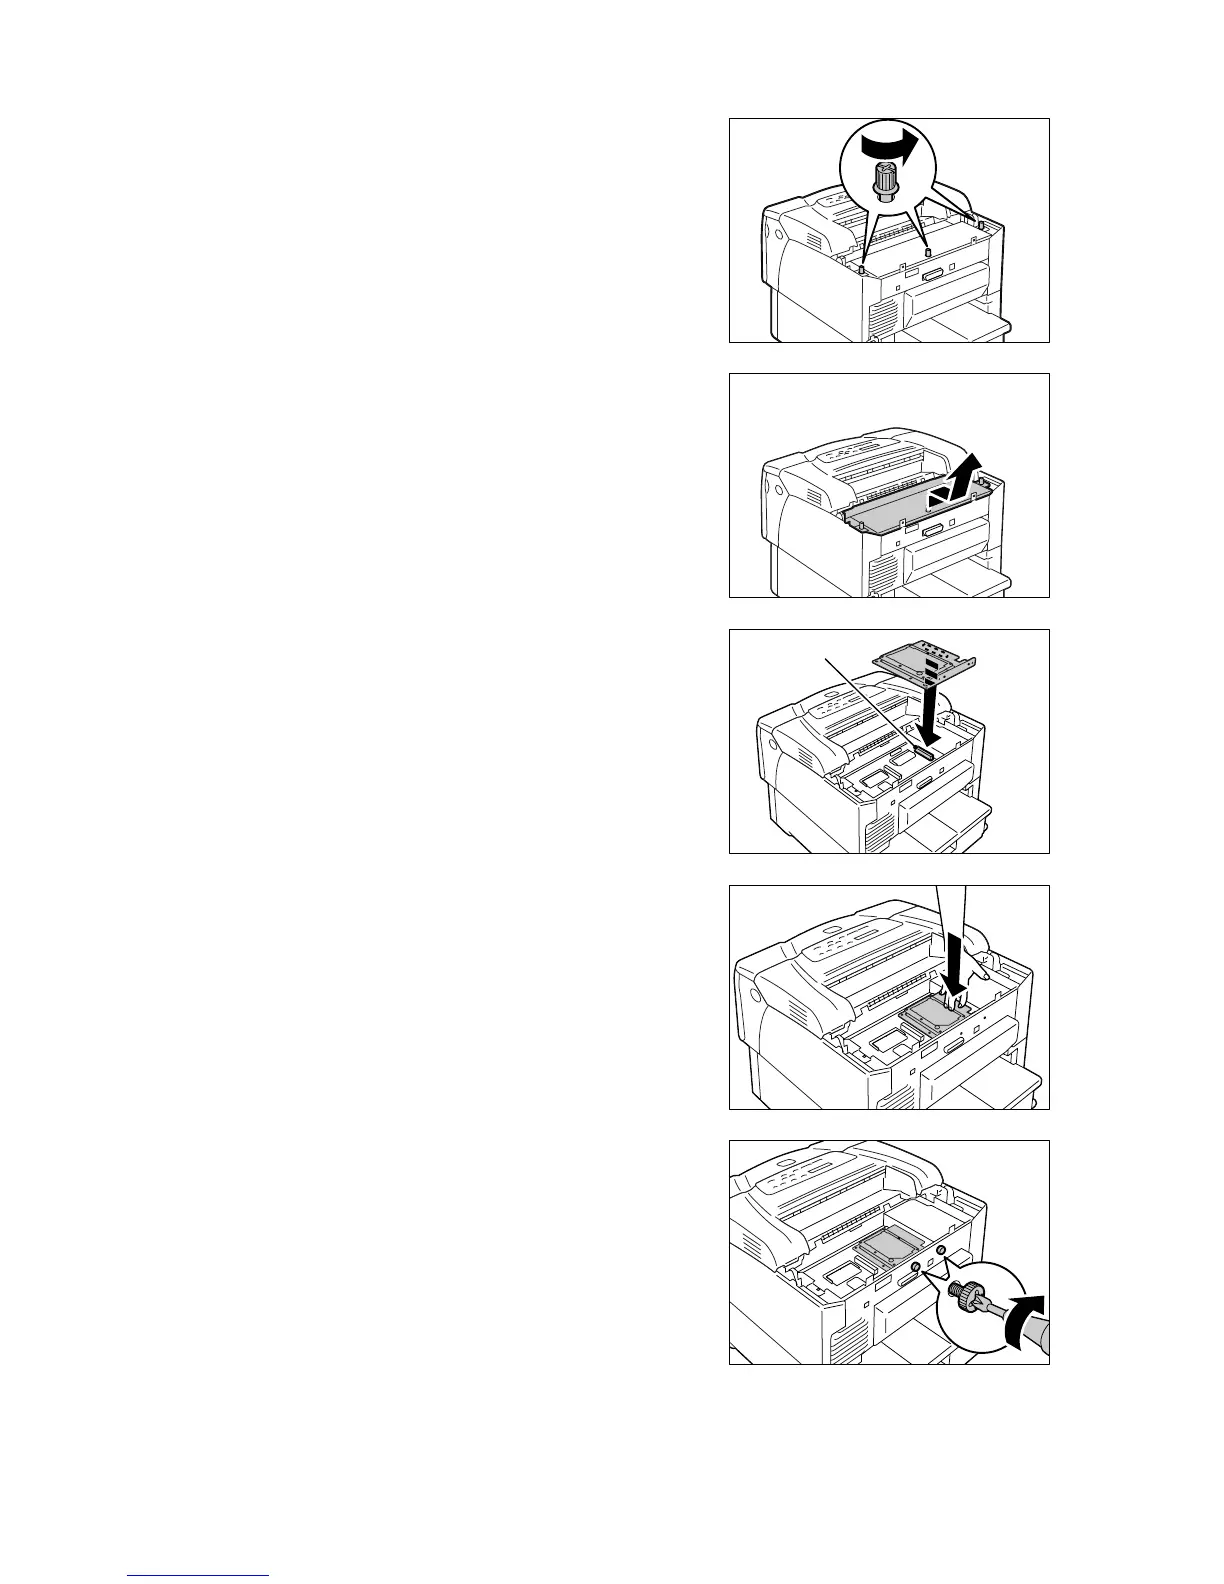
4. Loosen the three screws that secure the
metal plate cover inside the printer.
5. Pull the metal plate cover forward and
remove it from the printer.
6. Insert the connector on the hard disk into
the connector on the printer (located at the
right of the controller board).
Important
• The connector at the left of the controller board is for a
network expansion card (optional). Do not insert the
hard disk into this connector.
7. Push the hard disk by the part shown in the
figure and firmly insert it into the connector.
8. Use a screwdriver to tighten the two screws
(supplied) from the outside of the printer
and secure the hard disk onto the controller
board.
Hard disk connector
 Loading...


