UNINET IMAGING INC. • XEROX
®
PHASER 6250 CARTRIDGE REMANUFACTURING INSTRUCTIONS
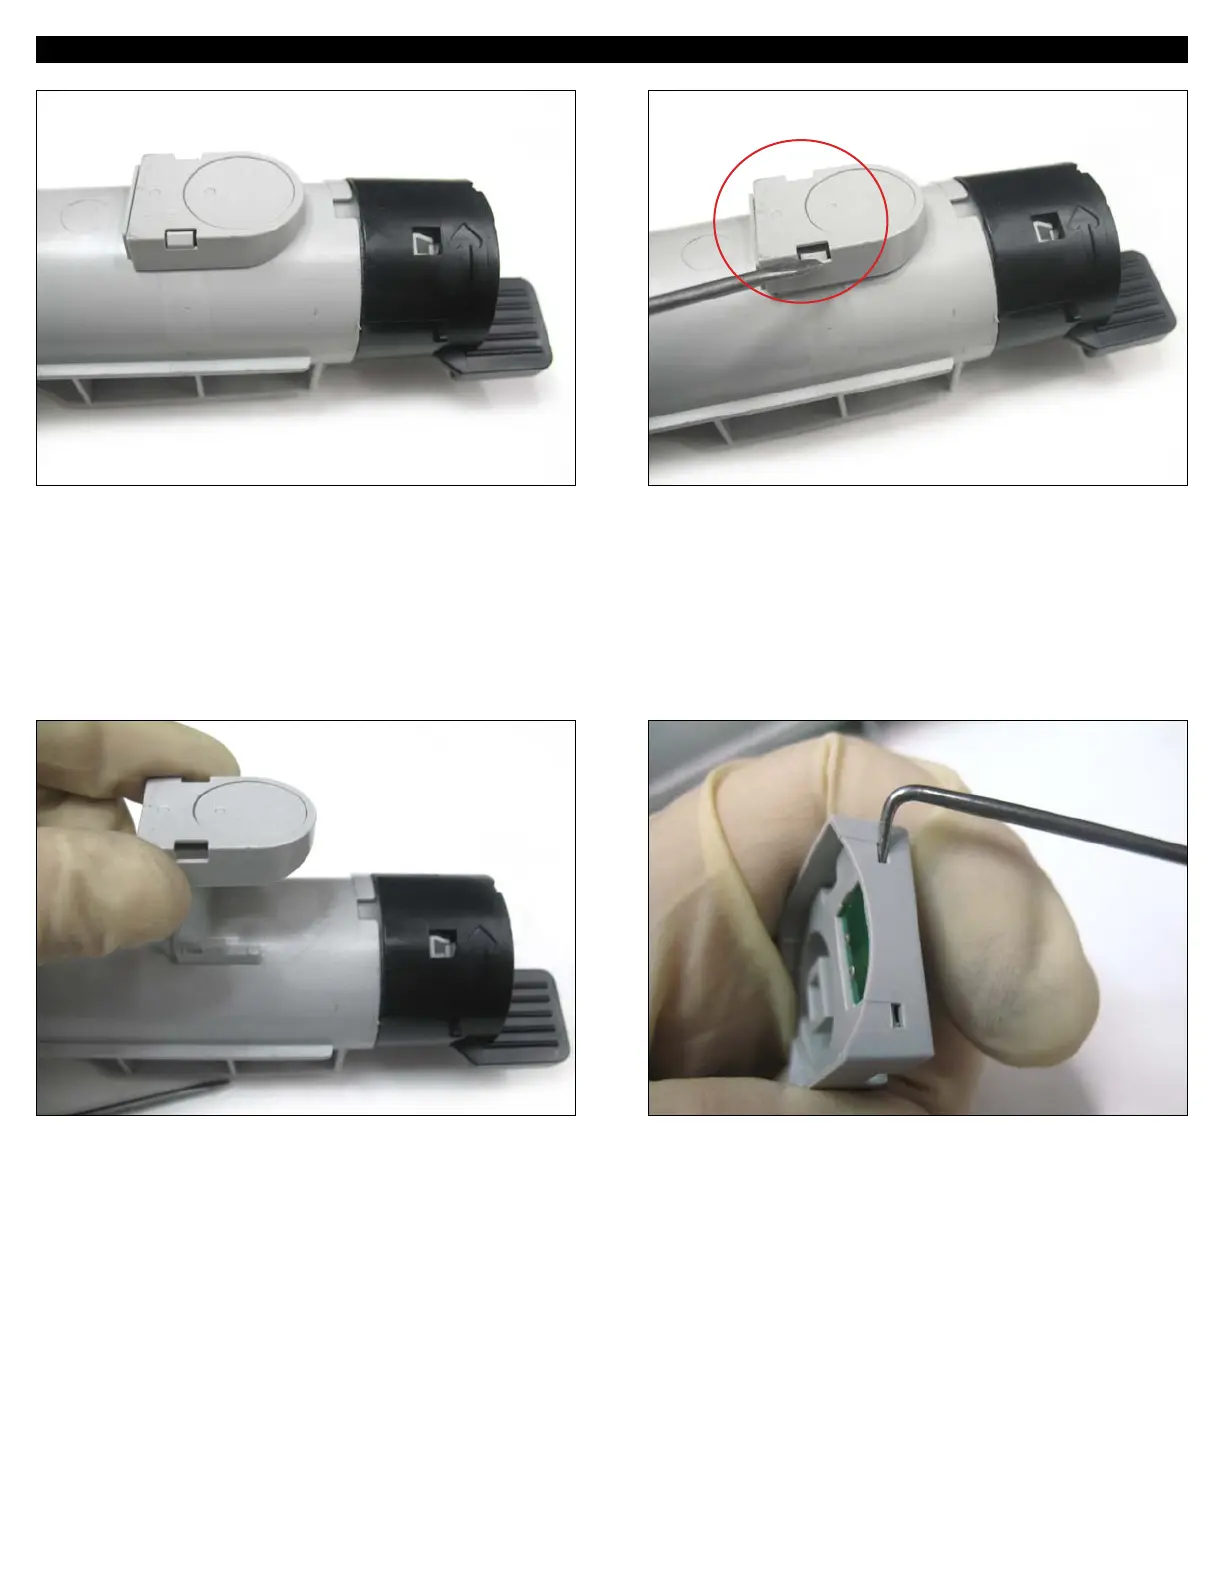
23. Using a small flathead screwdriver, press down on the tabs
(shown on either side) to release the chip housing.
24. Always wear latex gloves when handing chips. 25. Unlock the actual chip from its housing by pressing the tabs
(shown) using an angled hook tool.
REPLACING THE OEM CHIP
22. Locate the OEM chip housing near the gearless side of the
cartridge.
© 2007 UniNet Imaging Inc. All Trademark names are property of their respective owners. Product brand names mentioned are intended to show compatibility only. UniNet Imaging does not guarantee or warrant downloaded information.
www.uninetimaging.com/technical.asp
11124 Washington Blvd., Culver City, California USA 90232 • Ph +1 310 280 9620 • Fx +1 310 280 0533 • techsupport2@uninetimaging.com

 Loading...


