5. Type the recipient name and fax number, add other information as needed, then click OK.
6. To add more recipients, repeat this procedure.
7. To include a cover sheet, click the Cover Sheet tab.
8. From the Cover Sheet list, select Print a Cover Sheet, then enter the details as needed.
9. On the Options tab, select the required options. To save your settings and return to the main print
dialog window, click OK.
10. To send the fax, click Print.
PPrreevviieewwiinngg aanndd BBuuiillddiinngg JJoobbss
Use the Preview option to view and check scanned images, or to build jobs that contain more than 50
original documents.
If you are using Preview to build a job, divide your job into segments of 50 or fewer pages. After all
the segments are scanned and previewed, the job is processed and sent as a single job.
Note: If the Preview option is hidden from view, refer to Customize and Personalize.
1. At the printer control panel, press the Home button.
2. To clear previous app settings, touch Reset.
3. Load your original documents.
• Use the document glass for single pages or for paper that cannot be fed using the duplex
automatic document feeder. Lift the automatic document feeder, then place the original
document face down in the upper-left corner of the document glass.
• For single, multiple, or 2-sided pages, use the duplex automatic document feeder. Remove any
staples and paper clips from the pages. Insert the original documents face up in the
automatic document feeder, with the top of the page entering the feeder first. Adjust the
paper guides so that they fit against the documents.
• For jobs containing more than 50 original documents, divide the documents into segments of
50 or fewer pages. Load segment one into the duplex automatic document feeder.
Note: If you are scanning multiple segments, use the same input area for each segment.
Scan all segments using the document glass, or scan all segments using the automatic
document feeder.
4. Touch the app required.
5. Select the job settings.
6. Touch Preview.
7. If you are scanning from 2-sided original documents, touch 2-Sided Scanning, then select an
option.
8. To start scanning, touch Preview.
The original documents are scanned and preview images appear on the screen.
Xerox
®
VersaLink
®
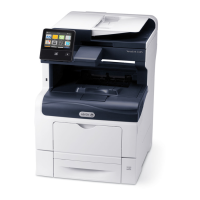
C405 Color Multifunction Printer
User Guide
119
Xerox
®
Apps
 Loading...


