EasyManua.ls Logo

Xilinx Zynq UltraScale+ ZCU104

Xilinx Zynq UltraScale+ ZCU104
4 pages
To Next Page IconTo Next Page
Loading...
Zynq UltraScale+ MPSoC
ZCU104 Evaluation Kit
Quick Start Guide
This ZCU104 Evaluation Kit contains all the hardware, tools, and IP required to evaluate and develop your Zynq®
UltraScale+™ MPSoC design. The ZCU104 reVISION package provides out-of-box SDSoC™ development
environment software flow with OpenCV libraries, machine learning framework, and live sensor support.
Use this quick start guide to set up and configure the board, run the built-in self-test (BIST), install the Xilinx tools,
and redeem the license voucher. The guide also provides a link to additional design resources including reference
designs, schematics and user guides.
ZCU104 Evaluation Kit
For more information, visit www.xilinx.com/zcu104.
X-Ref Target - Figure 1-1
Power Supply and
Power Cables
Ethernet
and USB
Cables
ZCU104
Evaluation
Board
04
4
04
on
d
USB
Camera
Send Feedback
Question and Answer IconNeed help?

Do you have a question about the Xilinx Zynq UltraScale+ ZCU104 and is the answer not in the manual?

Xilinx Zynq UltraScale+ ZCU104 Specifications

General IconGeneral
ManufacturerXilinx
ModelZCU104
FPGA FamilyZynq UltraScale+
Memory4GB DDR4
USBUSB 3.0, USB 2.0
DisplayPortYes
HDMIYes
PCIe Gen2Yes
SATAYes
SD CardYes
Power Supply12V DC
ProcessorQuad-core ARM Cortex-A53, Dual-core ARM Cortex-R5
FPGA Part NumberXCZU7EV-2FFVC1156
Ethernet1GbE
StorageeMMC, SD Card
Dimensions160mm x 110mm
FPGAXCZU7EV-2FFVC1156E

Summary

Zynq UltraScale+ MPSoC ZCU104 Evaluation Kit

Kit Overview

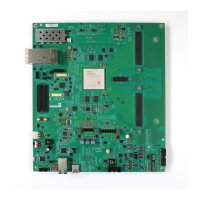
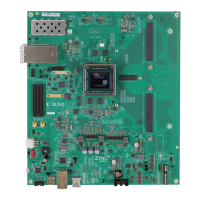
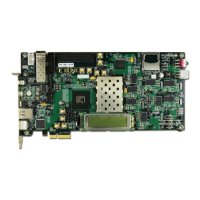
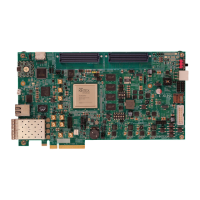
Describes the ZCU104 Evaluation Kit hardware, software, and IP for development and evaluation.

Built-In Self-Test (BIST) Instructions

Set Configuration Switches

Configure SW6 mode switch and DIP switches for BIST according to the specified settings.

Connect Power

Connect the 6-pin power supply plug to J52 and turn on the board using SW1.

Initiate Configuration

Start the built-in self-test after power-on; POR_B or SRST_B restarts the BIST.

Running the Built-In Self-Test

Execute Built-In Self-Test

Run sequential pass/fail tests; LEDs indicate status. Input is required for DIP and pushbutton tests.

PL LED Assignments

Details the mapping of PL GPIO LEDs to specific tests like Clocking, Memory, and Switches.

Installation and Next Steps

Install Xilinx Tools and Redeem License

Install Xilinx tools and redeem the SDSoC development environment voucher code.

Get Started Guide

Provides a link to the ZCU104 Getting Started GitHub site for further setup.

Additional Resources and Support

Links to learn more about vision systems, product support, and warranty information.

Related product manuals