19
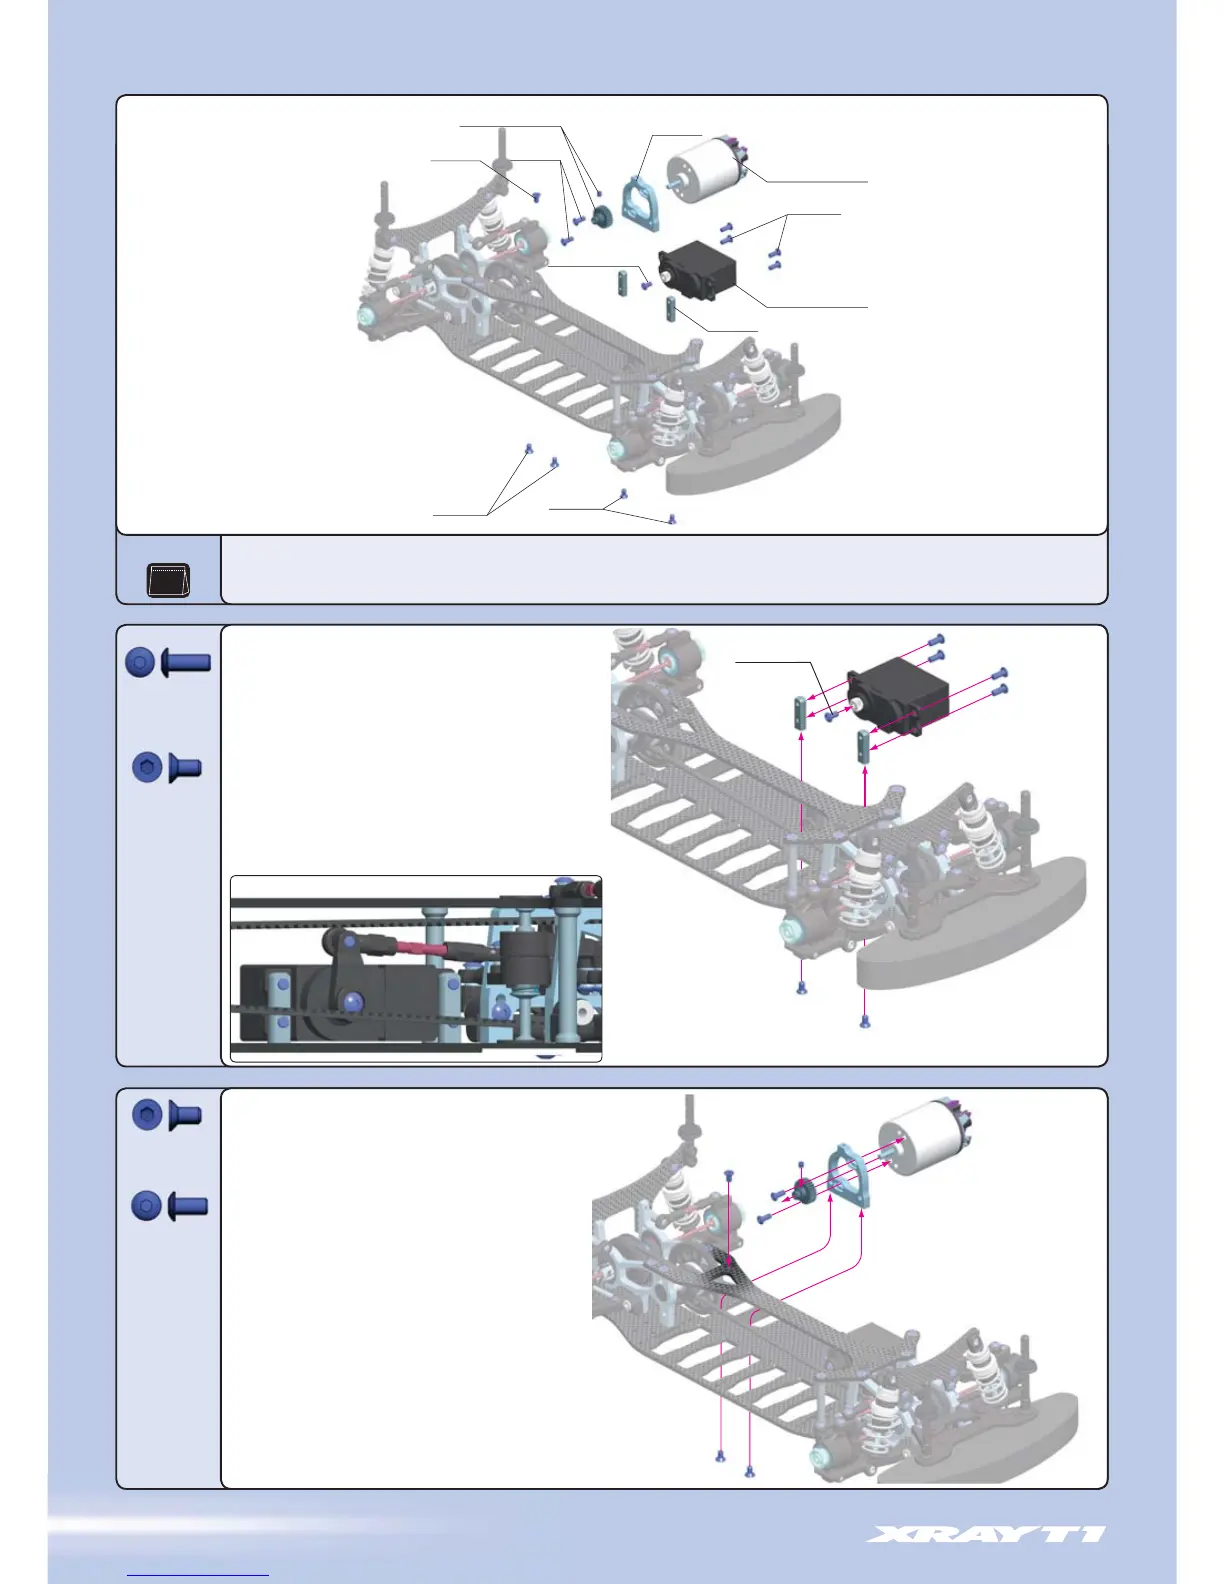
9. FINAL ASSEMBLY
30 3050 CENTRAL MOTOR MOUNT
30 5716~34 PINION GEAR ALU HARD COATED 48T (OPTION)
30 6200 ALU SERVO MOUNT (2)
90 2306 HEX SCREW SH M3x6 (10)
90 2308 HEX SCREW SH M3x8 (10)
90 4306 HEX SCREW SFH M3x6 - SILVER (10)
902308
SH M3x8
FROM SERVO
904306
SFH M3x6
1. Attach the central motor mount to the chassis using two
#904306 (SFH M3x6) screws, and to the top deck with one
#904306 (SFH M3x6) screw.
2. Mount a pinion gear to the motor shaft and secure with
setscrew.
Pinion gear is NOT included in the kit.
3. Mount the motor to the central motor mount using two
#902306 (SH M3x6) screws.
Adjust the motor so the pinion meshes with the spur
gear properly. Make sure the gear mesh is not too
tight.
There should be a small amount of play between the teeth of
the pinion gear and the spur gear.
1. Attach the servo to the #306200 servo mounts using four
#902308 (SH M3x8) screws.
The servo output shaft should go to the REAR.
2. Attach the servo mounts to the chassis using two #904306
(SFH M3x6) screws.
3. Attach the servo horn to the servo using the screw that
comes with the servo.
If the servo does not fit properly, you may have to
add shims between the servo tabs and the mounting
posts.
904306
SFH M3x6
902306
SH M3x6
DETAIL
09
BAG