5
1.
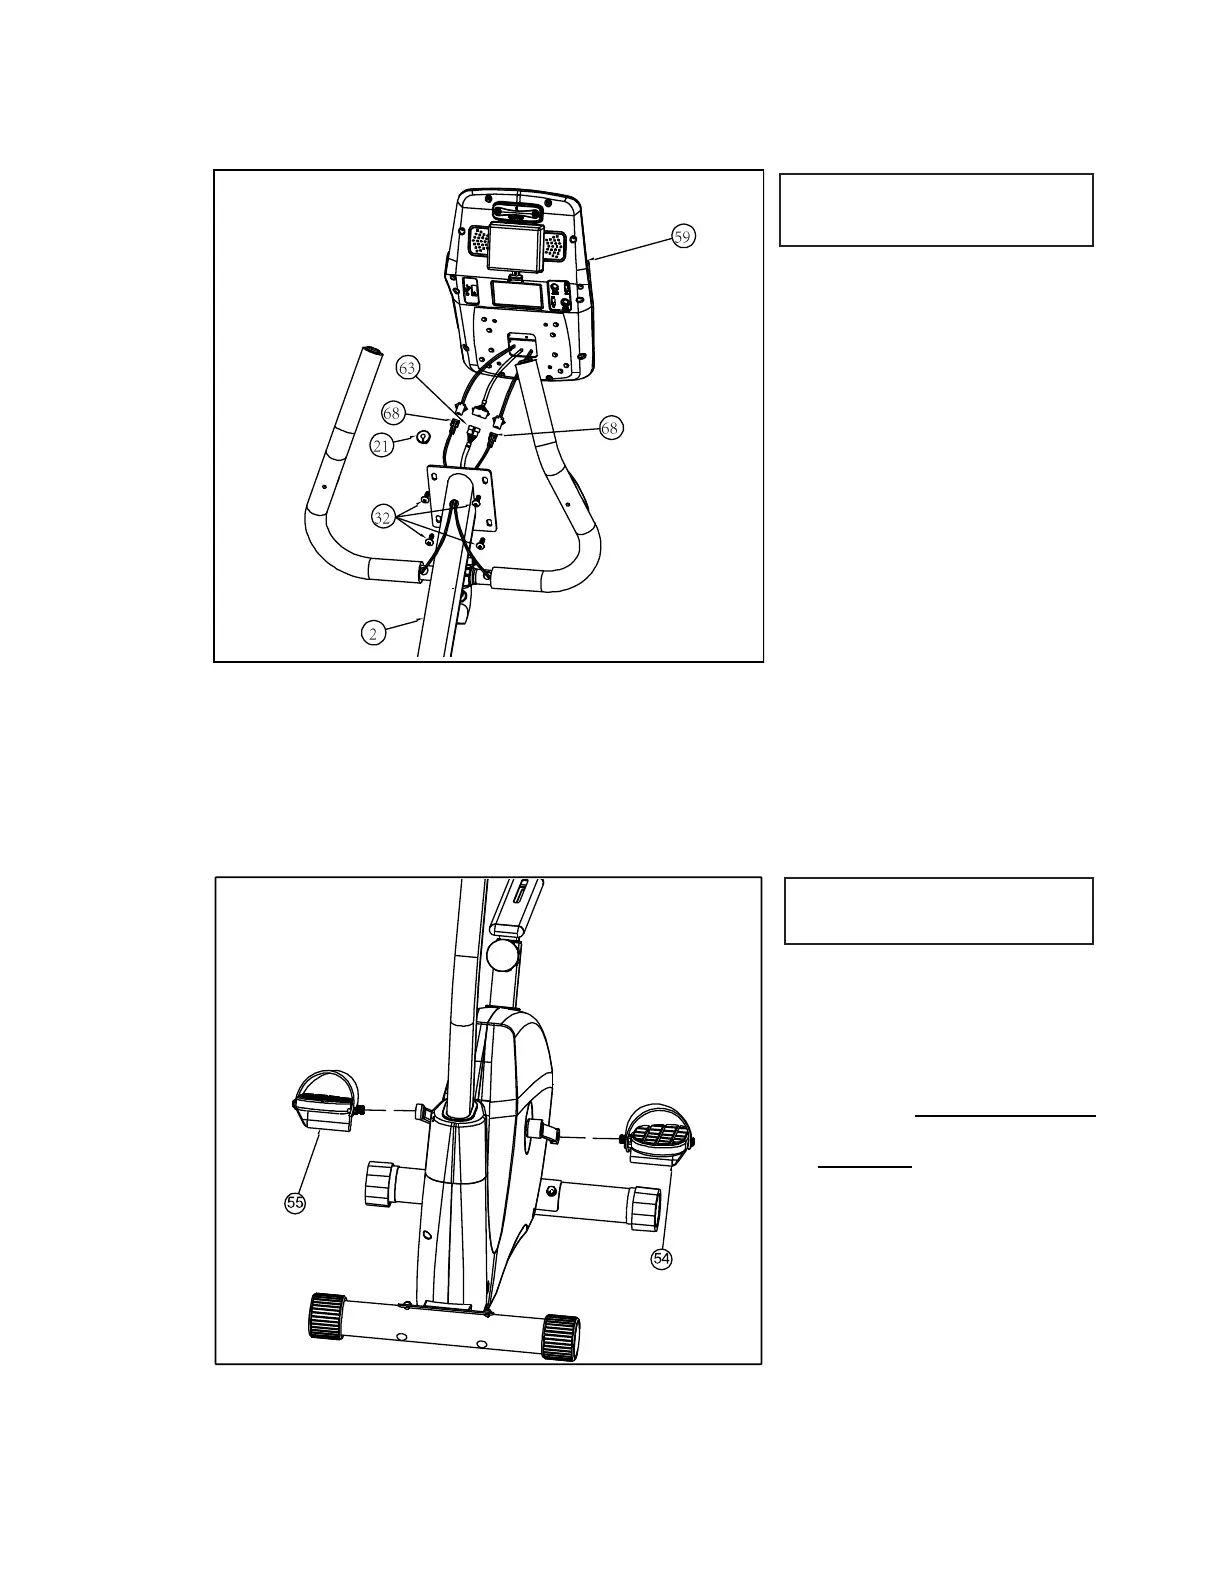
Pull the Handpulse wires
(No. 68) through the
Grommet (No. 21) and then
through the hole of the
Console mast (No. 2), finally
plug the Grommet (No. 21)
into the Console mast (No.
2)
2.
Connect the upper Computer
Cable (No. 63) with the
Handpulse wires (No. 68) to
the Console (No. 59) and
install console onto the Mast
(No. 2) with using 4 Philips
Head Screws (No. 32)
Note: Pay attention on avoiding scratching and pinching the cables.
6
1.
Secure the Pedal - L (No. 54)
and Pedal - R (No. 55) using
the Philips Head Screwdriver
& Wrench (No. 51). The Left
Pedal (No. 54) should be
tightened counter-clockwise
and the Right Pedal (No. 55)
clockwise.
 Loading...