VESDA by Xtralis VESDA Pipe Network Installation Guide
www.xtralis.com 27
5. Attach capillary tube or drop pipe to the reducing connector.
6. Run the capillary or the drop pipe into the cabinet.
7. Ensure that the capillary tube or drop pipe runs right to the top of the cabinet and is supported there by a
mounting clip or pipe clamp.
8. Unless specified otherwise, the sampling hole should be 25 mm to 50 mm (1 to 2 inches) below the top
of the cabinet.
9. Attach sampling point fitting to ensure the correct sampling hole size.
Note: Microbore installations only require steps 1 and 6 to 9.
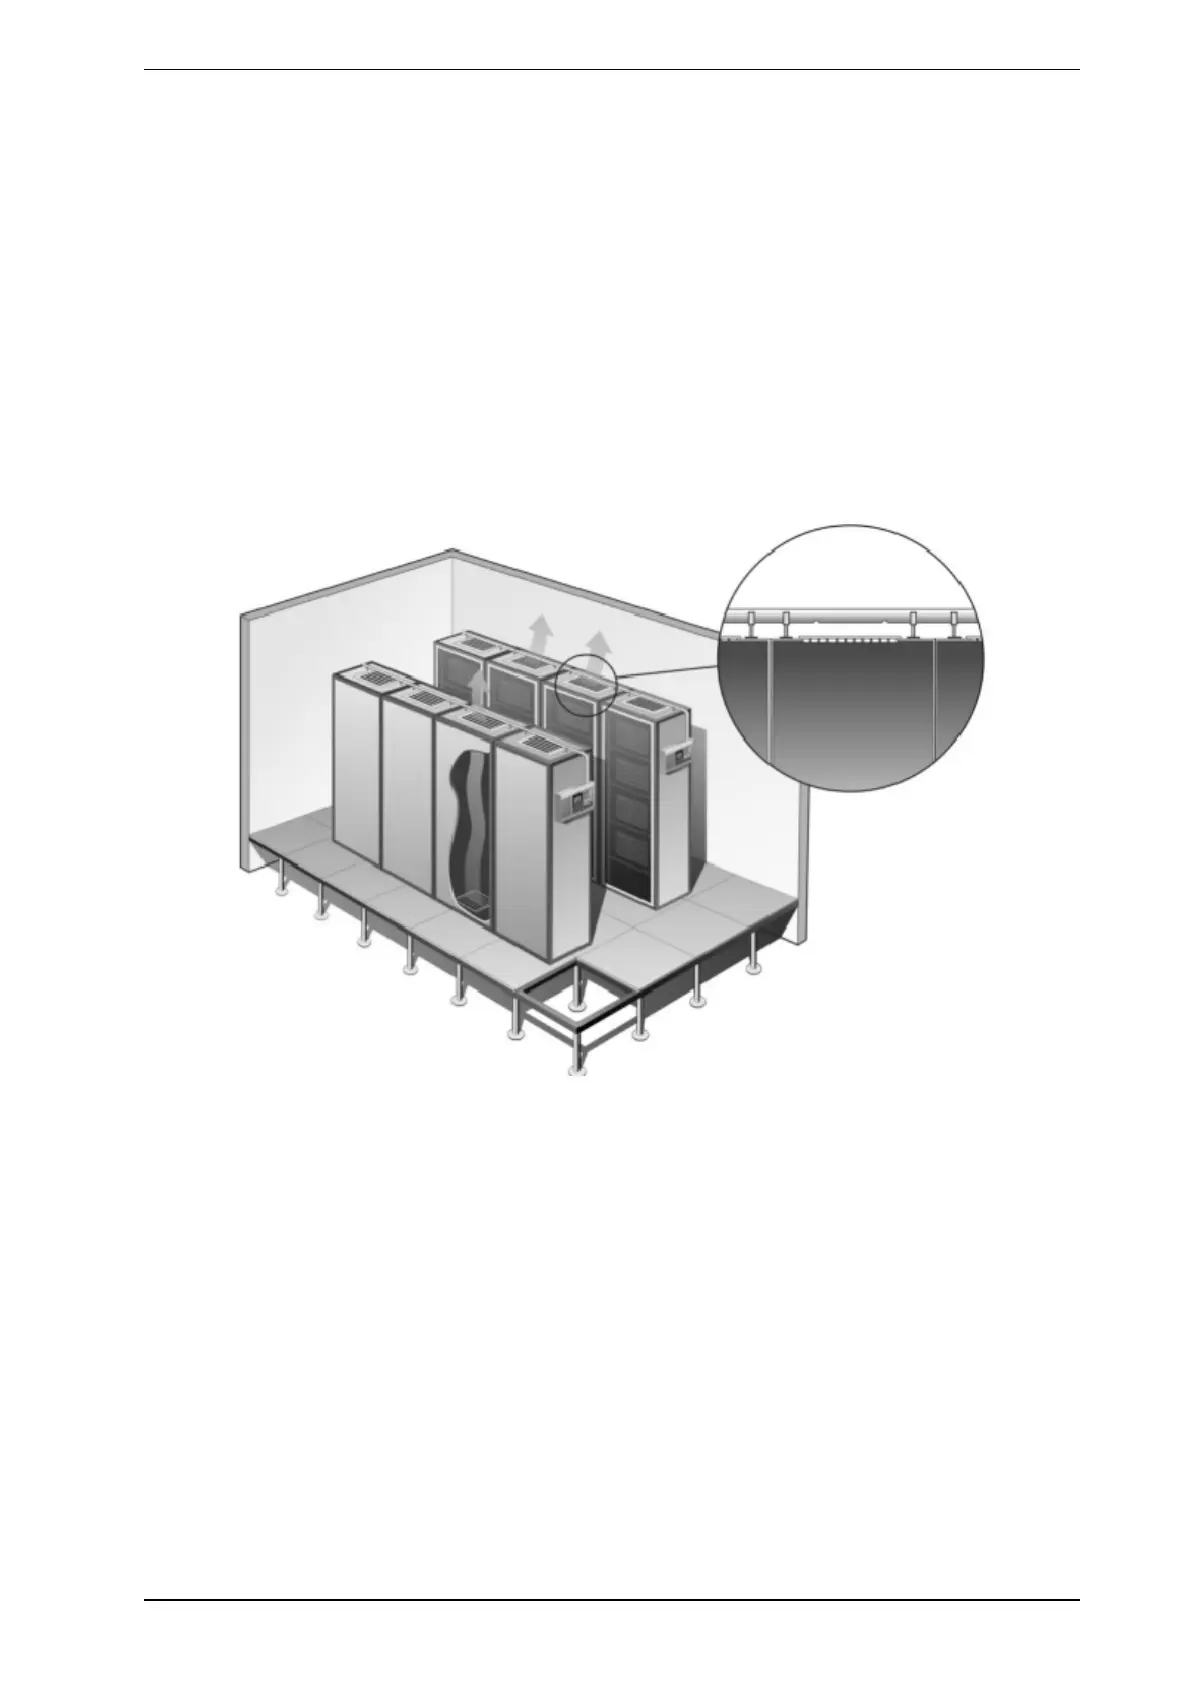
5.3.2 On-Cabinet
The sampling pipe is installed directly over the cabinets that need monitoring. The sampling holes are drilled
so that they face into the air stream from the cabinet. Each cabinet must have at least one dedicated sampling
hole. The installation guidelines for on-cabinet sampling are the same as for Return Air Grilles and Air Ducts
(refer to Section 5.2 on page 21).
Figure 5-16: On-cabinet sampling