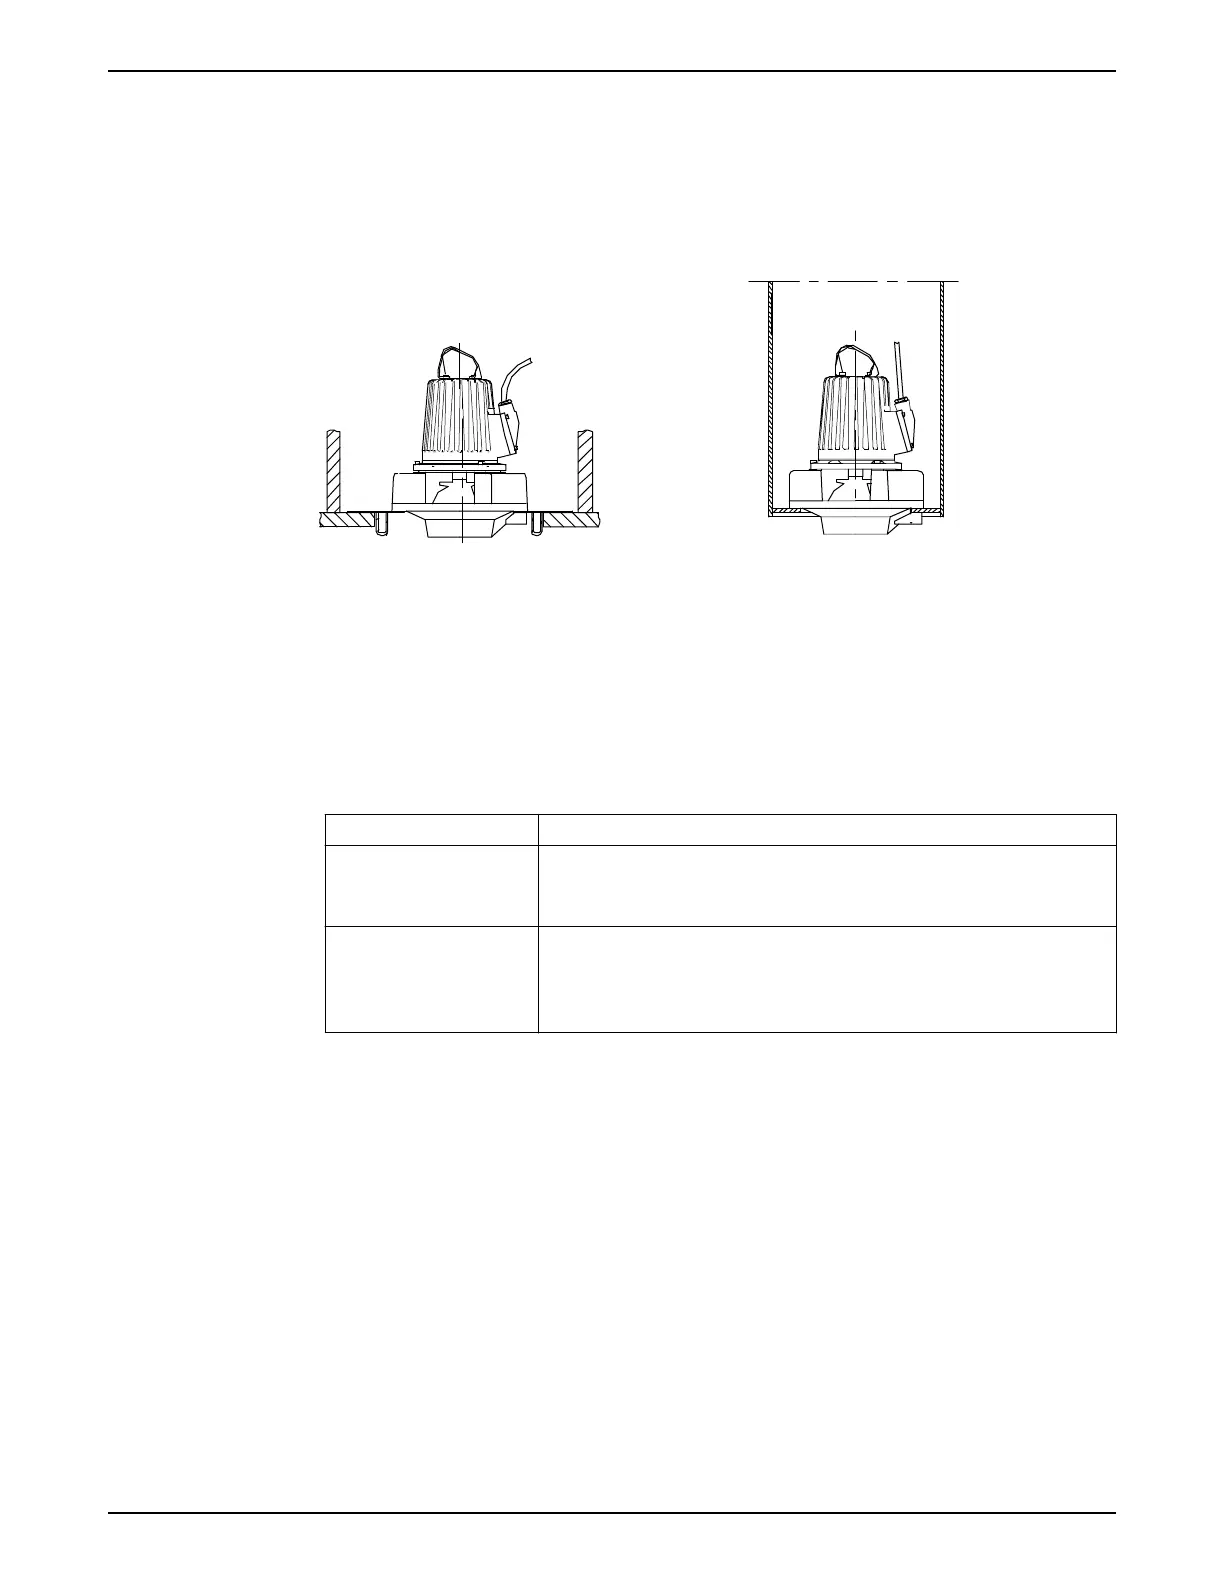
4.7 Install with L-installation
In the L-installation, the pump is installed in a vertical, semipermanent, wet well column
pipe arrangement. The well is divided into a suction part and a discharge part. The pump
end is equipped with guide vanes.
These requirements and instructions only apply when the installation is made according
to the dimensional drawing.
1. Concrete installation
2. Column installation
Figure 12: L-installation alternatives
These items are required:
• Plate 416 13 0x or column pipe 416 12 xx for L-installation
• Anchor bolts for L -installation
• Cable holder
1. Select one of the following steps:
Type of installation Action
Concrete installation 1. Place the plate for L-installation in position and align it horizontally.
2. Grout the anchor bolts in place.
3. Protect the bolts with corrosion-protective compound.
Column installation 1. Cast the column pipe in concrete or install the pre-fabricated column.
2. Place the column in position and align it horizontally.
3. Grout the anchor bolts in place at the top flange of the column pipe.
4. Protect the bolts with corrosion-protective compound.
2. Run a cable between the pump and the starter and monitoring equipment.
Make sure that the cable is not sharply bent or pinched.
3. Connect the motor cable and the starter and monitoring equipment according to the
separate instructions.
Make sure that the impeller rotation is correct. For more information, see Check the
impeller rotation on page 39.
4. Install the pump.
a) Fasten the lifting device to the pump.
Use a stainless steel lifting chain with shackles.
b) Lower the pump into the correct position according to the dimensional drawing.
Make sure that the pump cannot rotate at start-up or during operation.
5. Secure the motor cable:
a) Install the cable support grip and the turnbuckle.
Use a support that is positioned over the center of the column.
4 Installation
24 Flygt 3102 Installation, Operation, and Maintenance Manual
 Loading...