1800 YRM 1332 Brake Pedal Assembly Repair
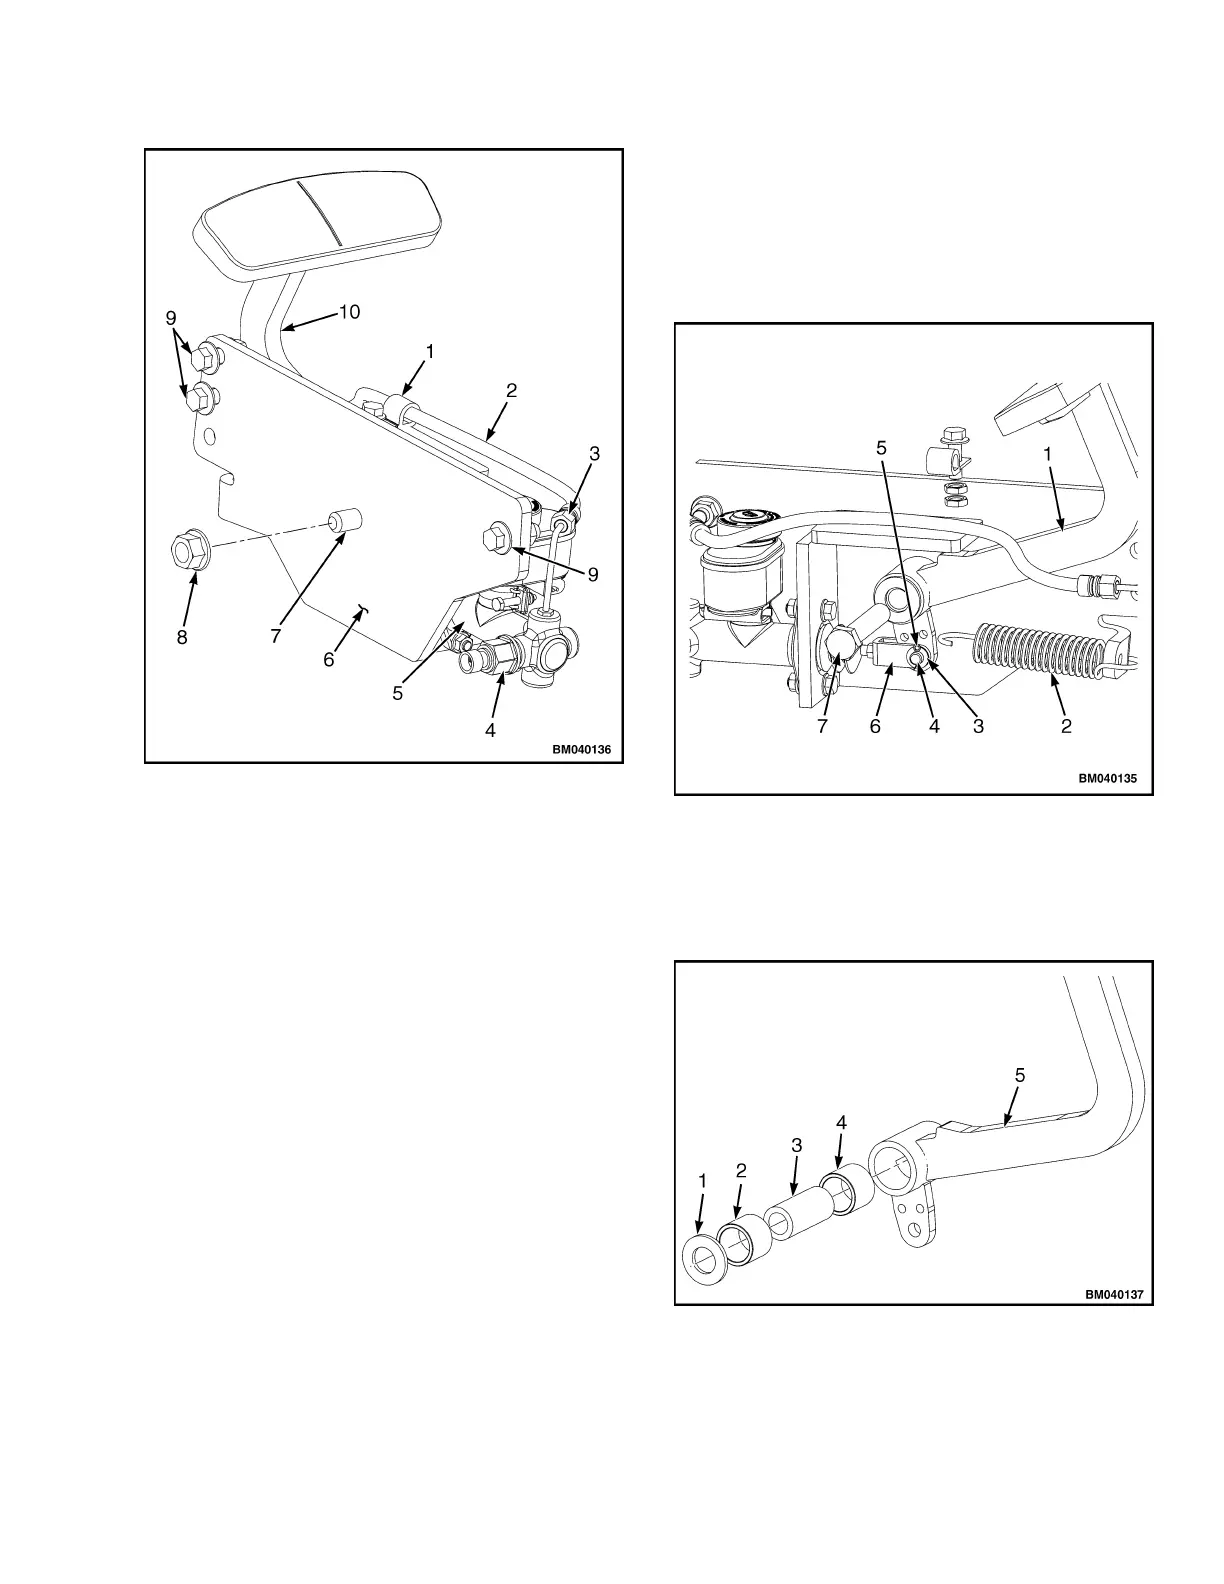
1. CLAMP
2. MAIN PRESSURE
LINE
3. ELBOW FITTING
4. TRANSDUCER
5. MASTER
CYLINDER
6. BRACKET
7. BOLT
8. NUT
9. MOUNTING
CAPSCREWS AND
NUTS
10. PEDAL
Figure 3. Pedal Retaining Nut
5. Remove three mounting capscrews and nuts secur-
ing bracket to frame.
6. Lift brake pedal assembly from the lift truck.
DISASSEMBLE
Forthefollowingprocedures,seeFigure3,Figure4,
andFigure5.
1. Remove master cylinder if necessary. See Master
Cylinder Repair, in this section.
2. Remove brake pedal:
a. Remove the return spring. See Figure 4.
b. Pull the cotter pin and remove clevis pin and
washer from the clevis if the master cylinder
has not been removed. Discard the cotter pin.
c. Remove nut, then slide bolt from assembly.
SeeFigure3andFigure4.
d. Lift pedal from assembly. Recover washer and
sleeve from pedal. See Figure 5.
e. Remove bushings from pedal if necessary.
1. PEDAL
2. RETURN SPRING
3. WASHER
4. CLEVIS PIN
5. COTTER PIN
6. CLEVIS
7. BOLT
Figure 4. Pedal Assembly and Linkage
1. WASHER
2. BUSHING
3. SLEEVE
4. BUSHING
5. PEDAL
Figure 5. Pedal Bushings
3
 Loading...