1800 YRM 1332 Master Cylinder Repair
Master Cylinder Repair
REMOVE
WARNING
Always wear the proper protective equipment in-
cluding eye protection and petroleum-resistant
gloves when handling Dexron III. Thoroughly wash
exposed areas of skin as soon as possible.
CAUTION
Protect the brake system from dirt and contami-
nants during servicing procedures.
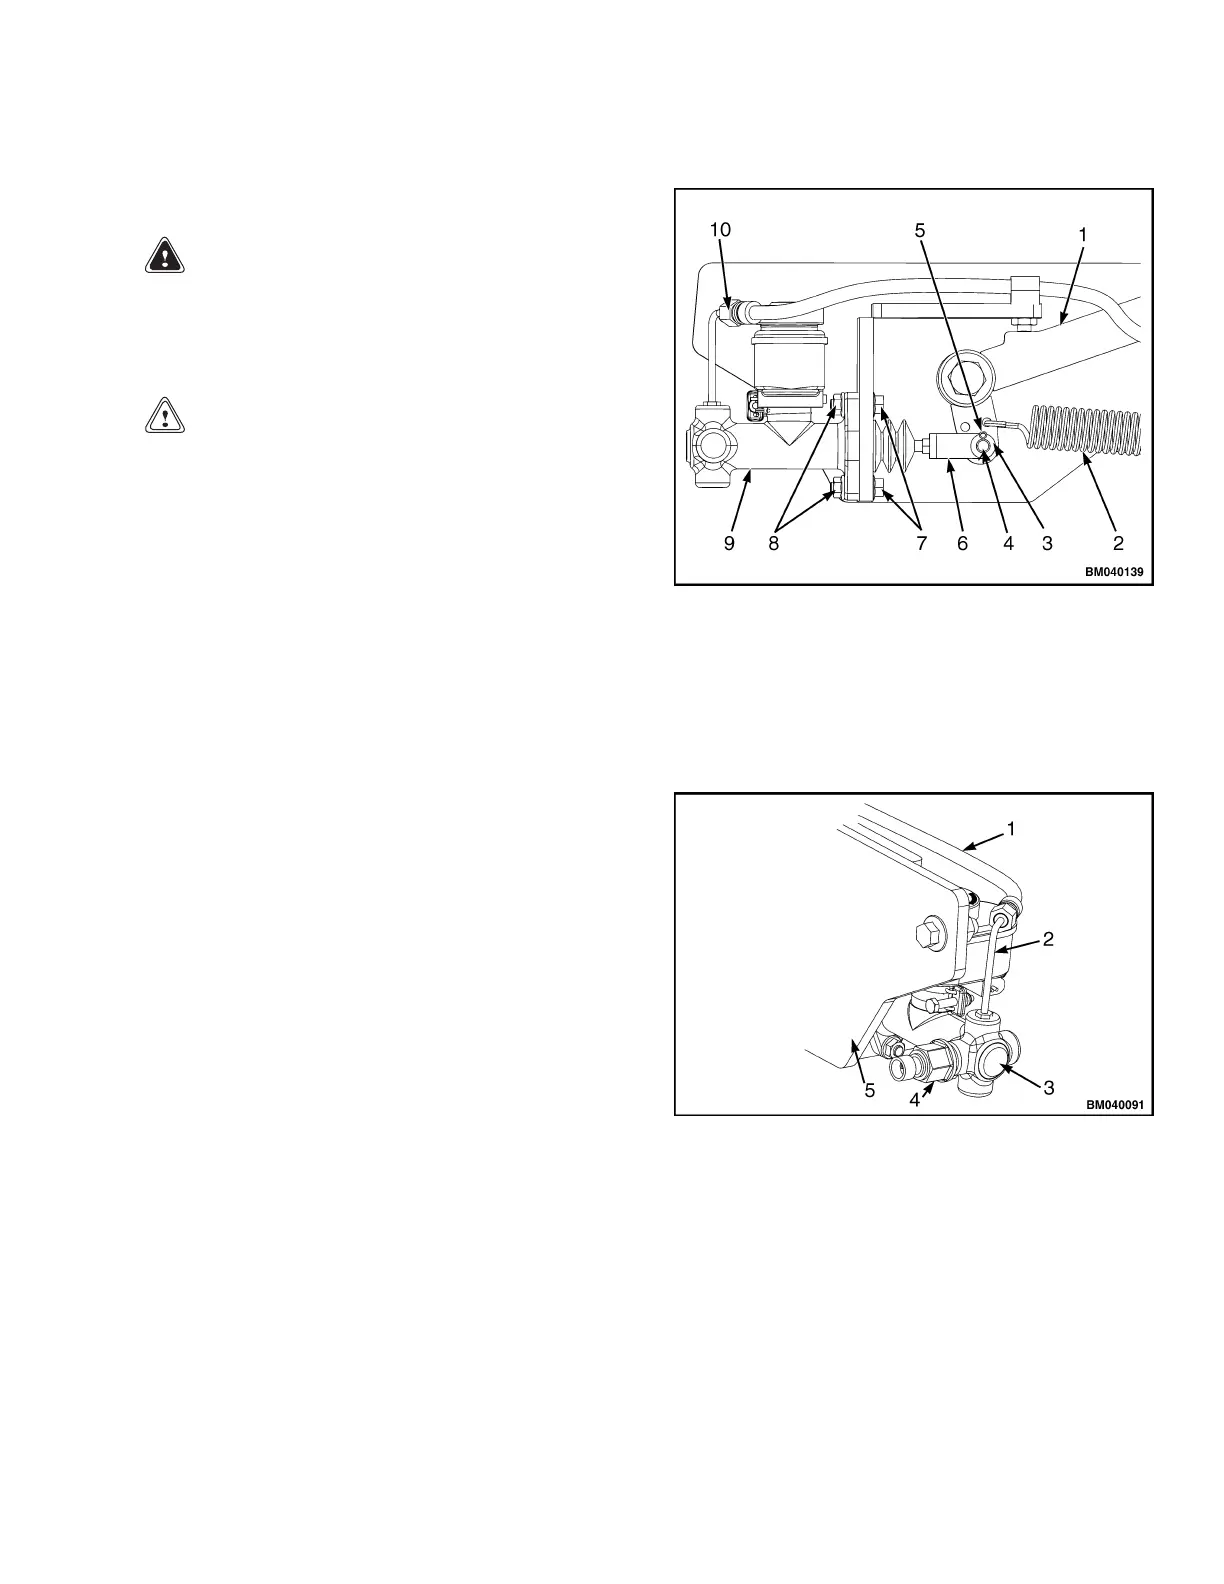
1. Turn the key switch to the OFF position and discon-
nect the battery.
2. Remove the floor mat and floor plates.
3. Disconnect the brake pressure line from the elbow
fitting on top of the master cylinder. Cap hose and
fitting to minimize spills and prevent contamination.
4. Disconnect the transducer and the fluid sensor
wiring.
5. Pull the cotter pin from the clevis pin and remove
the clevis pin and washer connecting the clevis to
the pedal. Discard the cotter pin.
6. Remove capscrews and nuts securing master cylin-
der to bracket.
7. Remove master cylinder from bracket. See Fig-
ure 7.
DISASSEMBLE
1. Remove master cylinder assembly from the truck.
See Remove.
2. Remove the brake switch by unscrewing it from the
cylinder housing. See Figure 8.
3. Remove the elbow fitting from the cylinder housing.
4. Loosen the clamp and remove the reservoir from
the cylinder housing. See Figure 9.
5. Pull the push rod out of the boot. Remove the boot
from the cylinder housing. See Figure 9.
1. PEDAL
2. RETURN SPRING
3. WASHER
4. CLEVIS PIN
5. COTTER PIN
6. CLEVIS
7. CAPSCREWS
8. NUTS
9. CYLINDER
HOUSING
10. BRAKE PRESSURE
LINE
Figure 7. Master Cylinder Mounting
1. MAIN BRAKE LINE
2. ELBOW FI
TTING
3. MASTER CYLINDER HOUSING
4. TRANSDUCER (BRAKE PRESSURE)
5. BRACKET
Figure 8
.BrakeSwitch
5
 Loading...