11
s
ound a two-tone confirmation and the control
unit will confirm. Please ensure that you test
smoke detectors regularly.
Add the flood detector
1 Enter the Devices +/- menu and select the Add
Devices sub menu
2 When prompted by the control unit, bridge the
water sensor probes with a coin so that a
continuous alarm can be heard and then press
the learn button on the printed circuit until 3
beeps are given.
3 Assign zone number and press OK.
4 Enter zone location if required.
5 Press OK.
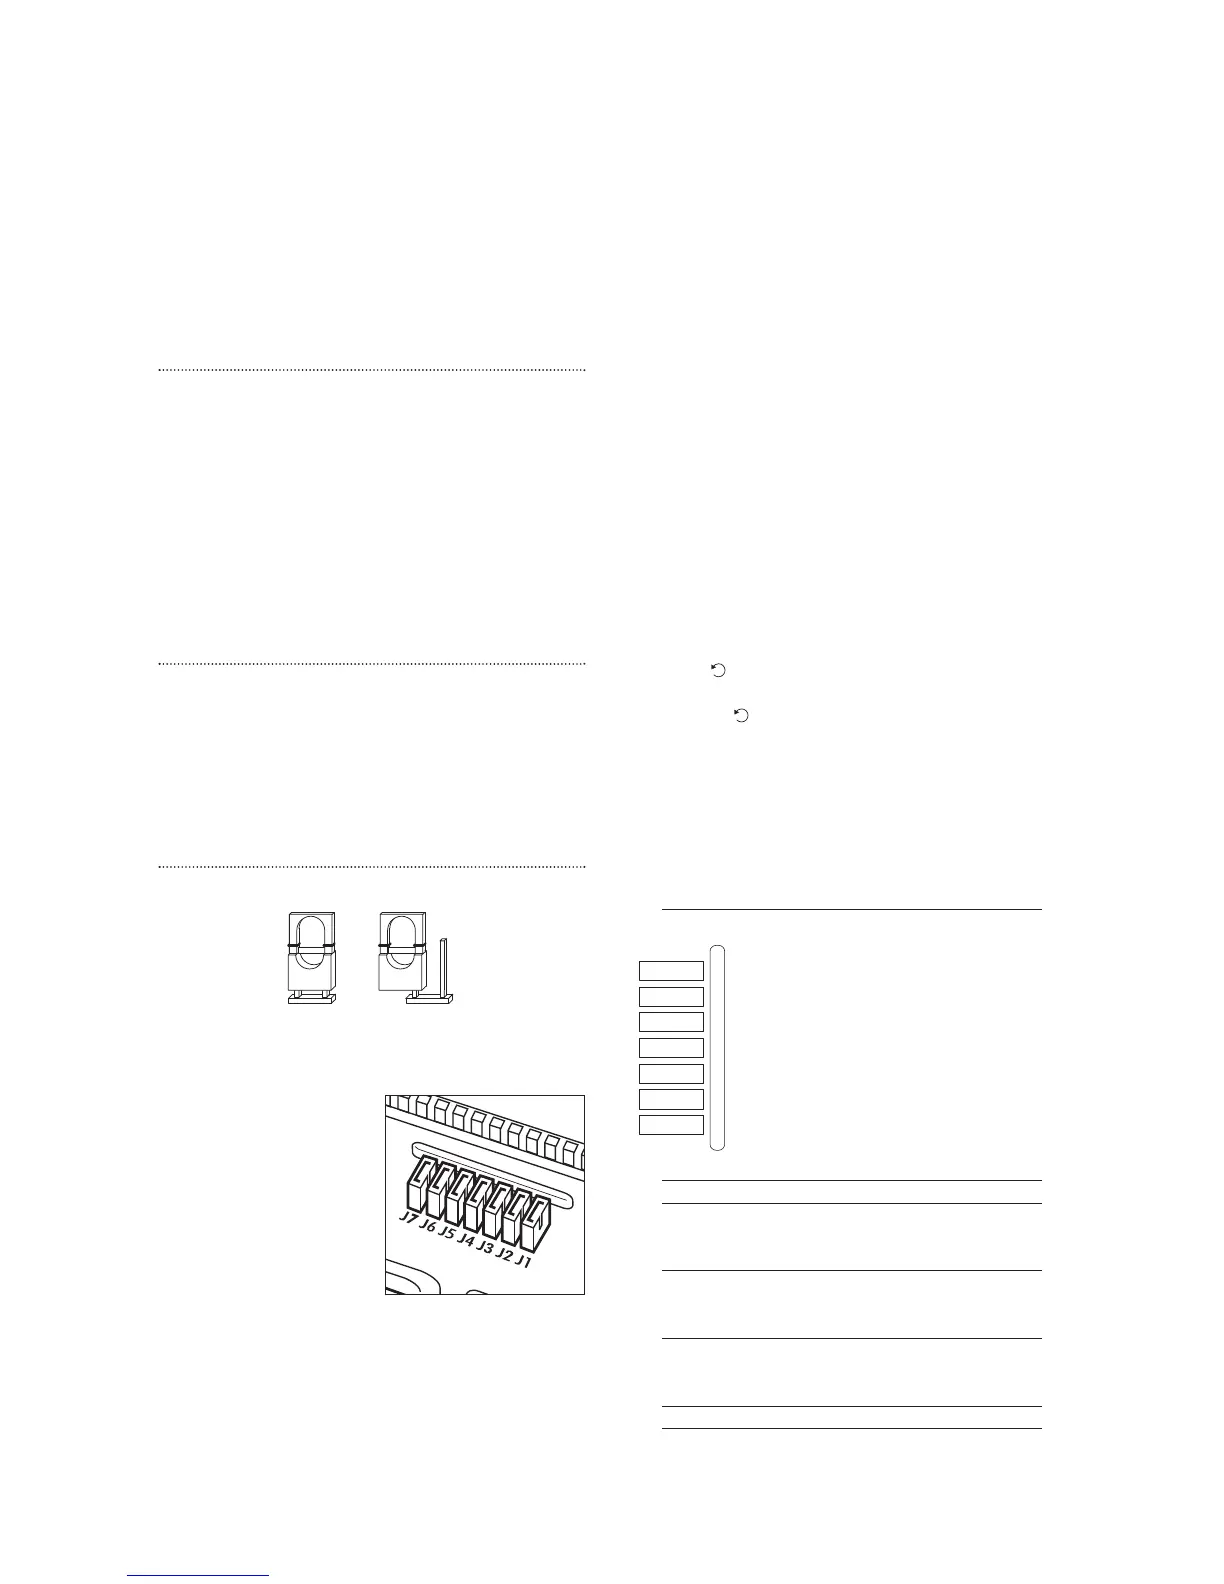
Use of jumper switches
Some devices have internal switches, or
jumpers, which control working modes, or offer
additional programming. The jumpers are either on
or off . On is when the jumper connects two pins,
off when it is removed. It can be parked on one
pin as shown.
Add the siren unit
WARNING
The siren is very loud, be prepared! Take care
not to activate the siren tamper switch
unnecessarily.
The siren is
programmed by the
jumper switches in the left
hand compartment.
1 Lift of
f jumper number
1 and park it. The siren
will beep and flash. The
sir
en is now in learn
mode.
2 Lift off jumper 5 and park it. This must be left in
the of
f position permanently.
¥ If jumper 3 and jumper 4 are removed during the
learning-in process, the siren will only be
activated for 1 second if accidently activated and
Jumper in
‘of
f’ ‘parked’
position
Jumper in
‘on’
position
i
s useful for testing. Ensure the jumpers are
placed into the positions desired before replacing
the cover.
3 Program the control unit by selecting Devices
+/- menu, then Program Siren menu, then
Learn Siren.
4 Press OK and the unit will give a long beep to
confirm - the siren will also respond by a beep
and a flash.
5 Replace jumper 1 to the on position, the siren
will beep and flash to confirm.
6 To ensure siren does not activate, disable the
tamper switch by selecting Program Siren menu
on the control unit, then Siren A/T Off, and
press OK.
¥ The siren disable tamper will automatically revert
to on after about an hour if not switched back on
again manually by selecting Siren A/T On.
¥ Press to return to a previous menu.
¥ To return to Alarm off in normal mode, keep
pressing repeatedly.
Further siren programming
The siren can be configured to your personal
requirements by the use of jumpers.
Siren jumper programming
Jumper positions
J7 on = jamming detection off;
off = jamming detection on
J6 on = normal, J6 off = clear memory
J5
on = stand alone operation, not used in
this system;
off = slave operation
J3 on, J4 on = 3 minute sir
en on period
J3 off, J4 on = 5 minute siren on period
J3 on, J4 off = 10 minute siren on period
J2
on = LEDs on during siren period;
off = LEDs remain on (after an alarm) until
system is disarmed
J1 on = normal; off = learn-in mode
¥
Jumper 5 must be left in the of
f
position.
¥
J6 must be left on in nor
mal ser
vice other
wise
the sir
en will lose its lear
n-in memory when the
batteries ar
e r
eplaced.