a
rmed or home mode
Points for consideration
¥
In home mode, detectors set as Burglar will cause an alarm
when activated, whilst detectors set as Home Omit will not
trigger an alarm.
¥ If the system is fully or home armed, detectors set as Entry
will start the entry countdown when activated. When
disarmed, an entry detector will sound a ding-dong chime
from the control unit (if door chime is selected).
¥ If a detector is set as Home Delay it will start an entry
countdown when the system is home armed. This setting is
useful if your path to the control unit (when used at night) is
vulnerable (a stairwell for instance).
¥
After testing the door/window contact and PIR in your chosen
locations, please ensure that the jumpers are moved into the
off (parked) positions. If left in the on positions battery life will
be shortened and it will not be apparent if the detector has a
tamper or low battery condition.
Multiple door/window contact wiring
If difficulty is experienced fitting the door/window contact
because of space etc, the HSA3090 multiple door/window
contact set should be used (not included).
The magnet/contact pairs are wired using bell wire (not
supplied) to the extension terminals as indicated on page 7. The
knockout in the top of the door/window contact must be
removed to allow the wire to pass through. The total length of
wire used must not exceed 10 metres. The magnet/contact
pairs should be no fur
ther than 8mm apart.
It is possible to use a single pair of multiple door/window
contacts with a detector if you experience problems fitting the
main unit to the door frame.
When using multiple switches on a door/window contact, you
can use the detector without having a magnet alongside the
main unit.
22
system is home armed, but cause an instant alarm when fully
armed;
¥ To commence an entry countdown upon detection when the
s
ystem is fully or home armed.
These choices are presented during the learning in process
and are summarised by the following codes within the control
unit:
B Burglar active when control unit is in
armed or home mode
D home Delay starts entry countdown in home
mode only
E
Entry starts entry countdown when
in armed or home mode
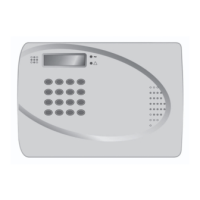
PIR operation
The LED does not normally flash when it senses movement.
This is to conser
ve battery power.
If the LED flashes regularly, it indicates that it has either been
tampered with, or the batteries are getting low and need
replacing.
Further door/window contact programming
The door/window contact can be used in six different ways
within the system:
¥ To cause an instant alarm upon activation when the system is
fully or home armed;
¥ To be omitted when the system is home armed;
¥ To commence an entry countdown upon activation when the
system is home armed, but cause an instant alarm when fully
armed;
¥ To cause a fire alarm when activated whether the system is
ar
med or disar
med;
¥ To cause an instant alarm whether the system is armed or
disar
med (24-hour alarm);
¥
T
o commence an entry countdown upon activation when the
system is fully or home armed.
These choices ar
e presented during the learning in process
and are summarised by the following codes within the control
unit:
B
Burglar active when control unit is
armed or home mode
O home Omit not active when in home mode
A home Access starts entry countdown when in
home mode
F Fire causes fire alarm upon activation
whether system armed or
disarmed
H 24 Hour causes burglar alarm upon
activation whether system armed
or disar
med
E Entry starts entry countdown when in
armed or home mode
Points for consideration
¥ In home mode, detectors set as Bur
glar
will cause an alarm
Knockout
removed for
wir
e
Door/window
switches wired in
series
Magnets