smallerholeintheuppersection
oftheEscutchen.
(接触子のツメをエスカッション
上部の小さい方の穴に入れます。)
Puttheendofthecontactintothelargerhole
intheuppersectionoftheEscutchen.
(接触子の端をエスカッション上部
の大きい方の穴に入れます。)
Checkthattheclawofthecontacti
引っ掛かることを確認します。)
(Fig. 2-2)
Passthisway.
(潜らせる)
Lowercontact
接触子(下)
3) 接触子(下)の取り付け
a. 既に取り付けてある接触子(上)の隙間に、接触子(下)
の曲げ部分を潜らせます。(Fig.2-3)
b. 接触子と基板が平行になるようにします。(Fig.2-3)
(Fig. 2-3)
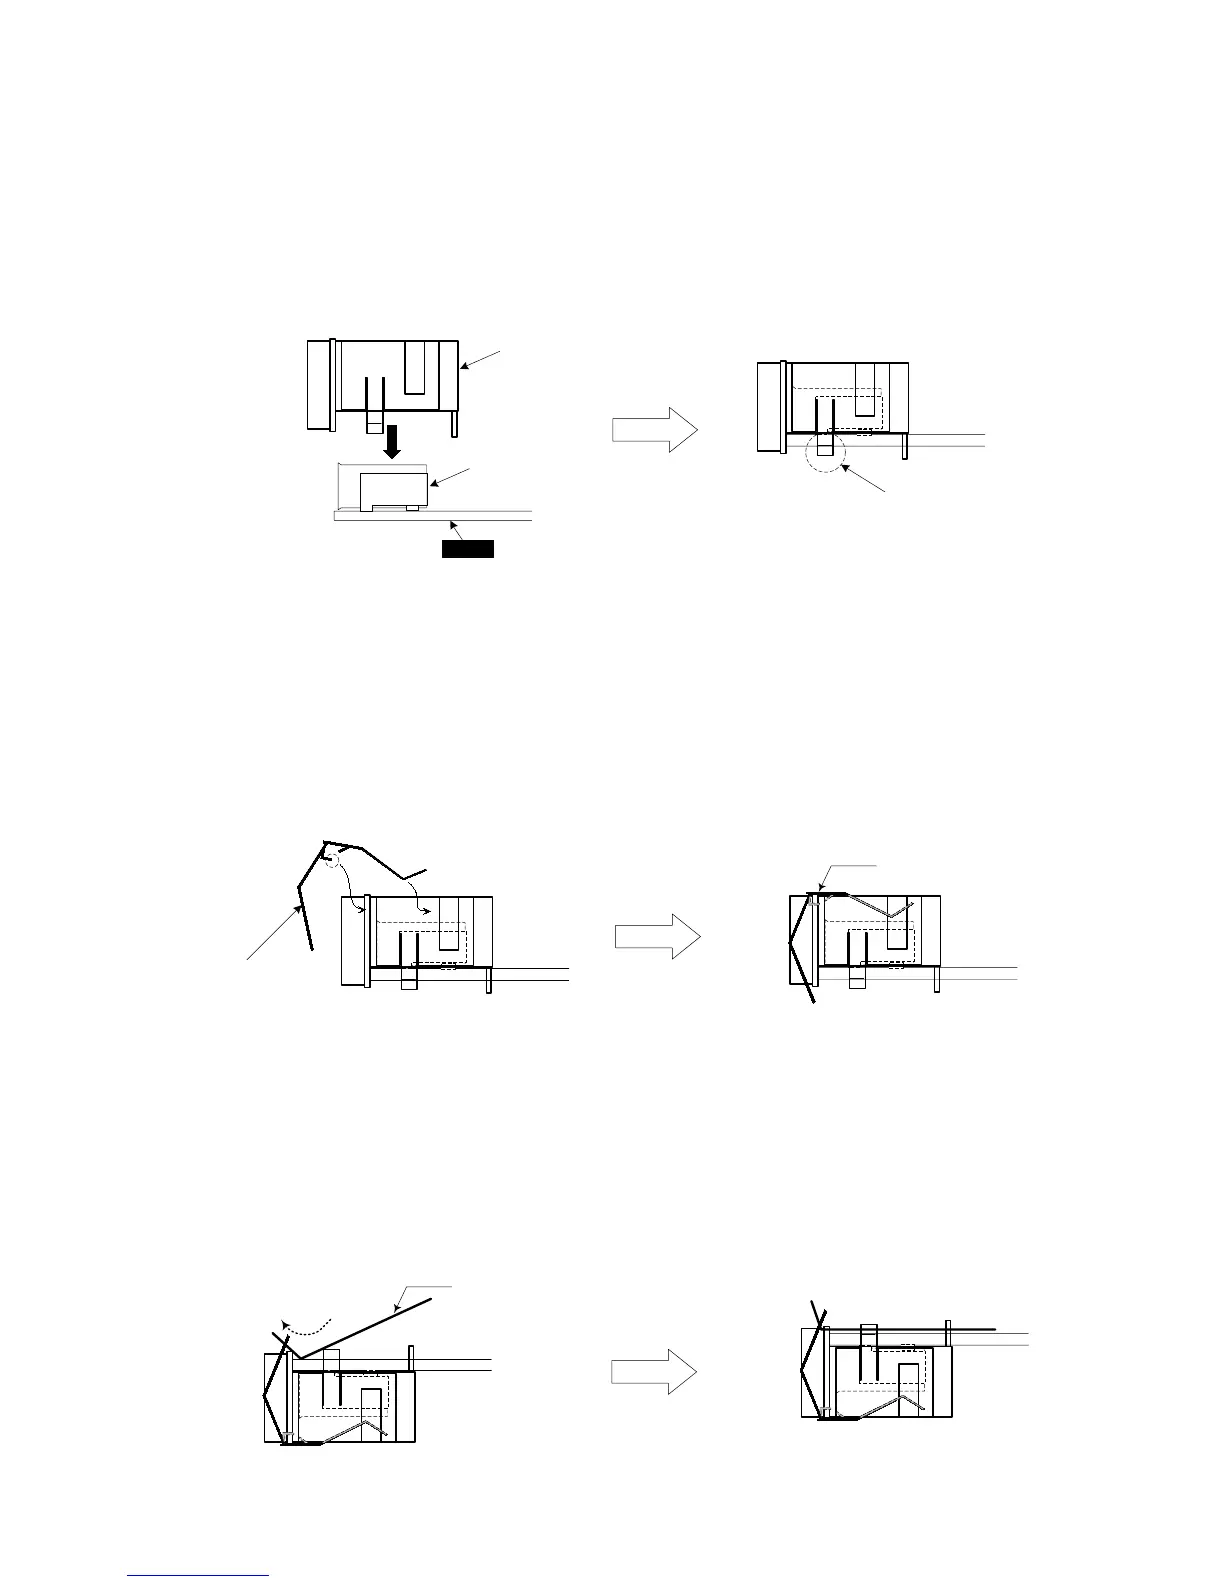
1) Installation of Escutchen
a. Place the Escutchen from the above and fit its claw into
the hole in the MLN2 circuit board. (Fig. 2-1)
b. Make sure that the Escutchen is horizontal to the circuit
board and there is no clearance between the Excutchen
and the MLN2 circuit board. (Fig. 2-1)
2) Installation of Upper Contact
Install the upper contact as shown in Fig. 2-2.
3) Installation of Lower Contact
a. Pass the bent part of the lower contact into the clearance
of the upper contact which has already been installed.
(Fig. 2-3)
b. Check to make sure that the contact is horizontal to the
MLN2 circuit board. (Fig. 2-3)
●エスカッション&接触子(MLN2シート)
1) エスカッションBの取り付け
a. 上から被せるようにして、エスカッションのツメを基
板の穴に嵌めます。(Fig.2-1)
b. エスカッションが基板に対して平行でかつ、基板との
間に隙間が無い程度まで嵌めます。(Fig.2-1)
Escutcheon
(ML エスカッション B)
CN1, CN2
TheclawoftheEscutchenshouldbecaugh