EasyManua.ls Logo

Yamaha 140 User Manual

Yamaha 140
44 pages
To Next Page IconTo Next Page
Page #1 background imageLoading...
Page #1 background image
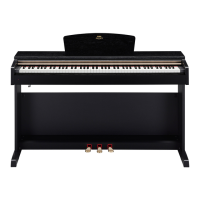
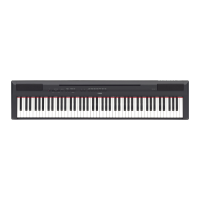
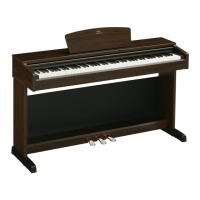
YDP-160
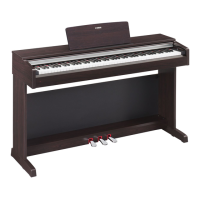
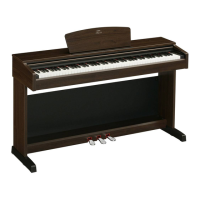
YDP-140
For information on assembling the keyboard stand, refer to the instructions at the end of this manual.
IMPORTANT — Check your power supply — (YDP-160)
Make sure that your local AC mains voltage matches the voltage specified on the name plate on the bottom
panel. In some areas a voltage selector may be provided on the bottom panel of the main keyboard unit near the
power cord. Make sure that the voltage selector is set for the voltage in your area. The voltage selector is set at
240V when the unit is initially shipped.
To change the setting use a "minus" screwdriver to rotate the selector dial so that the correct voltage appears
next to the pointer on the panel.
Owner's Manual
EN
Questions and Answers:

Yamaha 140 Specifications

General IconGeneral
BrandYamaha
Model140
CategoryMusical Instrument
LanguageEnglish

Summary

Initial Setup and Safety

Power Supply Check

Verify local AC voltage matches instrument specifications for safe operation.

Special Safety Messages (YDP-160)

Product Safety Markings

Explanation of safety graphics and symbols used on the product enclosure.

Battery and Disposal Notices

Information on battery lifespan, handling, and product disposal regulations.

Name Plate Location

Locating the name plate for model, serial number, and power requirements.

Special Safety Messages (YDP-140)

Power and Cord Safety

Guidelines for using power supplies, extension cords, and avoiding cord hazards.

Environmental and Battery Information

Yamaha's commitment to safety and environmental friendliness, including battery notices.

Name Plate Location

Details on where to find the product's name plate for identification.

General Precautions and Warnings

Electrical Safety Warnings

Essential warnings to prevent electric shock, short-circuiting, fire, and damages.

Physical Safety Warnings

Precautions against physical injury from misuse or improper handling.

Operational and Handling Precautions

Connections, Maintenance, and Handling

Guidelines for connecting components, cleaning, and safe handling practices.

Bench Use and Data Saving

Safe use of the bench and the importance of backing up instrument data.

Introduction to the Manual

Document Structure and Recommendations

Overview of the owner's manual contents and recommended reading order.

Included Accessories and Handling

Accessory List

List of items included with the digital piano, such as manuals and power cords.

Tuning and Transporting

Information on the instrument's tuning stability and safe transportation methods.

Key Instrument Features

AWM Dynamic Stereo Sampling

Explanation of Yamaha's proprietary sampling tone-generation system.

Graded Hammer Keyboard Technology

Details on the graded hammer action for realistic piano playability.

Instrument Controls and Ports

Keyboard Layout and Buttons

Identification and function of buttons, controls, and keyboard sections.

Power and Volume Controls

Location and operation of power switches and master volume adjustment.

Instrument Ports and Pedal Functions

Audio and MIDI Connectors

Description of PHONES, MIDI IN/OUT, and PEDAL connectors.

Pedal Functionality

Explanation of how to use the sustain and other pedals.

Initial Piano Setup

Key Cover Operation

Instructions for opening and closing the instrument's key cover safely.

Music Rest Installation

Guide on how to raise and lower the music rest for sheet music.

Connecting Power Sources

Connecting the Power Cord (YDP-160)

Step-by-step guide for connecting the power cord to the instrument and outlet.

Connecting the Power Adaptor (YDP-140)

Step-by-step guide for connecting the power adapter to the instrument and outlet.

Basic Operation

Turning the Power On and Off

Procedure for powering the unit on and off, and understanding the power indicator.

Setting the Master Volume

How to adjust the listening level using the master volume control.

Practice and Setup Aids

Using Headphones

Connecting headphones for private practice and hearing safety.

Headphone Hanger Installation (YDP-160)

Instructions for mounting the headphone hanger on the YDP-160.

Demo Song Playback

Playing Demo Songs

Procedure for listening to demo songs that showcase instrument voices.

Demo Song List

Details of demo songs, including voice names, titles, and composers.

Preset Song Playback

Playing 50 Piano Preset Songs

How to select and play 50 pre-programmed piano songs.

Adjusting Volume and Tempo

Adjusting the volume and tempo during preset song playback.

Computer Song Playback

Loading and Playing Computer Songs

Transferring and playing song data from a computer to the instrument.

Song Playback Channels

Selecting playback channels to improve sound quality for loaded songs.

Voice Selection and Characteristics

Selecting Instrument Voices

How to choose and switch between different instrument sounds (voices).

Voice Characteristics Overview

Guidance on understanding the characteristics of each preset voice.

Pedal Functions

Using the Damper Pedal

Explanation of the damper pedal's sustain function and half-pedal capability.

Sostenuto and Soft Pedals

Functions of the sostenuto (center) and soft (left) pedals.

Sound Variations with Reverb

Applying Reverb Effects

Selecting and adjusting digital reverb effects for sound depth.

Layering Voices (Dual Mode)

Engaging Dual Mode

How to layer two voices simultaneously for a richer sound.

Adjusting Dual Mode Settings

Settings for octave shift and balance between layered voices.

Pitch Adjustment Functions

Transposition Function

Shifting the keyboard pitch to match other instruments or singers.

Fine-Tuning Pitch

Adjusting the instrument's pitch in small increments (Hz).

Practice Aids: Metronome

Using the Metronome

Setting up and using the built-in metronome for practice.

Adjusting Metronome Tempo

Changing the metronome tempo and time signature.

Keyboard Touch Sensitivity

Adjusting Touch Response

Customizing how the instrument responds to playing dynamics (touch sensitivity).

Performance Recording

Recording a User Song

Step-by-step guide to recording your performance as a user song.

Record Mode Operations

Engaging record mode, starting, and stopping the recording process.

Recorded Performance Playback and Erasure

Playing Back Recorded Songs

How to play back previously recorded user songs.

Erasing Recorded Data

Procedure for deleting recorded user songs from the instrument.

MIDI Connectivity

About MIDI

Explanation of MIDI (Musical Instrument Digital Interface) and its purpose.

MIDI Capabilities

Overview of MIDI functions for data transfer and advanced performances.

Computer Connection

Connecting via USB-MIDI

Instructions for connecting the digital piano to a computer using a USB-MIDI interface.

MIDI Function Settings

Transmit/Receive Channel Selection

Setting MIDI channels for proper data transfer between devices.

Local Control ON/OFF

Controlling whether the keyboard triggers internal sounds or external MIDI.

MIDI Data Control

Program Change ON/OFF

Enabling or disabling program change number reception and transmission.

Control Change ON/OFF

Enabling or disabling MIDI control change data for performance expression.

Computer Song Data Management

Loading Song Data from Computer

Downloading song data from a computer to the instrument.

Musicsoft Downloader Software

Information on the software required for transferring song data.

Data Transfer and Backup

Transmitting Song Data to Computer

Saving recorded user songs and backup data to a computer.

Initializing Instrument Settings

Resetting the instrument to factory default settings.

Troubleshooting Guide

Common Problems and Solutions

Diagnosing and resolving issues like no power, noise, or pedal problems.

Available Options and Accessories

Listing of optional accessories like benches and interfaces.

Keyboard Stand Assembly

Parts Identification and Preparation

Identifying assembly parts and preparing tools for stand construction.

Step 1: Attach C to D and E

First step in assembling the keyboard stand, connecting main components.

Keyboard Stand Assembly Steps

Step 2: Attach Part B

Attaching the main support structure (Part B) to the stand's base.

Step 3 & 4: Secure and Mount Part A

Securing the stand components and mounting the main keyboard unit.

Final Connections and Adjustments

Connect Pedal Cord and Power

Connecting the pedal cord and power sources to the instrument.

Set Adjusters and Attach Hanger

Adjusting the stand feet and attaching the headphone hanger.

Post-Assembly Checks

Final Inspection and Checks

Ensuring all parts are used, screws are tight, and the unit is stable.

Safe Handling After Assembly

Guidelines for safely moving the assembled instrument.

Product Specifications

Keyboard and Sound Features

Detailed specifications for keyboard action, sound source, and polyphony.

Dimensions, Weight, and Accessories

Physical dimensions, weight, and included accessories for the instrument.

Important Safety Instructions and Symbols

Key Safety Guidelines

Crucial safety instructions for operation, maintenance, and electrical safety.

Graphical Symbols Explanation

Interpretation of warning symbols like lightning flash and exclamation point.

Regulatory Compliance

FCC Information for USA

FCC compliance statements for Class B digital devices in the USA.

UK Plug and Cord Information

Wiring color code for the mains lead and terminal connection in the UK.

Distributor and Contact Information

Worldwide Yamaha Representatives

Contact details for Yamaha representatives and distributors globally.

Related product manuals