Changing the patch settings
Owner’s Manual
45
8. In the Centralogic or Channel Strip section,
select the bank that includes the channel to
which you want to apply the processor.
9. Press the [SEL] key of the channel to which
you want to apply the processor.
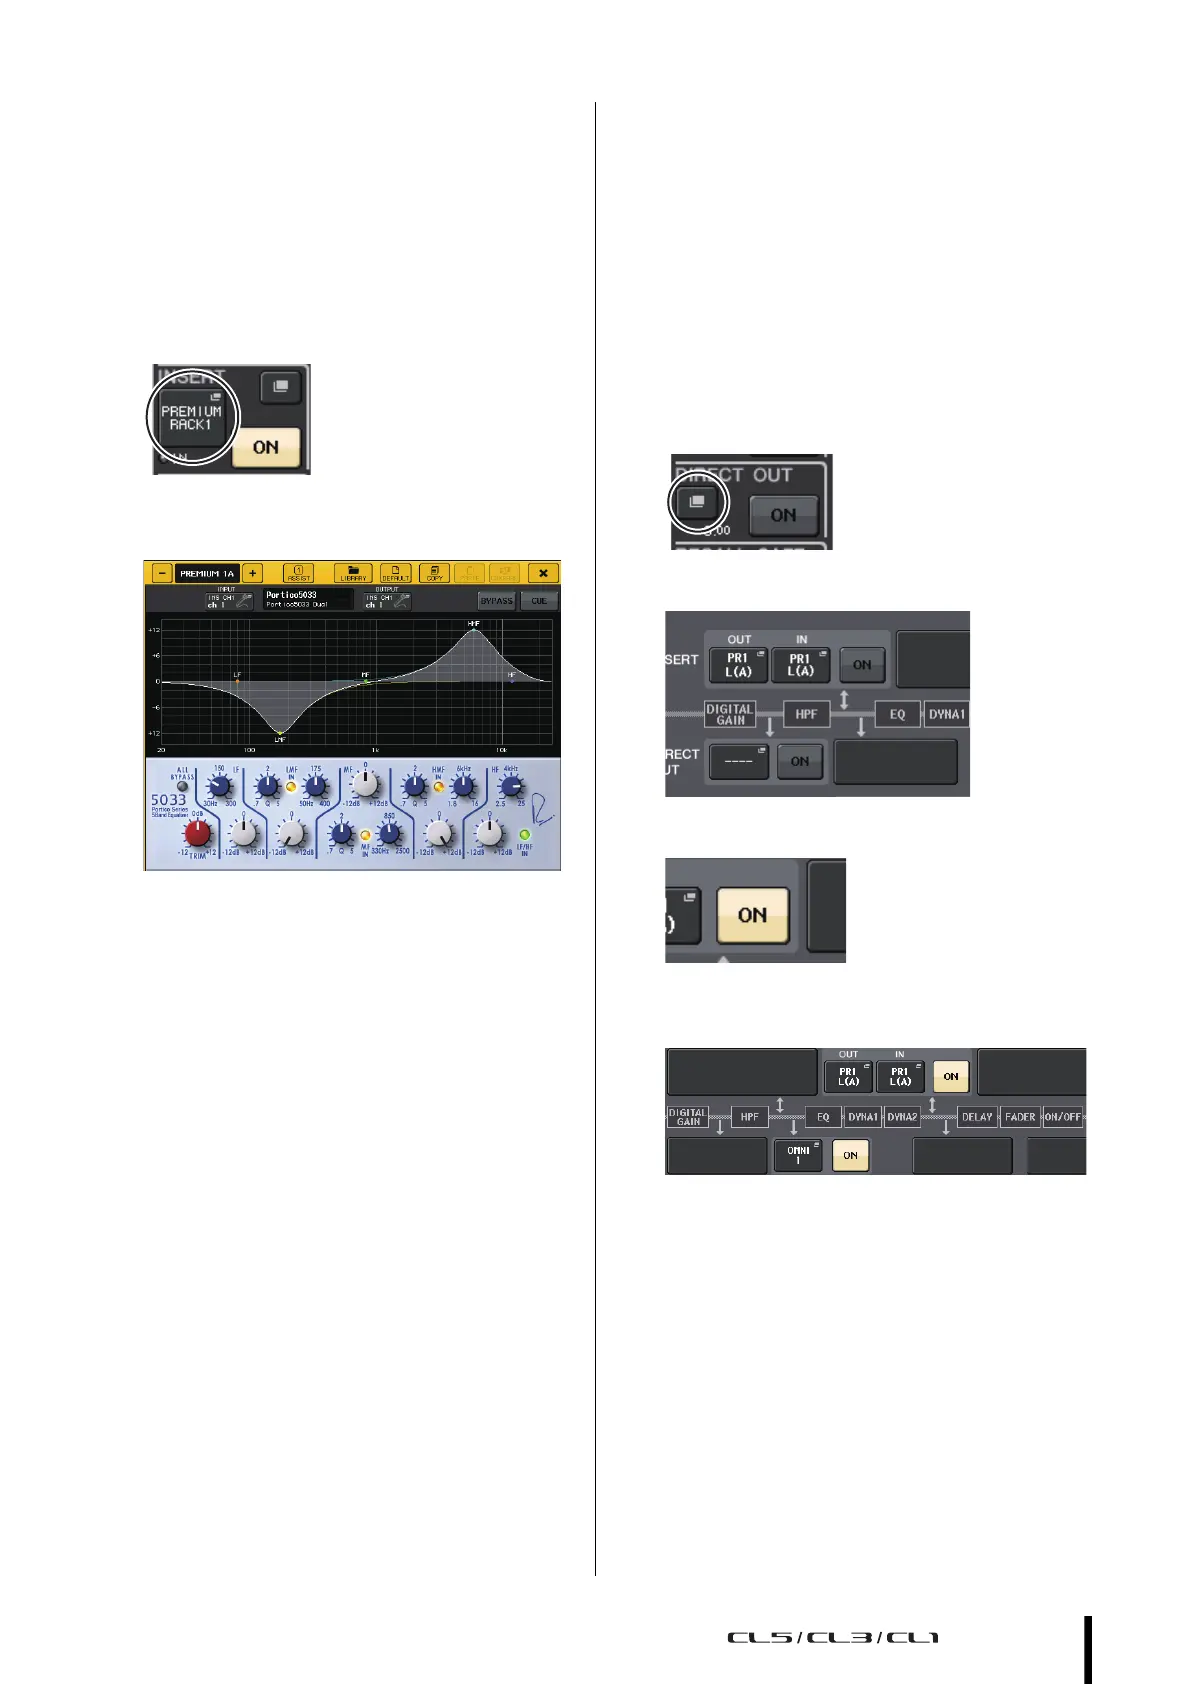
10. In the INSERT field of the SELECTED
CHANNEL VIEW screen, press the button that
indicates the name of the inserted PREMIUM
RACK.
11. Adjust the parameters in the PREMIUM RACK
popup window.
Changing the patch settings
Setting up INSERT or DIRECT OUT
1. Select the bank that contains the channel for
which you want to set up INSERT or DIRECT
OUT in the Channel Strip section or
Centralogic section.
2. Press the [SEL] key of the channel for which
you want to change the patching.
3. Press the setting button in the DIRECT OUT
area of the SELECTED CHANNEL screen.
4. Assign OUT and IN for INSERT or DIRECT OUT.
5. Press the ON button to enable it.
6. Modify the INSERT or DIRECT OUT point by
pressing it, if necessary.