HS80M/HS50M
8
■ HS80M DISASSEMBLY PROCEDURE (分解手順)
1. Woofer (Time required: about 1 minute)
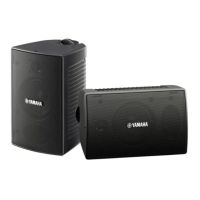
1-1 Remove the six (6) screws marked [55]. The woofer
ring can then be removed. (Fig. 1)
1-2 Remove the six (6) screws marked [40]. The woofer
can then be removed. (Fig. 1)
2. Tweeter (Time required: about 1 minute)
Remove the four (4) screws marked [20]. The tweeter
can then be removed. (Fig. 1)
[20]: Hexagonal Socket Tapping Screw 4x20 (WG341100) 6
角穴付きTP1種
[40]: Bind Head Tapping Screw 4x16 (WG540200) +バインド
TP1種
[55]: Hexagonal Socket Tapping Screw 4x20 (WG341100) 6
角穴付きTP1種
Fig. 1(図1)
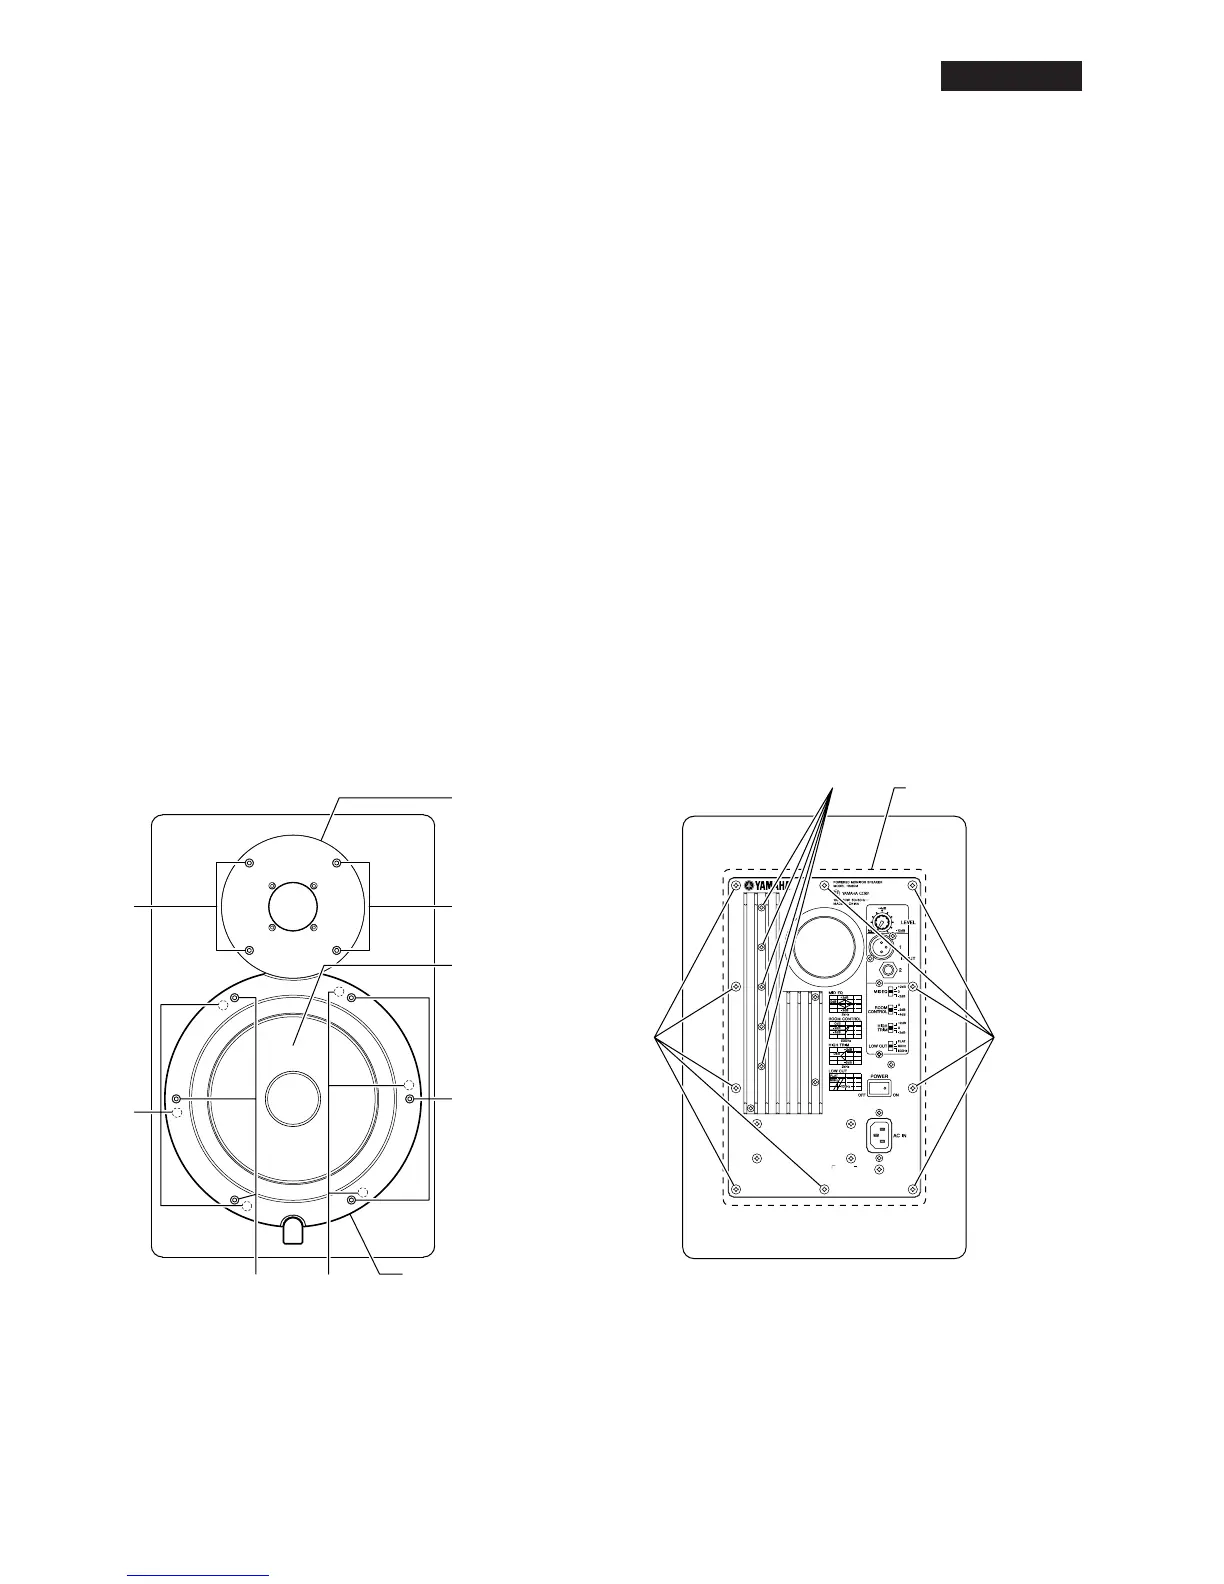
3. Rear Panel Assembly (Time required: about
1 minute)
Remove the ten (10) screws marked [155]. The rear
panel assembly can then be removed. (Fig. 2)
4. AMP Circuit Board
(Time required: about 2 minutes)
4-1 Remove the rear panel assembly.(See procedure 3.)
4-2 Remove the five (5) screws marked [90]. The AMP
unit can then be removed. (Fig. 2)
* At this time, be careful not to lose the spacer which
also comes off.
Fig. 2(図2)
[90]: Bind Head Tapping Screw-S 3x16 (WG341600) +バイン
ドSタイト
[155]: Bind Head Tapping Screw 4x16 (WG540200) +バインド
TP1種
1. ウーファー(所要時間:約1分)
1-1 [55]の六角孔付きボルトを6本外し、ウーファーリン
グを外します。(図1)
1-2 [40]のネジを6本外し、ウーファーを外します。(図1)
2. ツィーター(所要時間:約1分)
[20]の六角孔付きボルトを4本外し、ツィーターを外
します。(図1)
4. AMPシート(所要時間:約2分)
4-1 リアパネルAssyを外します。(3項参照)
4-2 [90]のネジを5本外し、AMPユニットを外します。
(図2)
* このとき、スペーサーも同時に外れますのでなく
さないよう注意してください。
3. リアパネルAssy(所要時間:約1分)
[155]のネジを10本外し、リアパネルAssyを外し
ます。(図2)
HS80M
[20] [20]
[40]
Woofer Ring
ウーファーリング
[55]
[55]
[40]
Woofer
ウーファー
Tweeter
ツィーター
[90]
[155][155]
Rear Panel Assembly
リアパネルAss'y
 Loading...