MSP5 STUDIO
8
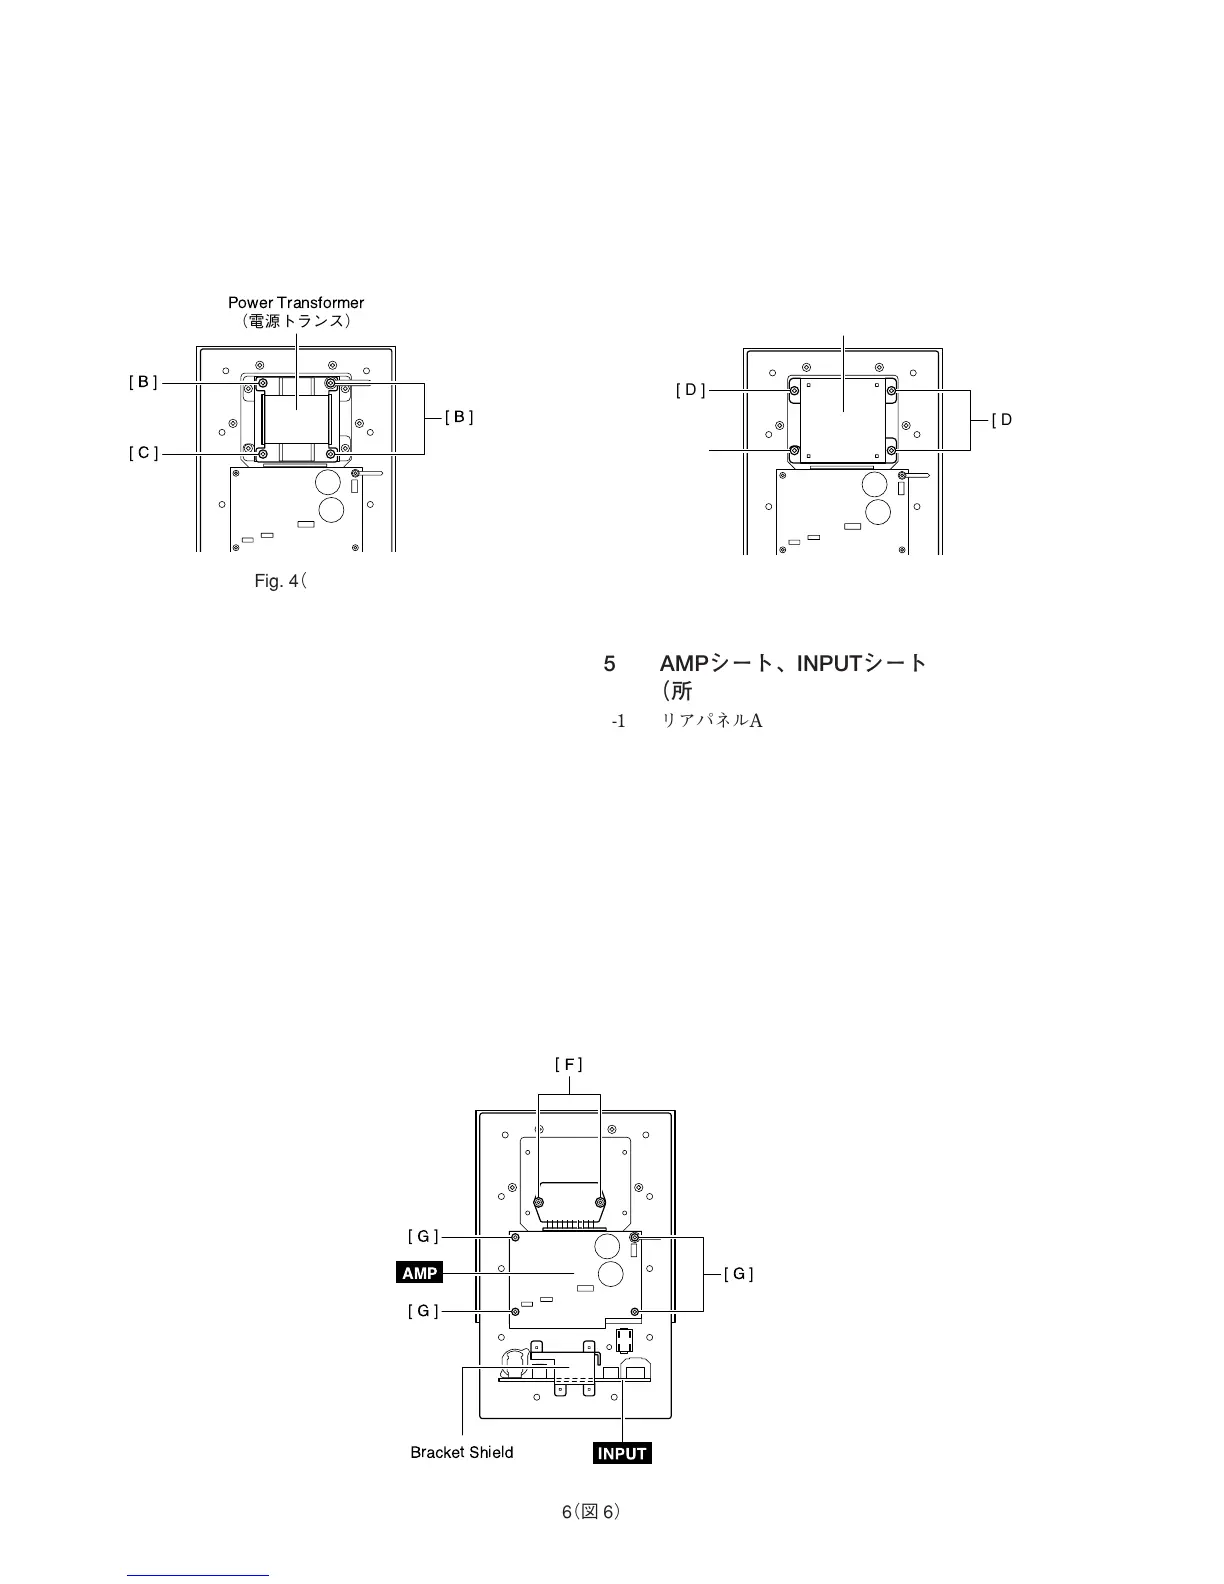
4. Power Transformer
(Time required: About 3 minutes)
4-1 Remove the rear panel assembly. (See procedure 2)
4-2 Remove the three (3) screws marked [B] and screw
marked [C]. The power transformer can then be removed.
(Fig. 4)
4. 電源トランス(所要時間:約3分)
4-1 リアパネルAssyを外します。(2項参照)
4-2 [B]のネジ3本、[C]のネジを外し、電源トランスを外
します。(図4)
Power Transformer
(電源トランス)
[C]
[B]
[B]
Fig. 4(図4)
[ E ]
[ D ]
[ D ]
Transformer Bracket
(トランス金具)
[G]
[G]
[G]
[F]
Bracket Shield
(シールド金具)
INPUT
AMP
Fig. 5(図5)
Fig. 6(図6)
5 AMPシート、INPUTシート
(所要時間:各約5分)
5-1 リアパネルAssyを外します。(2項参照)
5-2 [B]のネジ3本と[C]のネジを外し、電源トランスを外
します。(図4)
5-3 [D]のネジ3本と[E]のネジを外し、トランス金具を外
します。(図5)
5-4 AMPシート:
5-4-1 [F]のネジ2本と[G]のネジ4本を外し、AMPシートを外
します。(図6)
5 AMP Circuit Board, INPUT Circuit Board
(Time required: About 5 minutes each)
5-1 Remove the rear panel assembly. (See procedure 2)
5-2 Remove the three (3) screws marked [B] and screw
marked [C]. The power transformer can then be removed.
(Fig. 4)
5-3 Remove the three (3) screws marked [D] and screw
marked [E]. The transformer bracket can then be re-
moved. (Fig. 5)
5-4 AMP Circuit Board:
5-4-1 Remove the two (2) screws marked [F] and the four (4)
screws marked [G]. The AMP circuit board can then be
removed. (Fig. 6)

 Loading...