1
Thank you for your purchase of the Yamaha PX10, PX8, PX5 or PX3 power amplifier. Please read through
this manual carefully before using for the first time, in order to take full advantage of your PX power ampli-
fier’s superlative features and enjoy trouble-free operation for years to come.
After you have read the manual, keep it in a safe, convenient place for reference when needed.
• Please read the PRECAUTIONS on the reverse side of this manual before use.
• The illustrations as shown in this manual are for instructional purposes only.
• The company names and product names used in this manual are the trademarks or registered trademarks
of their respective companies.
• In this manual, the PX10, PX8, PX5 and PX3 power amplifier models are referred to collectively as “PX
amplifier.”
• Unless specified otherwise, the example illustrations used in this manual are taken from the PX10.
• The PX amplifier provides two setting methods: Basic mode and Advanced mode. This manual explains
operations in the Basic mode. Operate in the Advanced mode for detailed settings. For information on the
Advanced mode, refer to the PX10/PX8/ PX5/PX3 Reference Manual.
Features
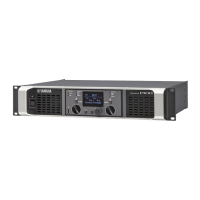
• Maximum output of 1,000W out of lightweight chassis (PX10)
• Yamaha’s proprietary Class-D and processing technologies provide superb sound quality and high reliability
• Speaker presets that allow you to get the best possible performance from Yamaha speakers
• A wide variety of DSP functions, including D-CONTOUR processing
• CONFIG WIZARD that provides the optimal configuration for any speaker
• Broad range of input/output connectors
Included accessories
•AC power cord
• Owner’s Manual (this leaflet)
• Technical Specifications (English)
• AC plug clamp
•USB cap
The PX amplifier can be used as a normal amplifier by simply setting the volume knobs properly. The fol-
lowing settings enhance the performance of speakers.
The PX10/PX8/ PX5/PX3 Reference Manual is an electronic file in PDF format. You can read this book
on a computer. Use Adobe
®
Reader
®
to read this book on screen, search for words very quickly, print
specific pages, or click links to display sections of special interest. The ability to search for words, or to
follow links directly to relevant sections in the document, are helpful attributes of this electronic file for-
mat. We encourage you to take advantage of these benefits. You can download the latest Adobe Reader
application from the website listed below.
http://www.adobe.com/
In this manual, methods of operations are explained with the following marks.
[(item name)]: Rotate the main knob to select [(item name)].
: Press the Main knob.
: Press the [MENU] key.
: Press the [ ] (back) key.
: Operate A, and then operate B.
A solid arrow ( ) between steps indicates a basic operation procedure, and a dotted arrow ( ) indi-
cates an operation returning to the previous screen.
EN
CAUTION
Please keep the USB cap out of reach of children,
to keep them from accidentally swallowing it.
Pre-installation
Mount PX amplifiers in a rack as required.
Make sure that the power is turned off, and
turn both the two volume knobs all the way
to the left.
CAUTION
Please carry out “Pre-installation” surely. Do not connect any cables while the power is on.
Stereo connection (using two full-range speakers)
Mixer
Full-range speaker
for R channel
Full-range speaker
for L channel
R channel
L channel
1. Connect the full-range speaker for L channel to the
[SPEAKERS] A terminal and the full-range speaker for
R channel to the [SPEAKERS] B terminal.
2. Connect the output from sources (such as a mixer) to
the [INPUT] A/B connectors. Connect the L channel
source to the [INPUT] A connector, and the R channel
source to the [INPUT] B connector.
3. Connect the AC power cord and turn on. First connect the
AC power cord to the connector on the unit, and then plug
it into an appropriate AC power outlet.
4. Secure the AC power cord with the AC plug clamp to pre-
vent accidental disconnection from the connector. Refer to
the “Rear panel” section on the reverse side for instructions on installation.
NOTE
Refer to the “Wiring” section on the reverse
side for instructions on making connections.
AC IN connector
AC power cord
To outlet
HOME screen
MENU screen (top screen)
SP TYPE screen
Speaker selection
Select a speaker to be connected from the shown list.
If the speaker is not in the list, select “GENERIC.”
HPF screen
Select a cutoff frequency of the high pass filter. If
the high pass filter is not used, select “OFF.”
CONFIRMATION screen
[CONFIG WIZARD]
[FULL+FULL]
[(Speaker name)]
[(Cutoff frequency)]
[APPLY]
(Applies the set value)
Go on to the “Tone control” instructions.
CAUTION
Please carry out “Pre-installation” surely. Do not connect any cables while the power is on.
Cross-over connection (using a full-range speaker and a subwoofer)
Mixer
Full-range
speaker
Subwoofer
1. Connect the subwoofer to the [SPEAKERS] A terminal
and the full-range speaker to the [SPEAKERS] B ter-
minal.
2. Connect the output from source (such as mixer) to the
[INPUT] A connector.
3. Connect the AC power cord and turn on. First connect
the AC power cord to the connector on the unit, and then
plug it into an appropriate AC power outlet.
4. Secure the AC power cord with the AC plug clamp to pre-
vent accidental disconnection from the connector. Refer to
“Rear panel” section on the reverse side for instructions on the installation.
NOTE
Refer to “Wiring” section on the reverse side
for instructions on making connections.
AC IN connector
AC power cord
To outlet
HOME screen
MENU screen (top screen)
[CONFIG WIZARD]
SP TYPE screen
[FULL+SUB]
Speaker selection (A)
Select a subwoofer to be connected from the shown
list. If the subwoofer is not in the list, select
“GENERIC.”
[(Speaker name)]
HPF screen
Select a cutoff frequency of the high pass filter of
the subwoofer. If the high pass filter is not used,
select “OFF.”
[(Cutoff frequency)]
Speaker selection (B)
Select a full-range speaker to be connected from the
shown list. If the speaker is not in the list, select
“GENERIC.”
[(Speaker name)]
X-OVER screen
Select a crossover frequency.
[(Crossover frequency)]
CONFIRMATION screen
[APPLY]
(Applies the set value)
Go on to the “Tone control” instructions.
NOTE
• To mute channel A, push the [A] key and the main knob simulta-
neously. To cancel muting, push the [A] key and the main knob
simultaneously again.
• To mute channel B, push the [B] key and the main knob simulta-
neously. To cancel muting, push the [B] key and the main knob
simultaneously again.
Input signal from the source, confirm that the sound is
being output from the speakers, and adjust the volume
appropriately.
MENU screen (top screen)
[TUNING]
TUNING screen
[D-CONTOUR]
D-CONTOUR screen
[MODE]
MODE Selection screen
Select one of the following three modes.
• OFF: Turns off D-CONTOUR.
• FOH/MAIN: Boosts the high and low frequency compo-
nents so that the frequency response is suitable for main
speaker use.
• MONITOR: Reduces the low frequency range, which could
otherwise tend to be boomy if the speaker is set directly on
the floor. This enables you to hear mid and high frequency
ranges clearly when using as a floor monitor.
[(MODE)]
D-CONTOUR screen
[DEPTH]
DEPTH Selection screen
Set over a range from 1 to 10.
The larger the value, the deeper the effect.
MENU screen (top screen)
HOME screen