Periodic maintenance and adjustment
6-11
1
2
3
4
5
6
7
8
9
10
11
12
13
14
Skip steps 6–8 if the oil filter element is
not being replaced.
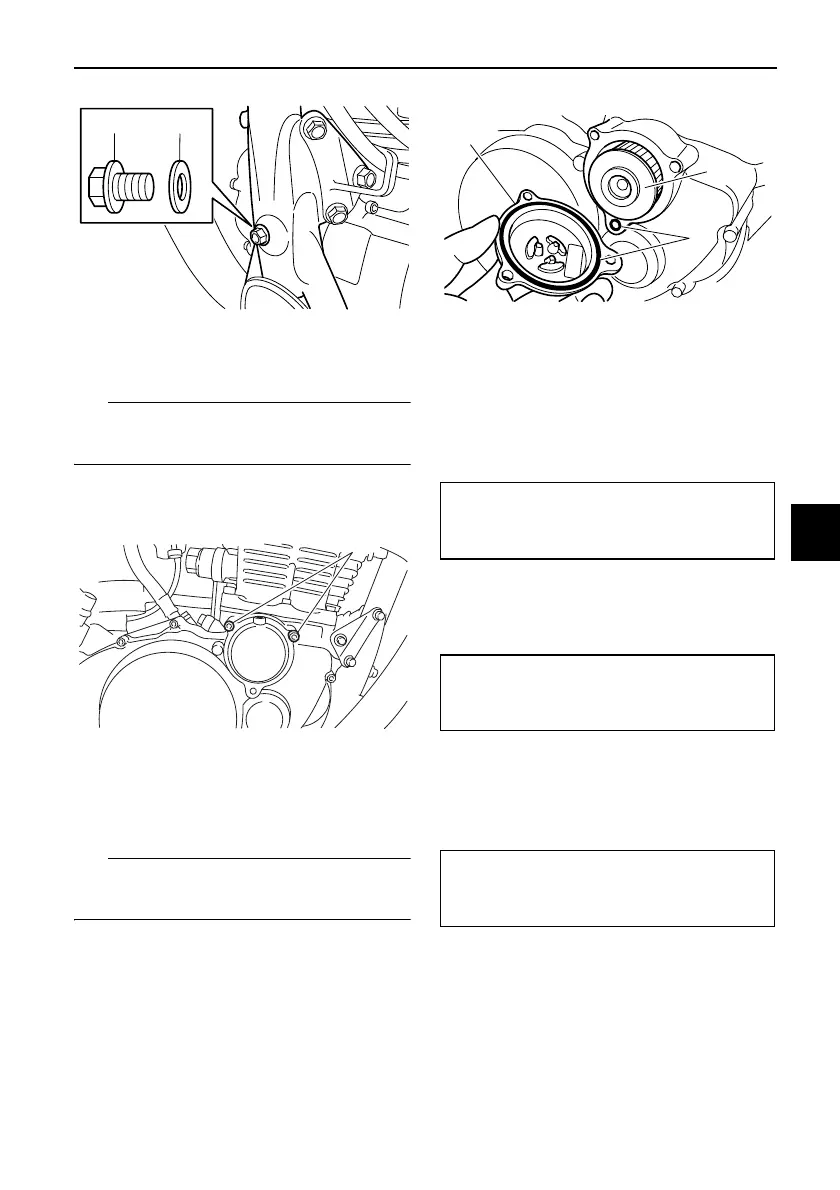
6. Remove the oil filter element cover
by removing the bolts.
7. Remove and replace the oil filter
element and O-rings.
Make sure that the O-rings are properly
seated.
8. Install the oil filter element cover by
installing the bolts, and then tight-
en the bolts to the specified torque.
9. Install the oil filter element drain
bolt, and then tighten the bolt to the
specified torque.
10. Install the oil filter element cover
bleed bolt and its gasket, and then
tighten the bolt to the specified
torque.
11. Install the engine oil drain bolts
and their new gasket, and then
tighten the bolts to the specified
torques.
1. Engine oil drain bolt (oil tank)
2. Gasket
1. Oil filter element cover bolt
1. Oil filter element cover
2. O-ring
3. Oil filter element
Tightening torque:
Oil filter element cover bolt:
10 Nm (1.0 m·kgf, 7.2 ft·lbf)
Tightening torque:
Oil filter element drain bolt:
10 Nm (1.0 m·kgf, 7.2 ft·lbf)
Tightening torque:
Oil filter element cover bleed bolt:
5 Nm (0.5 m·kgf, 3.6 ft·lbf)
2RD-28199-E1.book 11 ページ 2015年9月3日 木曜日 午後3時42分
 Loading...