Periodic maintenance and adjustment
7-35
1
2
3
4
5
6
7
8
9
10
11
12
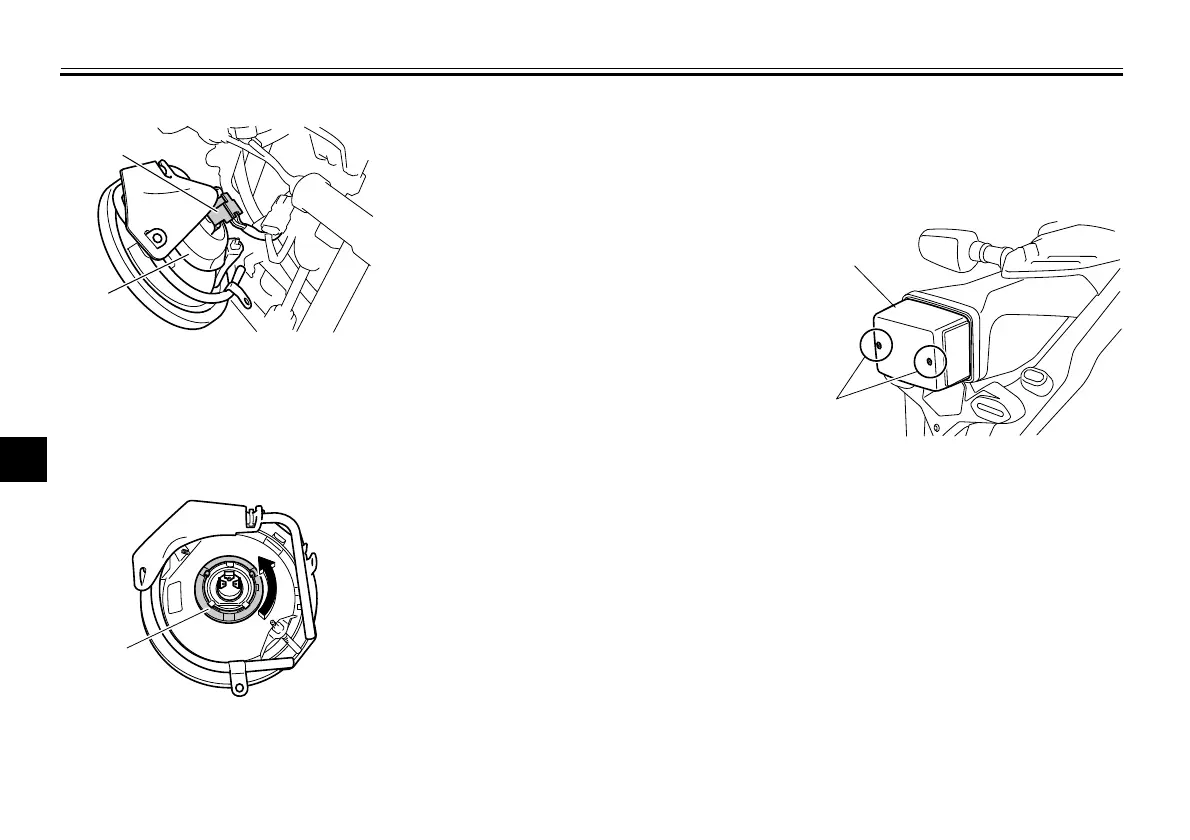
bulb cover.
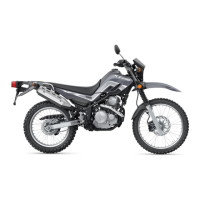
4. Remove the headlight bulb holder
by turning it counterclockwise, and
then remove the burnt-out bulb.
5. Place a new bulb into position, and
then secure it with the bulb holder.
6. Install the bulb cover, and then
connect the coupler.
7. Place the headlight unit in the orig-
inal position, and then install the
bolts.
8. Install the cowling.
9. Have a Yamaha dealer adjust the
headlight beam if necessary.
EAU70550
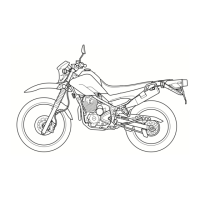
Replacing the brake/tail light
bulb
1. Remove the brake/tail light lens by
removing the screws.
2. Remove the burnt-out bulb by
pushing it in and turning it counter-
clockwise.
1. Headlight coupler
2. Headlight bulb cover
1. Headlight bulb holder
1. Brake/tail light lens
2. Screw
B1U-9-14.book 35 ページ 2022年4月6日 水曜日 午後2時13分