56
flush it down a drain or
pour
it on the
ground. Put it in suitable containers and
dispose
of
it according to local regulations.
CAUTION
Be careful not to spill antifreeze on painted
surfaces, as it may damage the surface.
Wash any spilled antifreeze immediately
with soapy water, then rinse the area thor-
oughly with clean water.
Flushing
and
refillingfreshwater coolant system
Use the following procedure to flush and refill the
freshwater coolant system. Refer to the preceding section
to flush the seawater portion
of
a freshwater coolant sys-
tem.
Replace the coolant in the freshwater coolant system af-
ter every 500 hours
of
operation or annually, whichever
occurs first.
CAUTION
Perform the following procedure when the
engine is cold.
1. Remove the pressure fill cap (Figure 24).
NOTE
Position the drain hoses in suitable contain-
ers to catch coolant when draining the cool-
ant from the exhaust manifold and engine.
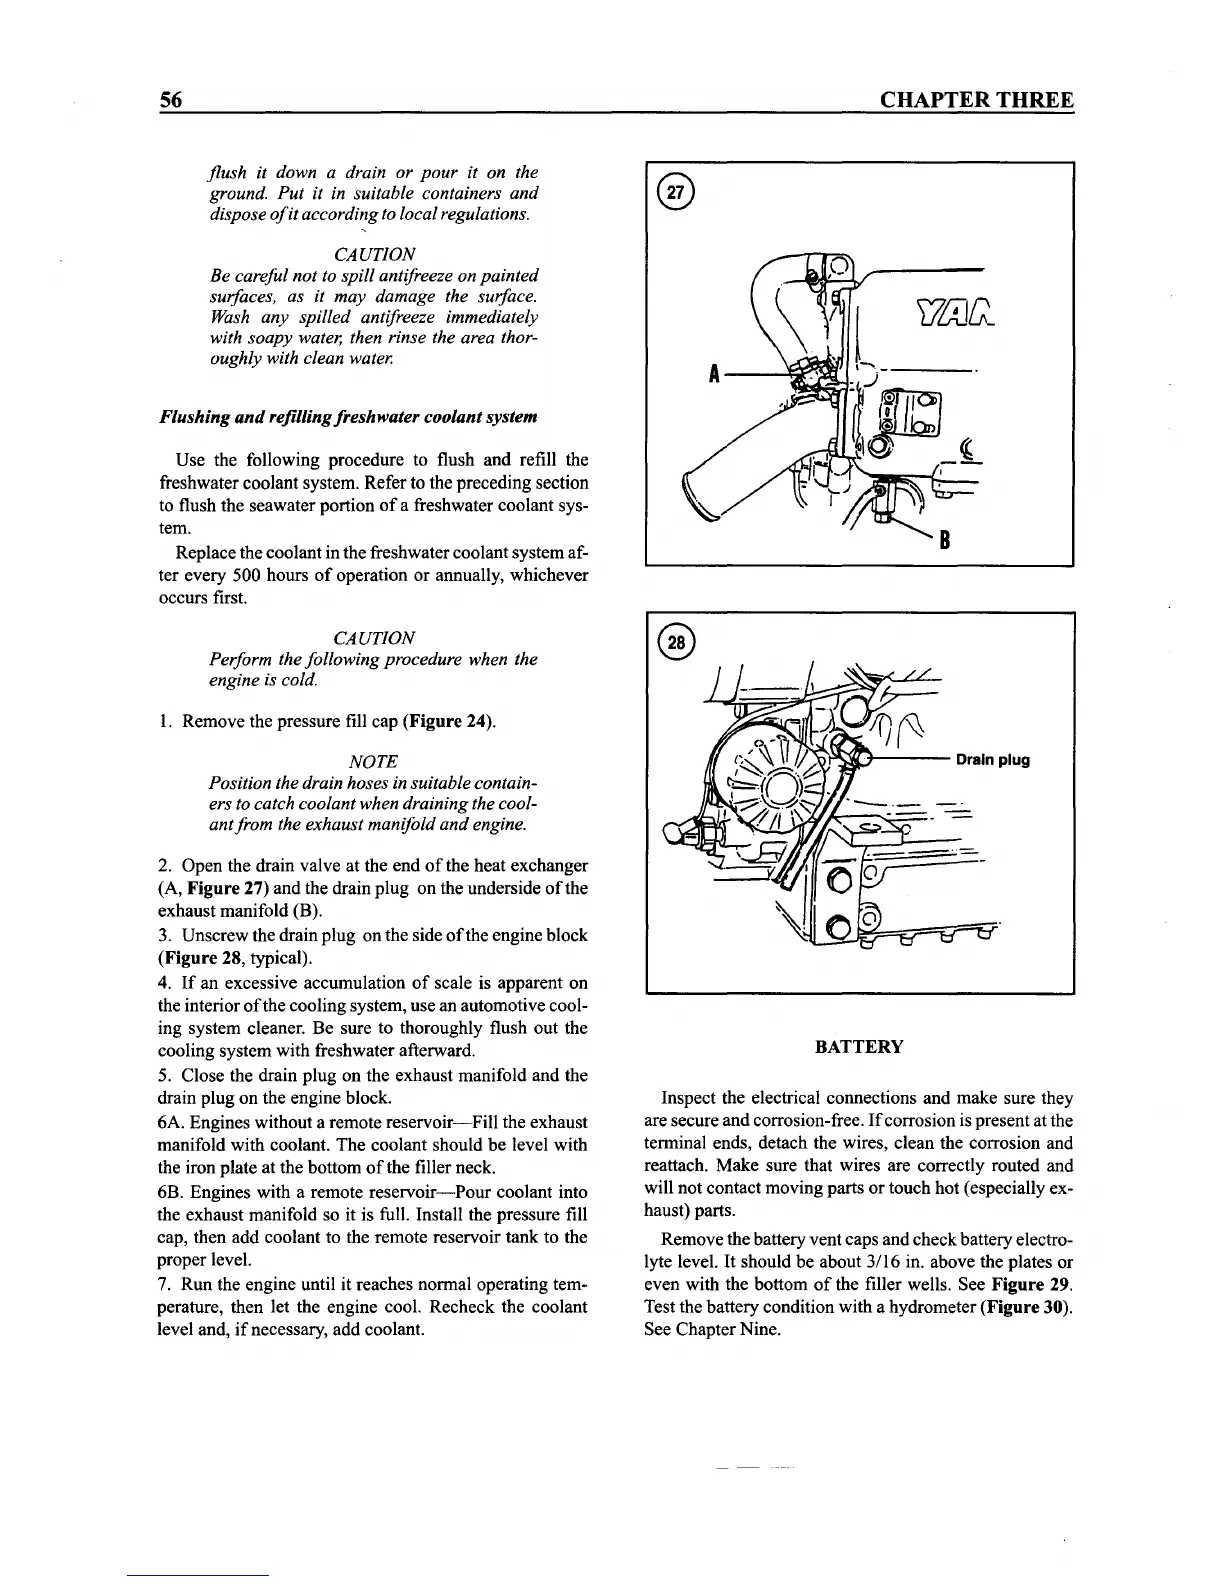
2. Open the drain valve at the end
of
the heat exchanger
(A, Figure 27) and the drain plug on the underside
of
the
exhaust manifold (B).
3. Unscrew the drain plug on the side
of
the engine block
(Figure 28, typical).
4.
If
an excessive accumulation
of
scale is apparent on
the interior
ofthe
cooling system, use an automotive cool-
ing system cleaner. Be sure to thoroughly flush out the
cooling system with freshwater afterward.
5. Close the drain plug on the exhaust manifold and the
drain plug on the engine block.
6A. Engines without a remote
reservoir-Fill
the exhaust
manifold with coolant. The coolant should be level with
the iron plate at the bottom
of
the filler neck.
68.
Engines with a remote
reservoir-Pour
coolant into
the exhaust manifold so it is full. Install the pressure fill
cap, then add coolant to the remote reservoir tank to the
proper level.
7. Run the engine until it reaches normal operating tem-
perature, then let the engine cool. Recheck the coolant
level and,
if
necessary, add coolant.
CHAPTER
THREE
~)y;;:1r~"":""_-
Drain plug
BATTERY
Inspect the electrical connections and make sure they
are secure and corrosion-free.
If
corrosion is present at the
terminal ends, detach the wires, clean the corrosion and
reattach. Make sure that wires are correctly routed and
will not contact moving parts or touch hot (especially ex-
haust) parts.
Remove the battery vent caps and check battery electro-
lyte level.
It
should be about 3/16 in. above the plates or
even with the bottom
of
the filler wells. See Figure 29.
Test the battery condition with a hydrometer (Figure30).
See Chapter Nine.