11
Fig. 18
Fig. 17
Fig. 16
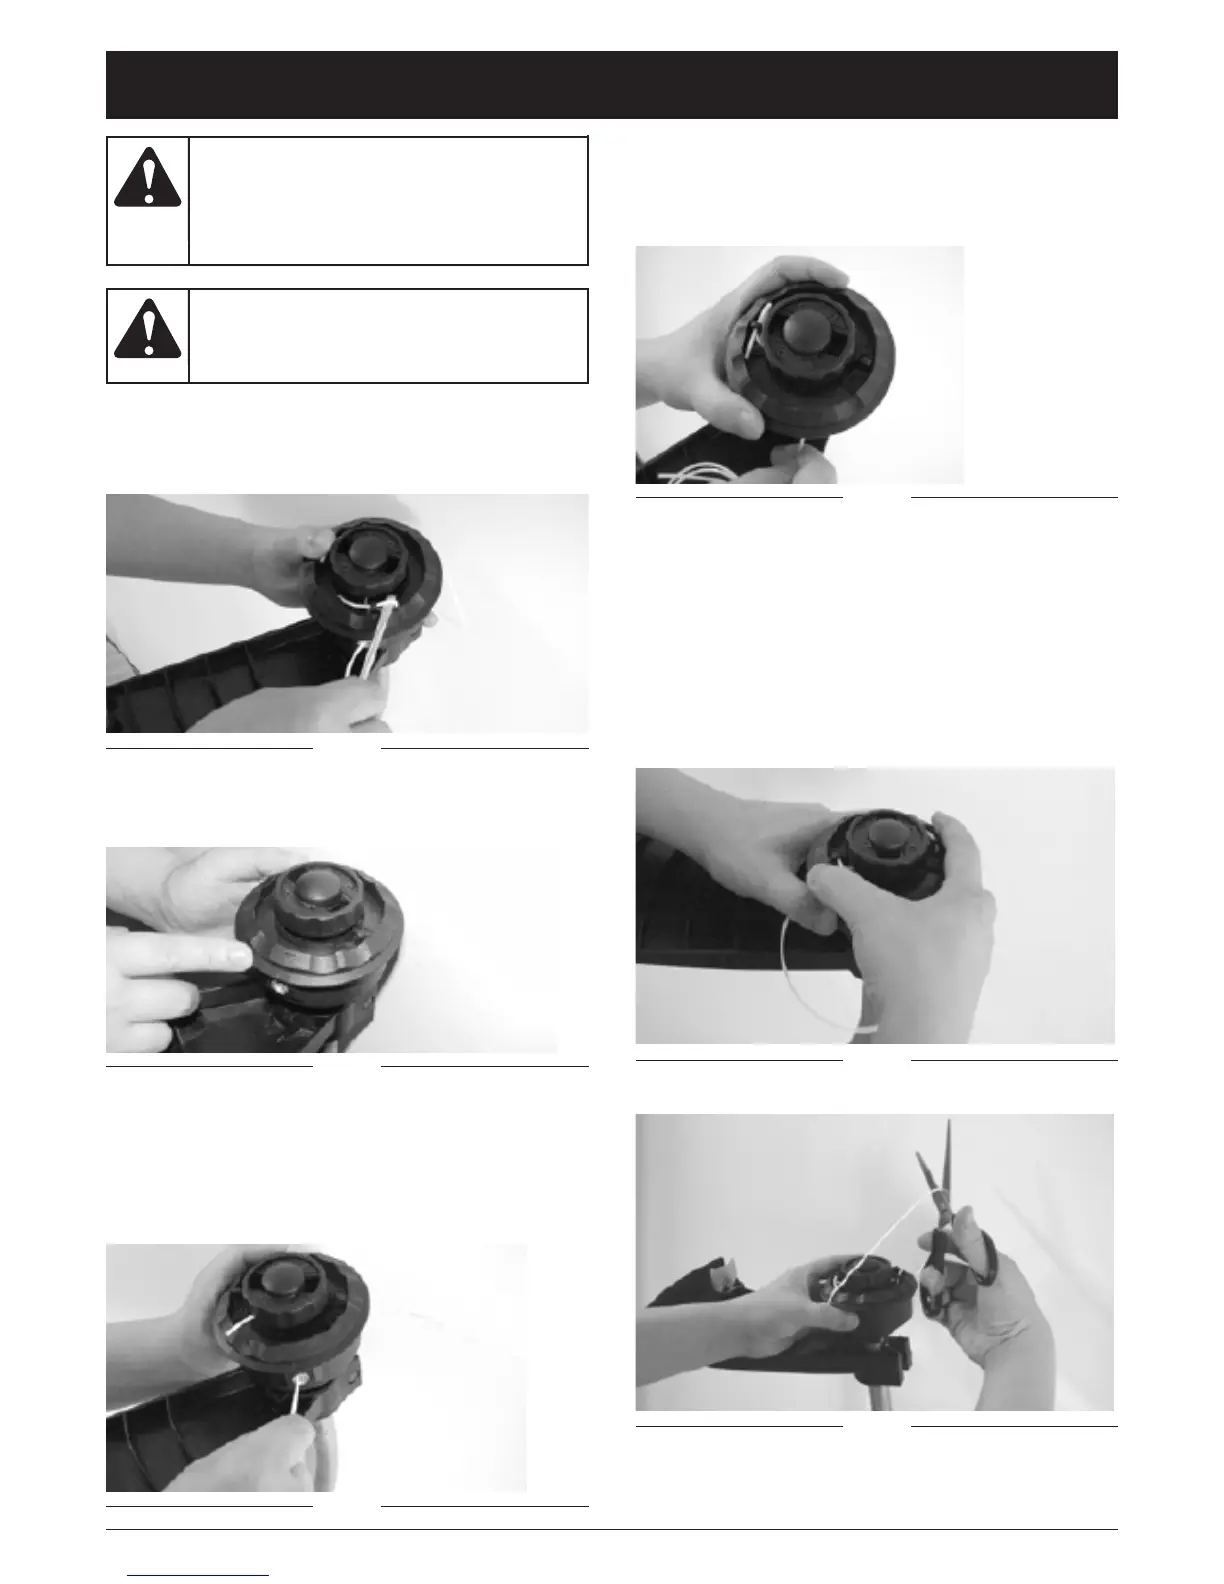
6. Insert each end into locking tabs by pushing the line
end through lower tab hole and looping end back
through upper tab hole. Pull line at eyelet to tension
(Fig. 16).
7. Once both line ends are locked in place turn inner
spool counter clockwise in direction of arrows to
load line (Fig. 17).
8. Wind spool until a loop of line approximately 10
inches (25cm) long is visible. Cut loop in half to
create two cutting line ends (Fig. 18). Ensure each
line end is not more than 5 inches (13cm) long. This
will minimize load on engine during starting.
MAINTENANCE AND REPAIR INSTRUCTIONS
Fig. 13
Fig. 14
REPLACING TRIMMING LINE: EASY-LOAD HEAD
1. Use a small screwdriver or pointed rod to release line
from the locking tabs (Fig. 13).
2. Remove remaining line from head.
3. Align arrows on inner and outer spool (Fig. 14).
Fig. 15
To prevent serious
injury, never per-
form maintenance or repairs with unit run-
ning. Always service and repair a cool unit.
Disconnect the spark plug wire to ensure
that the unit cannot start.
WARNING:
Never use metal-
reinforced line, wire,
chain or rope. These can break off and
become dangerous projectiles.
WARNING:
4. Cut a length of trimming line approximately 16 feet (5
meters) long.
5. While pushing inner spool down insert each end of
line through eyelets into feed slot on spool divider.
Ensure line enters feed slots. Push line until
approximately 2 inches (5 cm) appears from below
bump knob (Fig. 15).
 Loading...