35 support@yardistrystructures.com
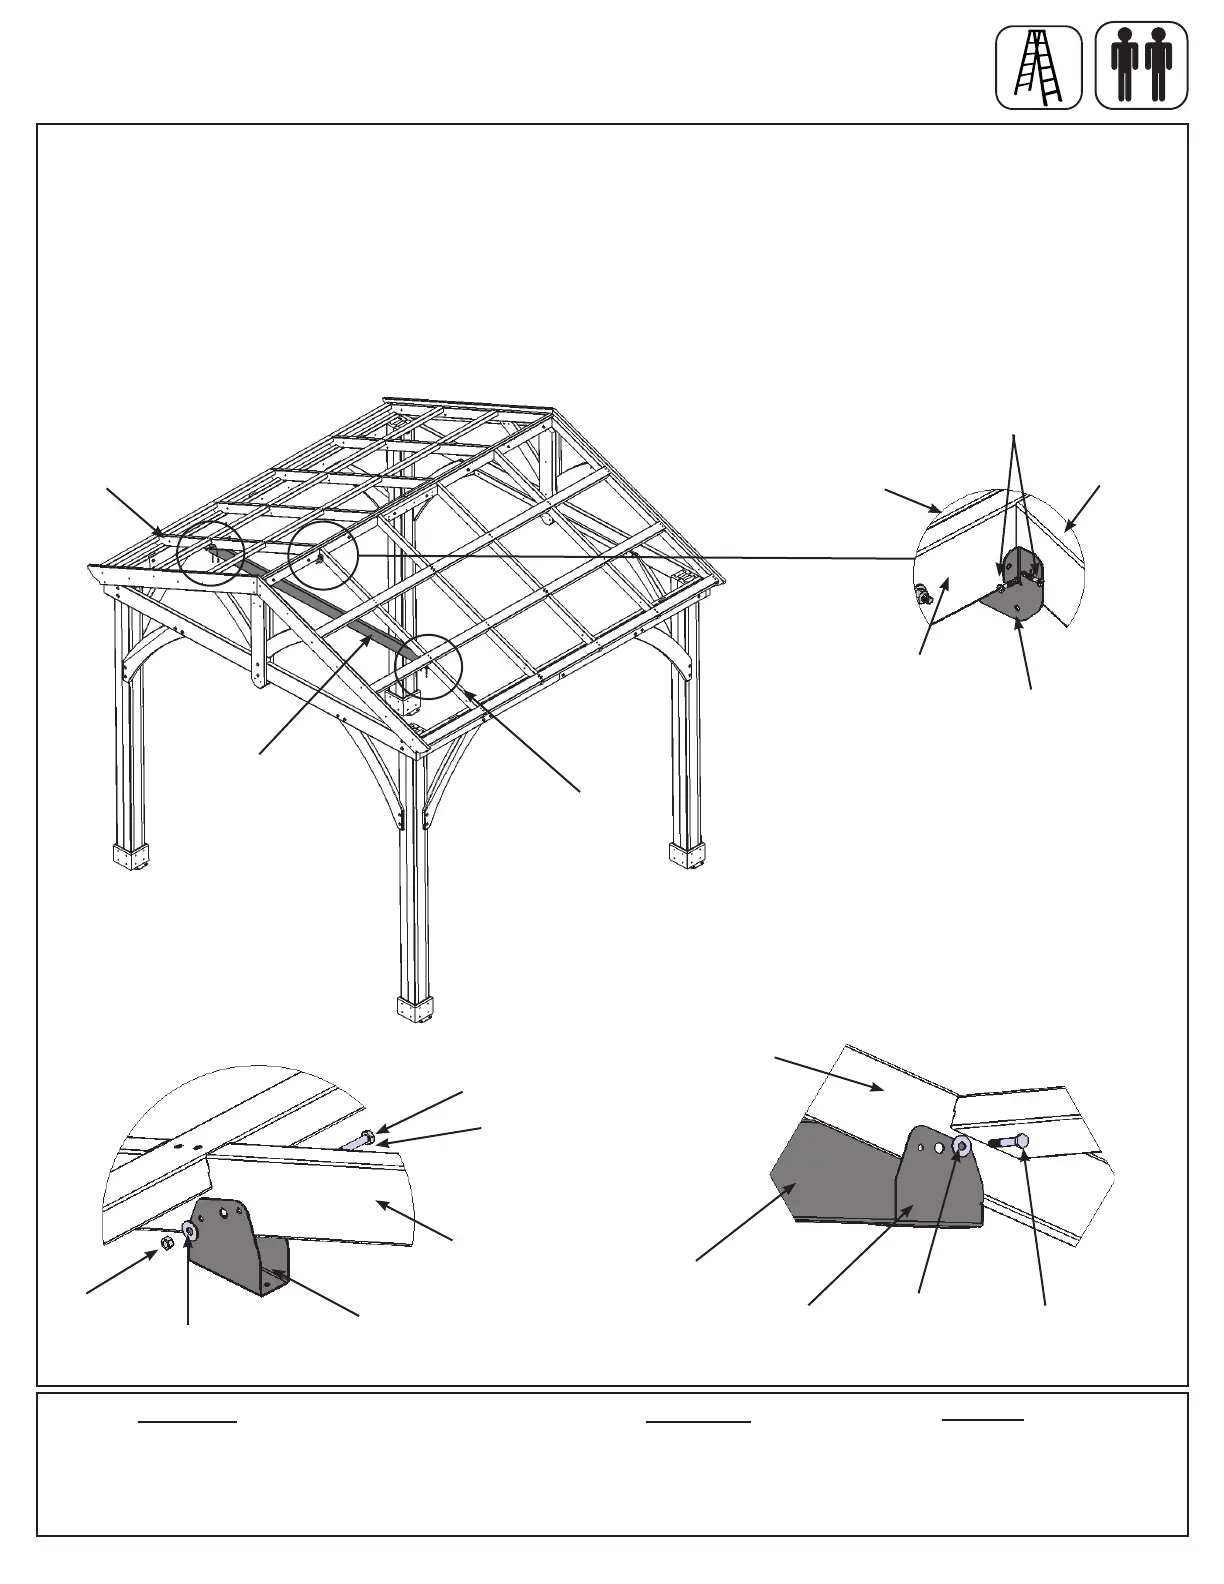
A: Attach one Tie Centre Bracket to the peak of the inside of one set of (412) Rafters and (420) Rafter Tops with
four #8 x 1” Pan Screws. (g. 13.1 and 13.2)
B: Loosley attach one Tie Wrap Bracket to one (412) Rafter as shown in g.13.3 with one 1/4 x 2” Hex Bolt (with
two 1/4” at washers and one 1/4” lock nut). (g. 13.1 and 13.3)
C: Slide one (416) Tie into the Tie Wrap Bracket then loosley attach second Tie Wrap Bracket at the opposite
end of (416) Tie to (412) Rafter with one 1/4 x 2” Hex Bolt (with two 1/4” at washers and one 1/4” lock nut). (g.
13.1 and 13.4)
Hardware
8 x 1/4 x 2” Hex Bolt
(1/4” at washer x 2, 1/4” lock nut)
16 x #8 x 1” Pan Screw
Componets:
4 x Tie Centre Bracket
8 x Tie Wrap Bracket
Fig. 13.1
Fig. 13.2
#8 x 1” Pan Screw
(4 per bracket)
Tie Centre
Bracket
Step 13: Truss Assemblies
Part 1
1/4” Flat Washer
and 1/4” Lock Nut on
other side of Rafter
Wood Parts
4 x (416) Tie 31.8 x 88.9 x 2333.6 mm (1-1/4 x 3-1/2 x 91-7/8”)
Fig. 13.3
Fig. 13.4
(420)
Rafter Top
1/4”
Lock
Nut
1/4” Flat
Washer
1/4 x 2”
Hex Bolt
(412)
Rafter
1/4 x 2”
Hex Bolt
(412) Rafter
(412)
Rafter
(416) Tie
1/4” Flat
Washer
1/4” Flat
Washer
(hidden)
(416) Tie
(412)
Rafter
(412)
Rafter
Tie Wrap
Bracket
Tie Wrap
Bracket
Roof Panel
removed for
clarity
(420)
Rafter Top