21 support@yardistrystructures.com
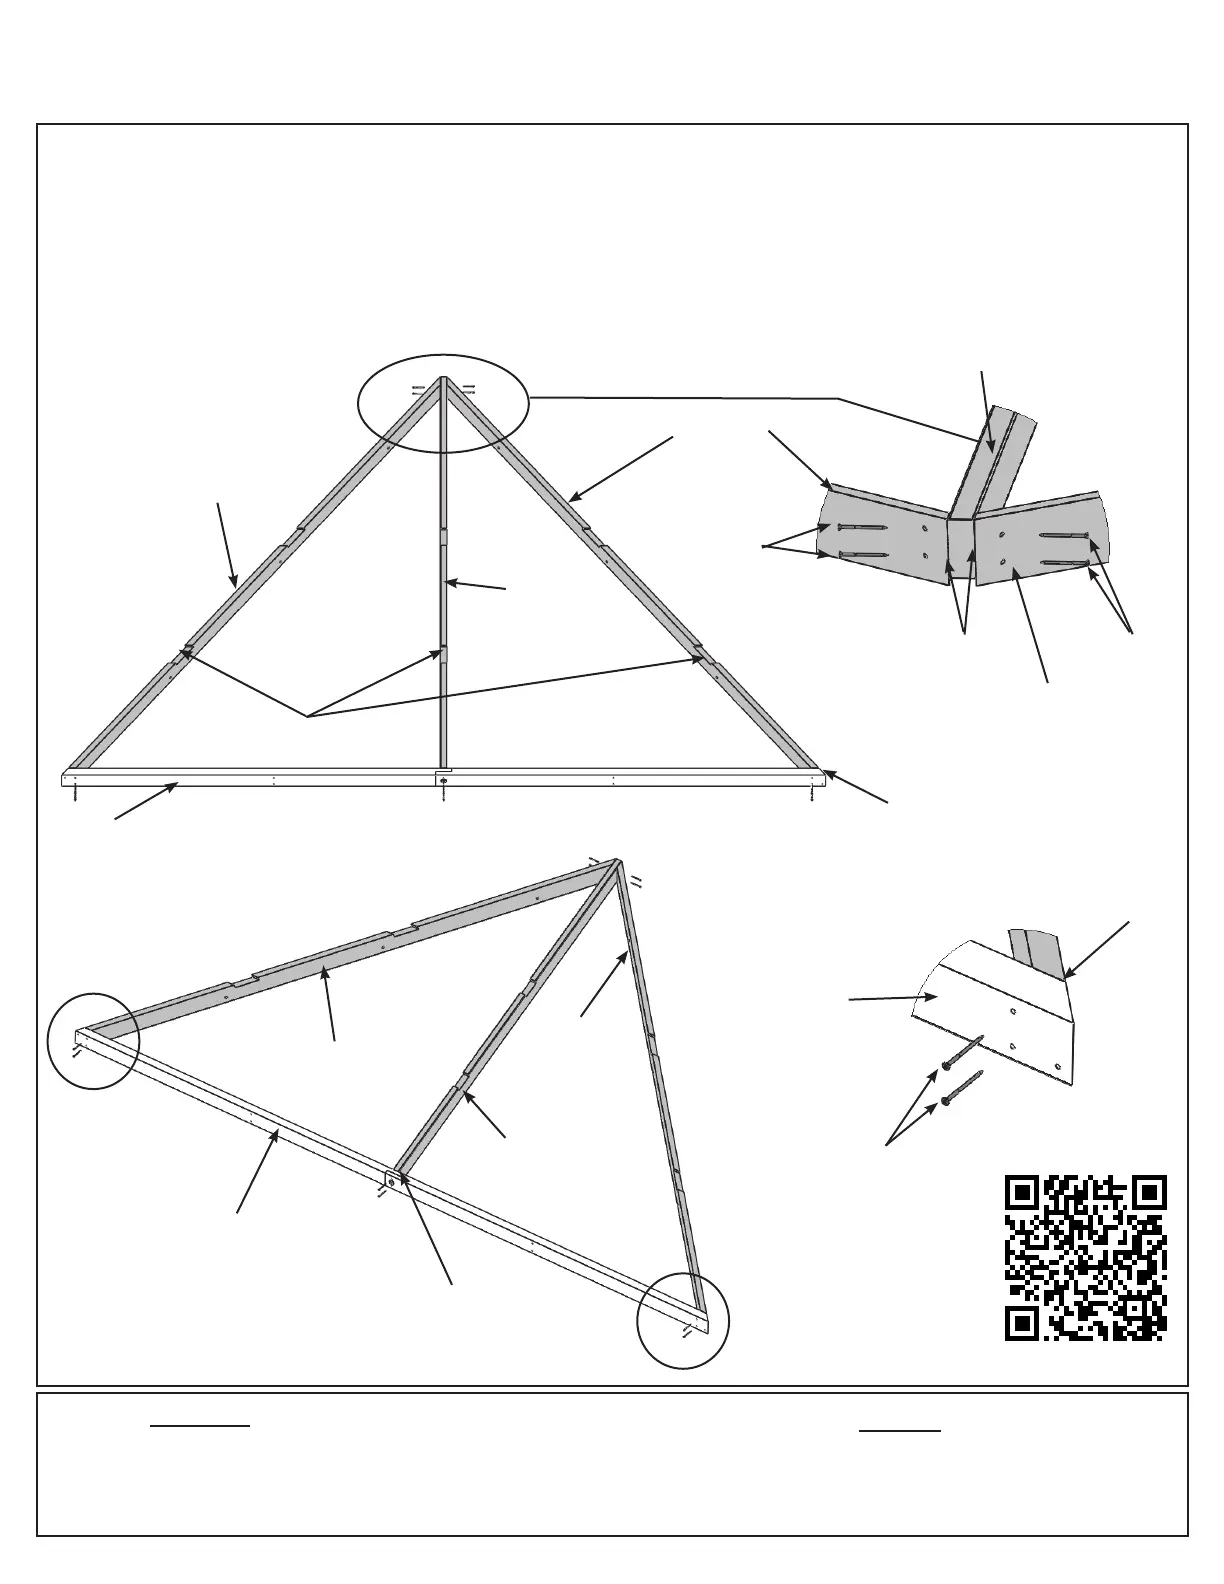
A: On each side of one (340) Rafter place one (333) Rafter Corner Left and one (334) Rafter Corner Right so
the tops and edges are ush then attach with two #8 x 2-1/4” Wood Screws per side. (Fig. 7.1 and 7.2)
B: Place Fascia Beam Assembly from Step 6 on the bottom of (333) Rafter Corner Left, (334) Rafter Corner
Right and (340) Rafter so the sides are ush then attach with two #8 x 2-1/4” Wood Screws at each end and two
in the middle. (g. 7.1, 7.3 and 7.4)
C: Repeat Steps A and B three more times to make four Roof Rafter Assemblies.
Hardware
Wood Parts
#8 x 2-1/4” Wood Screws
(x 6 per Fascia Beam
Assembly)
(340)
Rafter
Top View
Fascia Beam
Assembly
Step 7: Roof Rafter Assembly
Part 1
Fig. 7.1
40 x #8 x 2-1/4” Wood Screw
4 x (340) Rafter 31.8 x 76.2 x 1937.1 mm (1-1/4 x 3 x 76-1/4”)
4 x (333) Rafter Corner Left 25.4 x 88.9 x 2631.5 mm (1 x 3-1/2 x 103-13/16”)
4 x (334) Rafter Corner Right 25.4 x 88.9 x 2631.5 mm (1 x 3-1/2 x 103-13/16”)
Fig. 7.3
Fig. 7.4
Note notches
facing up
Flush
Fascia Beam
Assembly
Fascia Beam
Assembly
Flush
(340)
Rafter
(340)
Rafter
#8 x 2-1/4”
Wood Screws
#8 x 2-1/4”
Wood Screws
Flush
Fig. 7.2
(333) Rafter
Corner Left
(333) Rafter
Corner Left
(333) Rafter
Corner Left
(334) Rafter
Corner Right
(334) Rafter
Corner Right
Front View
Front View
Note angle
side up
QR code generated on http://qrcode.littleidiot.be
http://bit.ly/1KufXCB