42 support@yardistrystructures.com
6 - 1/4 x 2-3/4” Hex Bolt
12- 5/16” Large Flat Washer
6- 1/4” Lock Nut
6 - 1/4 x 2-3/4” Hex Bolt
12- 5/16” Large Flat Washer
6- 1/4” Lock Nut
6 - 1/4 x 2-3/4” Hex Bolt
12- 5/16” Large Flat Washer
6- 1/4” Lock Nut
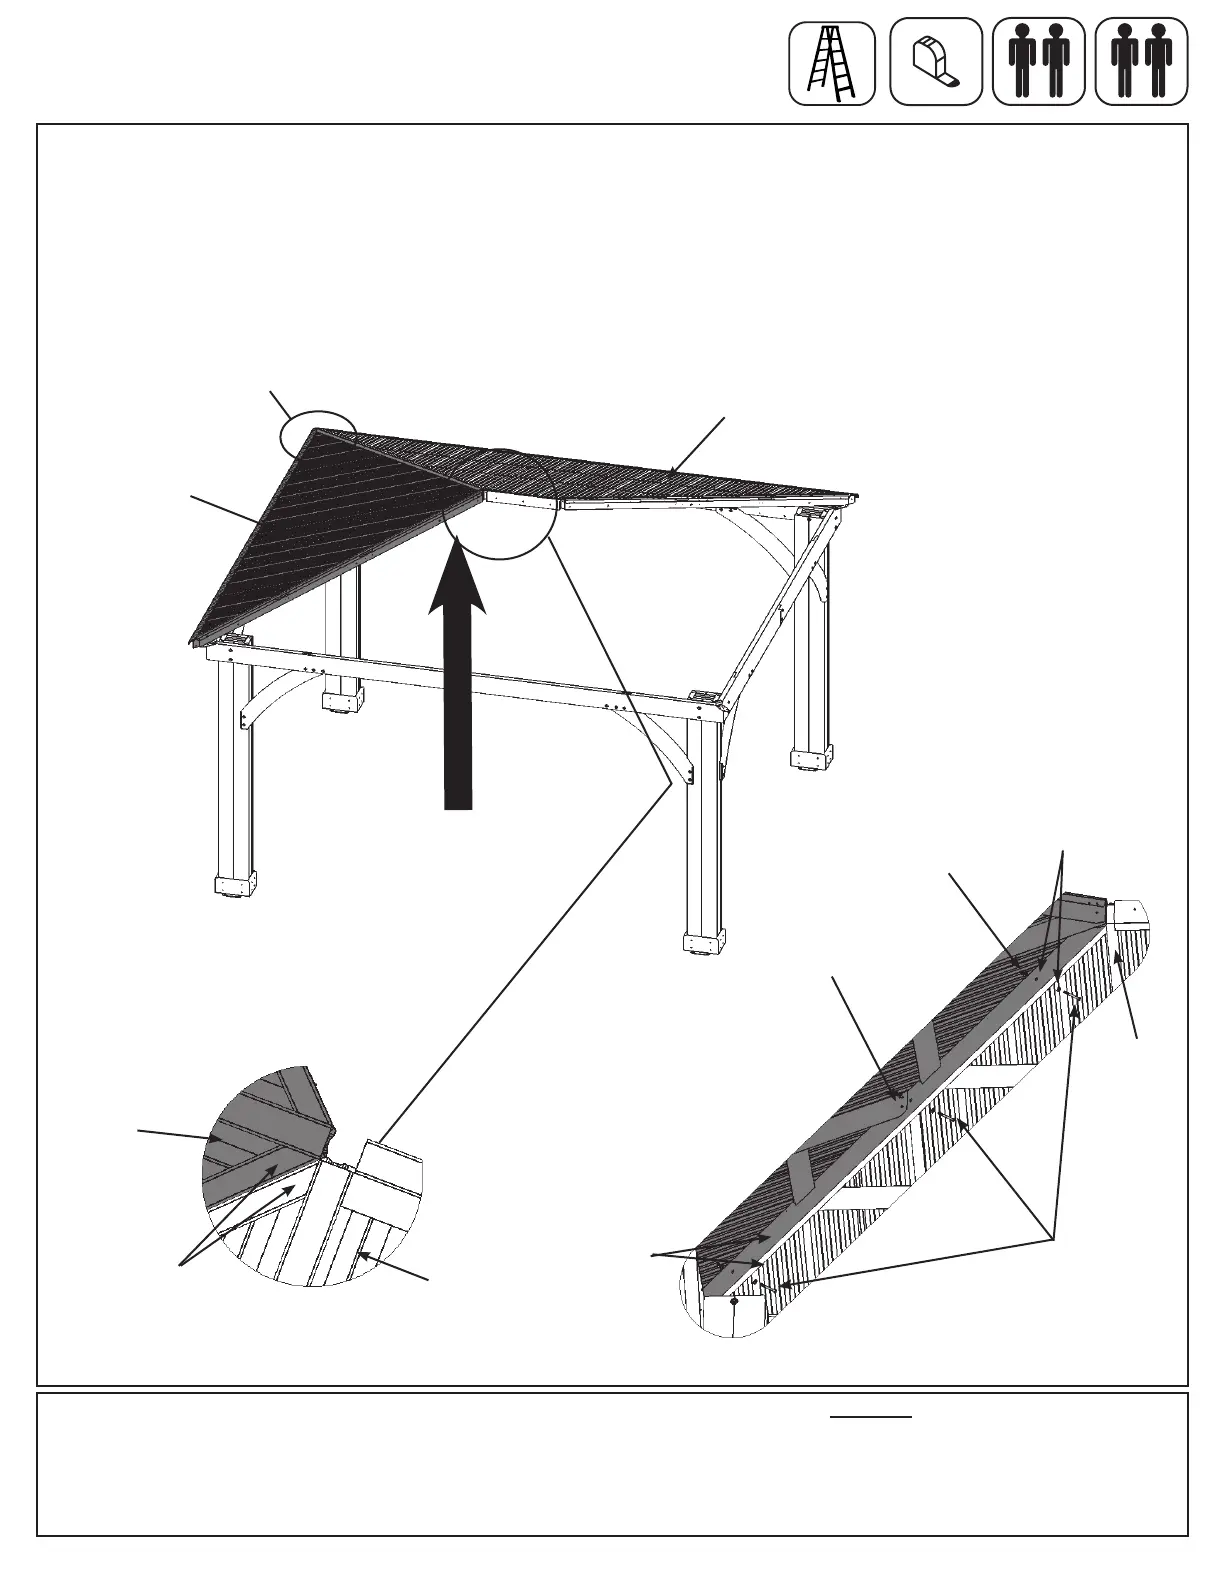
Step 16: Attach Roof Panels to Frame
Part 2
F16.3
C: Lift a Large Roof Panel Assembly with Rafter Beam Brackets over Long Beam Assembly taking care not to drag
the panel on the beams. Make sure the Rafter Corners are ush with each other. One person must remain on
the centre ladder to hold both panels in place until three panels are up and secure. (F16.2 and F16.3)
D: Starting at the bottom and working up connect Large Roof Panel Assembly to Small Roof Panel Assembly
through the Rafter Corners with three 1/4 x 2-3/4” Hex Bolts (with two 1/4-5/16” large washers and one 1/4” lock
nut). To align bolt holes helper in the centre may have to push up the centre of the panels while other helpers
make sure corners are aligned. Make sure all bolts are tight. (F16.2 and F16.4)
F16.2
x 3
Rafter
Corners
F16.4
Hardware
3 x 1/4 x 2-3/4” Hex Bolt
(1/4-5/16” large washer x 2, 1/4” lock nut)
Rafter
Corner
1/4” Lock
Nut
1/4 x 2-3/4”
Hex Bolt
Small Roof
Panel Assembly
Make sure corners
are aligned
Small Roof
Panel
Assembly
Start at bottom and
work up the rafters
One assembler
to support roof
panel(s) at all
times until secure
Large Roof
Panel
Assembly
Small Roof
Panel
Assembly
Large Roof
Panel
Assembly
Large Roof
Panel Assembly
1/4-5/16”
Large Washer