• Release the tip of the guide bar, and turn the chain tensioning knob 1/2 turn clockwise.
• Hold the tip of the guide bar up and tighten the chain cover lock knob to secure.
The chain is correctly tensioned when there is no sag on the underside of the guide bar,
and when the chain is snug, but can be turned by hand without binding.
NOTE: If chain is too tight, it will not rotate. Loosen the chain cover lock knob slightly, and
turn the chain tensioning knob 1/4 turn counter-clockwise. Lift the tip of the guide bar up,
and retighten the chain cover lock knob. Ensure that the chain will rotate without binding.
.odel /o. 054-573-0 | $ontact us: 18665235218
31
Maintenance
• Stop the motor and disconnect from power supply before setting the chain tension.
• Slightly loosen the chain cover lock knob.
• Turn the chain tensioning knob clockwise to tension the chain.
NOTE: A cold chain is correctly tensioned when there is no slack on the underside of the
guide bar, the chain is snug, and it can be turned by hand without binding.
• Rotate the chain cover lock knob clockwise to secure. Retension the chain whenever
the flats on the drive links hang out of the bar groove.
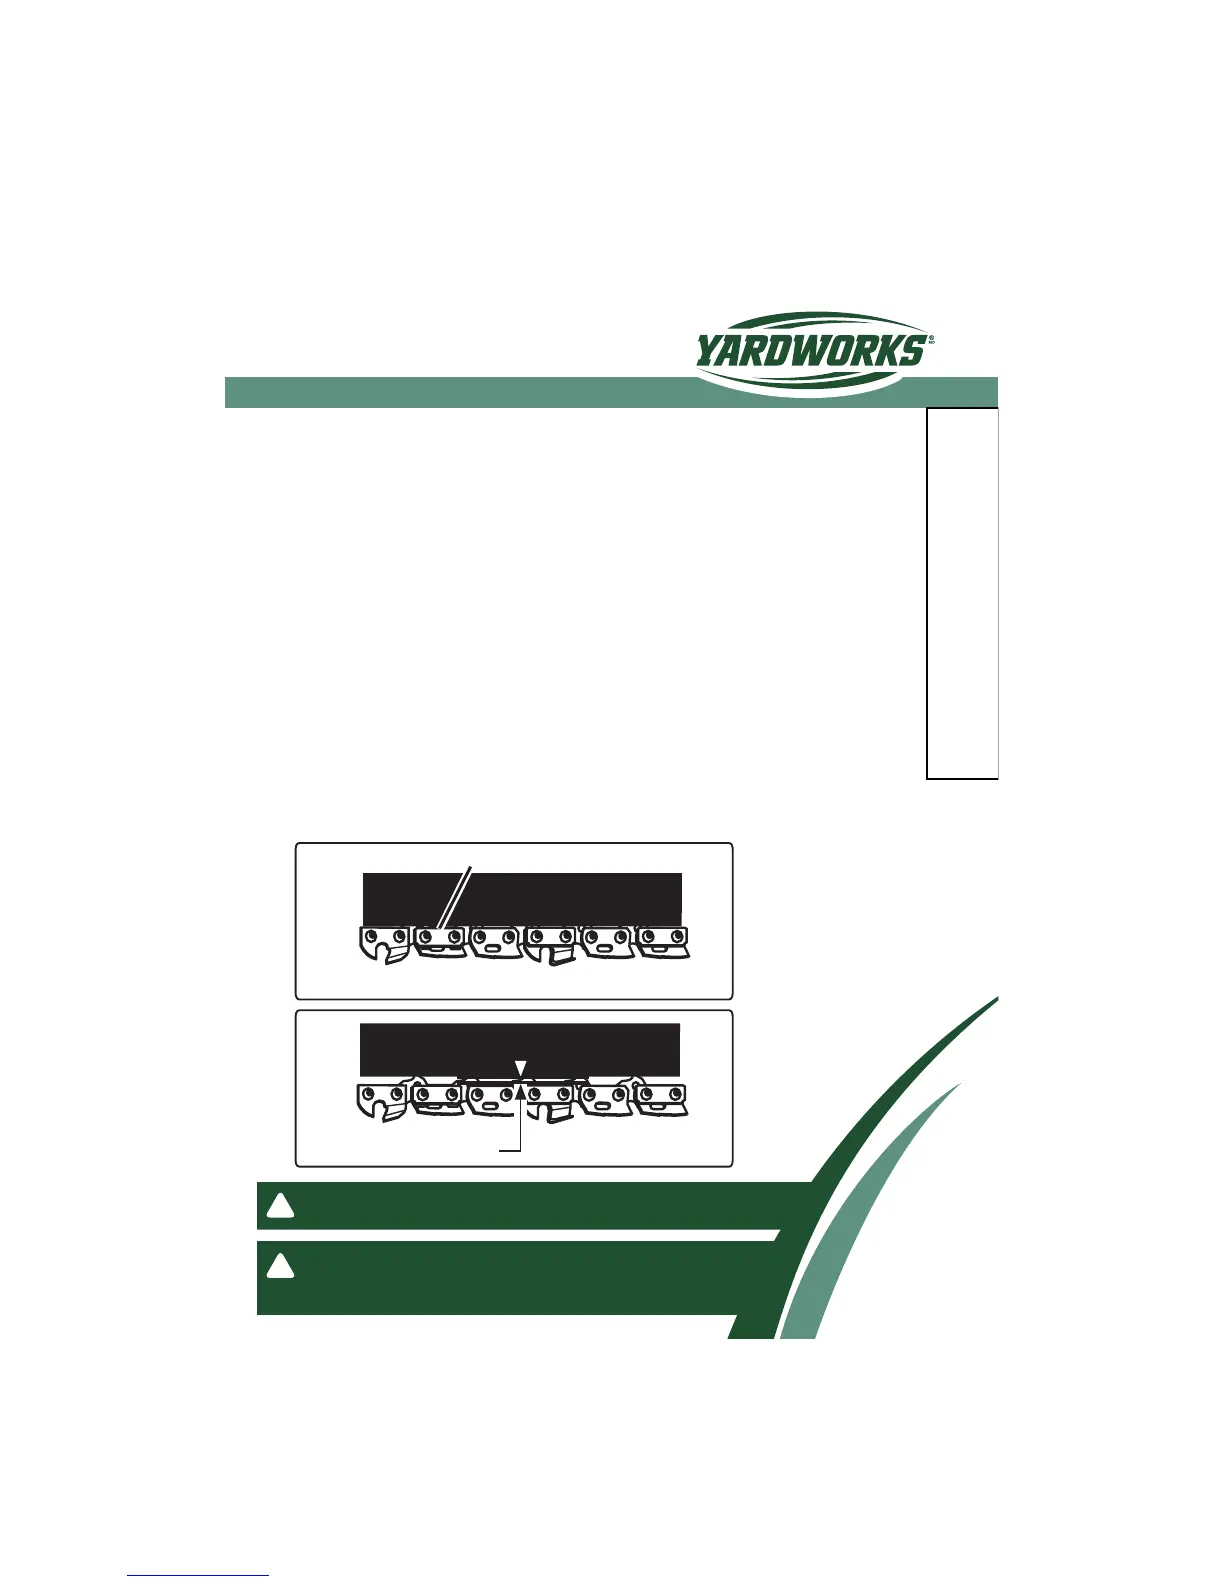
NOTE: During normal saw operation, the temperature of the chain increases. The drive links
of a correctly tensioned warm chain will hang approximately 1/16" (1.3 mm) out of the bar
groove.
NOTE: New chains tend to stretch. Check the chain tension frequently and tension
as required.
ADJUSTING THE CHAIN TENSION (See Figure 30-31)
Fig. 30
Fig. 31
FLATS ON DRIVE LINKS
≈ 1/16" (1.3 mm)
WARNING: Never touch or adjust the chain while the motor is running.
The saw chain is very sharp. Always wear protective gloves when
performing maintenance involving the chain.
!
WARNING: A chain tensioned while warm may be too tight upon cooling.
Check the “cold tension” before next use.
!
 Loading...